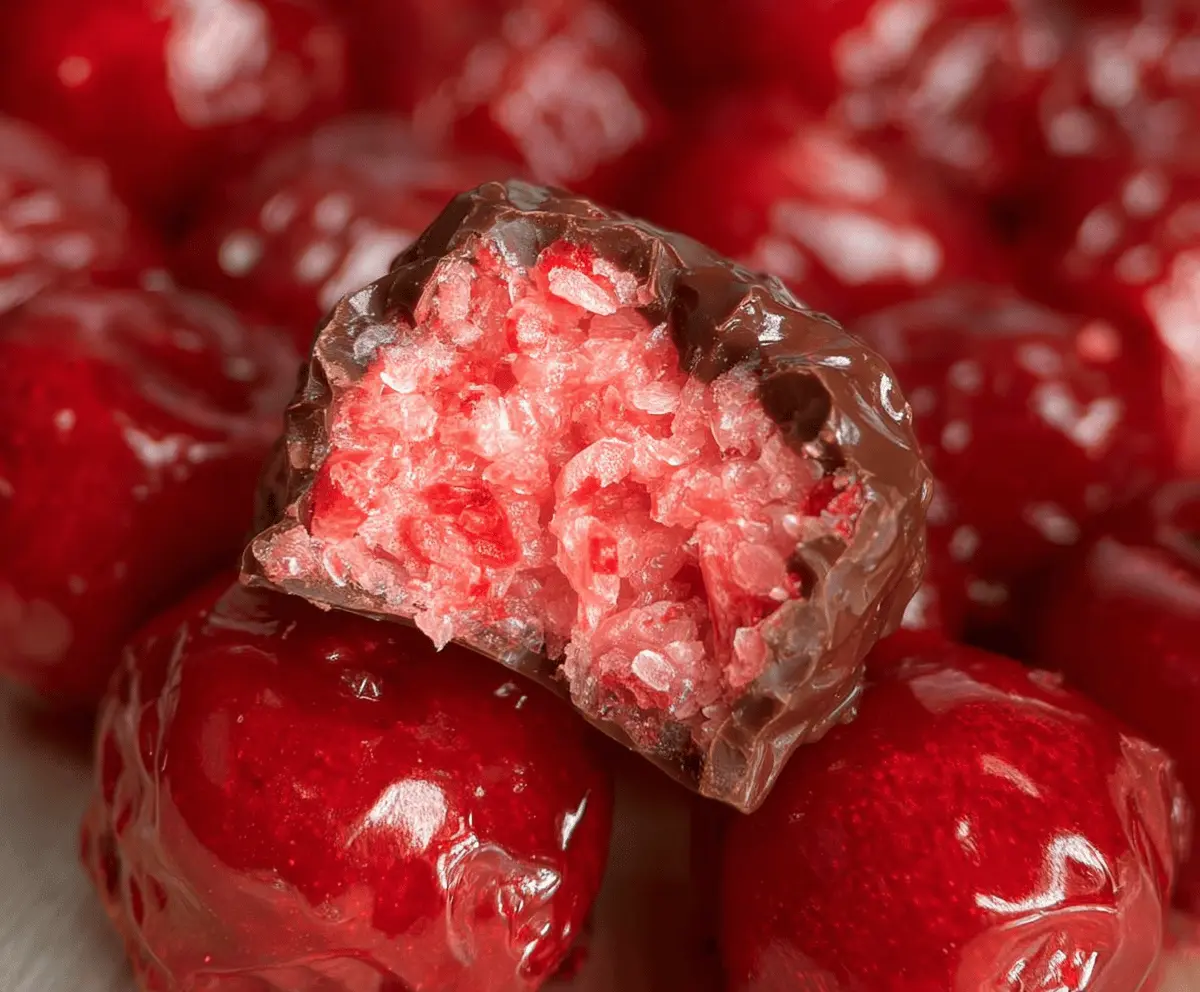
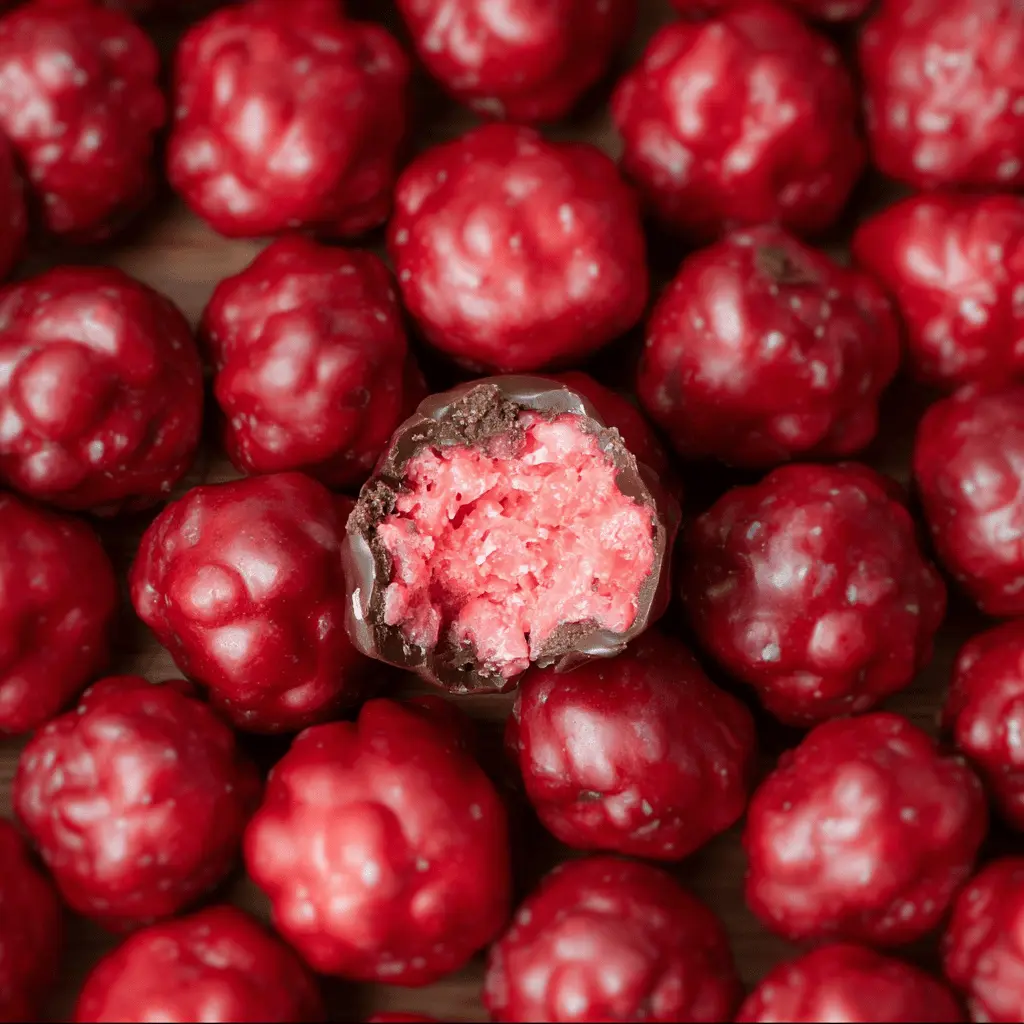
This Easy Homemade Cherry Mash Candy is a sweet treat featuring cherry flavor and a creamy center. It’s made with simple ingredients like cherry juice and chocolate, making it a delight!
Making these candies is super fun! I love unwrapping them and sharing them with friends. They always bring a smile, just like those charming cherry red wrappers! 🍒
What’s great is how quick and simple this recipe is. Just mix, mold, and let them set. Perfect for a homemade gift or a tasty snack at any time! Who can resist cherry goodness?
Key Ingredients & Substitutions
Maraschino Cherries: These sweet cherries add vibrant flavor and color. If you can’t find maraschino cherries, you could use fresh cherries (just pit and chop them) or even freeze-dried cherries for a different texture!
Cherry Juice: Don’t worry if you run out of maraschino cherry juice. You can substitute it with any fruit juice, like cranberry or even grape juice, which can change the flavor a bit but still works nicely.
Powdered Sugar: This is important for texture and sweetness. If you need a healthier option, try using coconut sugar blended into a fine powder; the flavor will be a bit different but still enjoyable!
Milk Chocolate Chips: I like using milk chocolate for its creamy taste. However, dark chocolate or even white chocolate can create a unique flavor twist. Choose according to your chocolate preference.
Nuts: Chopped peanuts or walnuts give a delightful crunch. If you’re allergic to nuts, you can leave them out entirely or use seeds like pumpkin or sunflower seeds for a similar crunch!
How Do I Shape and Dip the Candy Perfectly?
Shaping and dipping candies can feel tricky, but with a few tips, you can nail it! Start by ensuring your cherry mixture is chilled enough to hold its shape. Here’s how to go about it:
- Use a tablespoon to scoop consistent amounts of the cherry mixture. Roll them in your hands quickly to form smooth balls or logs.
- Keep your hands slightly wet to avoid sticking as you work with the dough. A dab of oil or water can help!
- When dipping into chocolate, use a fork or a skewer for easy handling. Let excess chocolate drip off before placing it back on the parchment.
- For a glossy chocolate finish, make sure your chocolate isn’t too thick. Thin it out with a touch of coconut oil or vegetable shortening if needed.
And remember, practice makes perfect! Enjoy the process and don’t worry if each candy isn’t identical. They’ll all taste fantastic!
Easy Homemade Cherry Mash Candy
Ingredients You’ll Need:
- 1 cup maraschino cherries, finely chopped
- 1/2 cup maraschino cherry juice
- 4 cups powdered sugar
- 1 teaspoon vanilla extract
- 16 oz milk chocolate chips
- 1 cup chopped peanuts or walnut pieces
How Much Time Will You Need?
This delightful homemade Cherry Mash Candy will take about 15 minutes of active preparation time, plus an additional 1.5 hours for chilling and setting. You can have fun mixing and shaping the candy, then just let it cool down, and soon you’ll have a yummy treat!
Step-by-Step Instructions:
1. Prepare the Cherries:
Start by draining the maraschino cherries, but make sure to keep the cherry juice! Once drained, chop the cherries into small pieces. This will help mix them evenly into the candy filling.
2. Mix the Cherry Filling:
In a large mixing bowl, combine the reserved cherry juice, the finely chopped cherries, powdered sugar, and vanilla extract. Use a spoon or spatula to combine everything together until it forms a thick, moldable dough. If it feels too sticky, you can add a little more powdered sugar!
3. Shape the Candy:
Next, take small portions of the cherry mixture and roll them into ball or log shapes, about 1 inch in diameter. This part is fun! Place these shaped candies on a parchment-lined baking sheet, so they won’t stick.
4. Chill the Candy:
Pop the baking sheet in the refrigerator for about 30 minutes. This will firm up the shaped candy, making it easier to coat in chocolate later!
5. Melt the Chocolate:
While the cherry pieces are chilling, melt the milk chocolate chips. Put them in a microwave-safe bowl and microwave in 30-second increments, stirring after each interval until the chocolate is smooth and fully melted.
6. Add the Nuts:
Once the chocolate is melted, gently stir in the chopped peanuts or walnuts. This adds a delicious crunch that pairs perfectly with the sweet cherry filling!
7. Dip the Candies:
Take the chilled cherry pieces out of the fridge. Using a fork or a dipping tool, dip each piece into the chocolate-nut mixture, making sure it’s fully coated. Let excess chocolate drip off before placing them back onto the parchment paper.
8. Set the Coated Candies:
Once you’ve dipped all the cherries, return them to the fridge and let them chill until the chocolate hardens completely, about 1 hour.
9. Enjoy Your Treat!
After the chocolate has set, your homemade Cherry Mash candies are ready to devour! Store any leftovers in an airtight container in the refrigerator. These little delights make perfect gifts or simply a sweet snack for yourself!
Enjoy your creamy, cherry-filled homemade candy! 🍒
Frequently Asked Questions (FAQ)
Can I Use Fresh Cherries Instead of Maraschino Cherries?
Yes, you can use fresh cherries! Just make sure to pit and chop them finely. Keep in mind that fresh cherries may not be as sweet as maraschino cherries, so you might want to add a little extra sugar for sweetness.
How Can I Store These Cherry Mash Candies?
Store your homemade Cherry Mash candies in an airtight container in the refrigerator for up to one week. You can also freeze them for up to 3 months for longer storage. Just make sure to thaw them in the fridge before serving!
What If My Candy Mixture Is Too Sticky?
If your cherry candy mixture feels too sticky to shape, simply add a bit more powdered sugar, a tablespoon at a time, until it reaches a moldable consistency. This will help you form the candies easily!
Can I Make These Vegan-friendly?
Absolutely! To make a vegan version, substitute milk chocolate chips with dairy-free chocolate chips, and make sure the chopped nuts you use are also suitable for a vegan diet. The rest of the ingredients are naturally vegan!