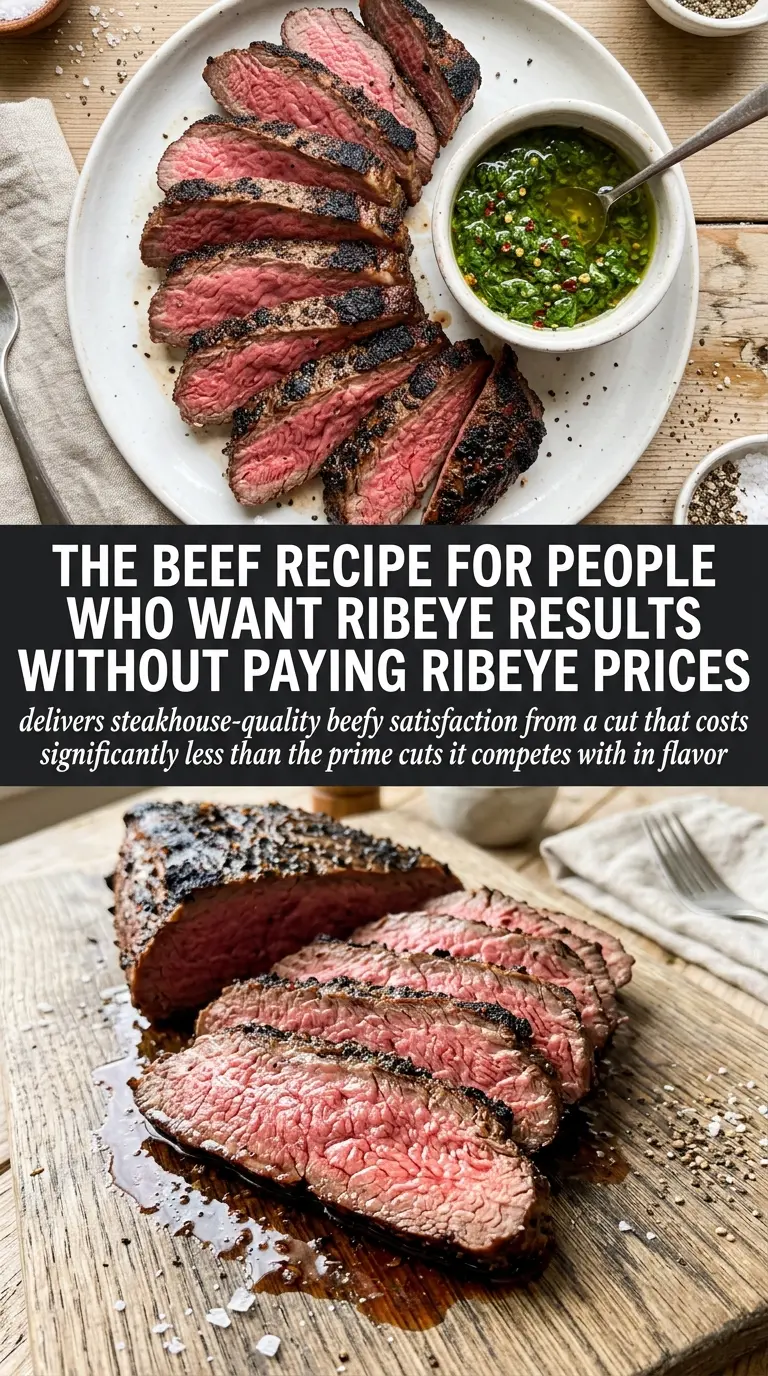
Tri tip is one of those cuts that gives you a deep, beefy payoff without demanding all day at the stove. When it’s seasoned well, seared hard, and sliced the right way, you get a crusty exterior and a pink, juicy center that eats like a much pricier roast. That combination is exactly why it keeps showing up for casual dinners and backyard cooking alike.
The trick is treating tri tip like both a steak and a roast. It needs enough heat to build a browned crust, but it also needs a little restraint at the end so the center stays medium-rare instead of drying out. The spice rub in this version does the heavy lifting: salt pulls the beef flavor forward, paprika and garlic add a savory edge, and oregano gives it that Santa Maria-style feel without complicated ingredients.
Below, I’m walking through the grill and oven methods side by side, plus the one slicing step that makes the biggest difference in tenderness. If your tri tip has ever turned out chewy or unevenly cooked, the fix is in here.
The crust was spot on and the center stayed pink all the way through. I used the oven method, rested it like you said, and the slices were tender instead of chewy.
Save this tri tip recipe for the nights when you want a crusty grilled or oven-roasted beef roast with a pink center.
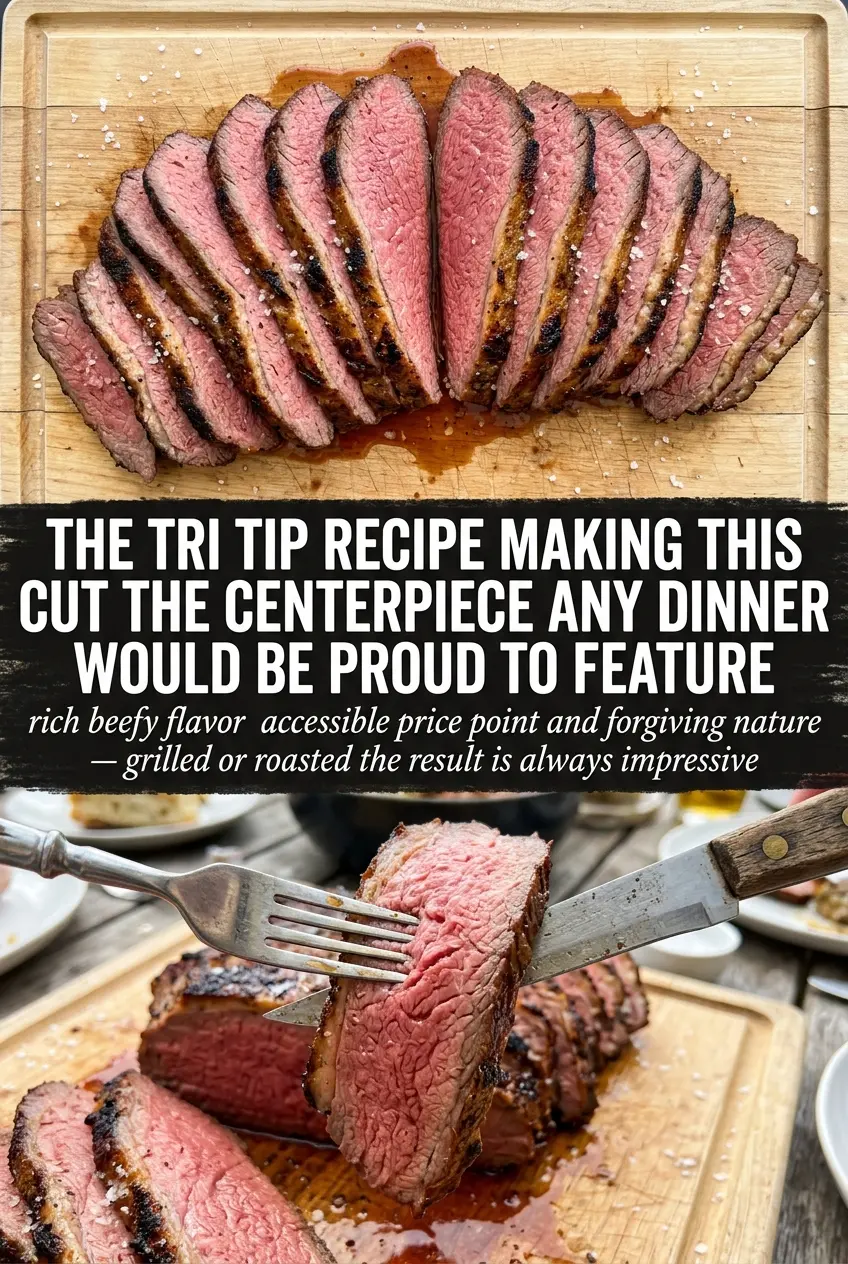
The Sear Is What Builds the Flavor, Not the Oven
Tri tip can get dry fast if it spends too long chasing temperature in gentle heat. The better move is to hit it hard at the start so the outside develops color before the center has time to overcook. That browned crust is where the savory depth comes from, and it matters whether you grill or use the oven.
The other place people lose this roast is the slicing. Tri tip has a noticeable grain, and if you cut with it instead of across it, even a perfectly cooked roast can eat tough. Resting matters too, because the juices need a few minutes to settle before you carve it. Skip that, and the cutting board takes the payoff instead of your plate.
- Tri tip roast — This cut has enough marbling to stay juicy, but it still needs precise heat control. Look for a roast with an even thickness if you can, since that helps it cook more uniformly.
- Kosher salt — Salt is doing more than seasoning the surface. It pulls the beef flavor forward and helps the crust taste bold instead of just spicy.
- Olive oil — The oil helps the rub cling and supports browning. You don’t need a fancy bottle here; a basic olive oil works fine because it’s doing a job, not starring in the dish.
- Paprika and garlic powder — These two give the roast that classic barbecue-style depth without adding moisture that could soften the crust. If you want a little smoke, use smoked paprika, but keep the amount the same.
- Dried oregano — This is the piece that nudges the rub toward Santa Maria-style tri tip. Fresh oregano won’t behave the same way here, so stick with dried.
What to Do in the First 10 Minutes and Why It Matters
Mix the Rub First
Stir the salt, pepper, garlic powder, paprika, onion powder, and oregano together before the meat comes out of the fridge. A fully mixed rub coats more evenly, which keeps one bite from tasting salty and the next one flat. If the spices are clumping, break them up with your fingers until the blend looks uniform.
Coat the Roast Generously
Rub the tri tip with olive oil first, then press the seasoning mix over every side. Don’t just dust the top; the roast needs a full coating because a lot of the flavor comes from the surface. If some rub falls off, pick it up and press it back on rather than shaking it away.
Let the Meat Take the Chill Off
Let the roast sit at room temperature for about 30 minutes before it hits the heat. That short rest helps it cook more evenly from edge to center, especially if one end is thicker than the other. If you put it on the grill or into the oven straight from the fridge, the outside will sprint ahead while the middle lags behind.
Build the Crust, Then Finish Gently
For grilling, sear the tri tip over high heat for about 5 minutes per side, then move it to indirect heat until the center reaches 130-135°F. For the oven method, sear it in a hot skillet first, then roast at 425°F until it hits the same temperature range. Pull it early and trust the rest time; the temperature will climb a little as it sits, and that carryover heat is part of why the center stays juicy.
Swap in smoked paprika for a deeper BBQ edge
Smoked paprika gives the crust a woodsy, cookout-style flavor without changing the texture. Use it in the same amount as regular paprika. The roast will taste a little more like it spent time over smoke, even if you made it in the oven.
Make it garlic-forward
If you want a stronger garlic punch, increase the garlic powder to 1 1/2 tablespoons and keep everything else the same. That leans the seasoning more savory and less herbal, which works especially well with grilled tri tip and a charred crust.
Lower-sodium version
Reduce the kosher salt to 1 tablespoon if you need a lighter hand on sodium. The roast will still taste good, but the crust won’t be as assertive, so rely on a clean slice and a good rest to keep the beef tasting rich.
Storage and Reheating
- Refrigerator: Store sliced tri tip in an airtight container for up to 4 days. The crust softens a little, but the beef stays usable for sandwiches, salads, or quick plates.
- Freezer: It freezes well if you slice it first and wrap it tightly with its juices. Thaw in the fridge overnight so the meat doesn’t dry out.
- Reheating: Rewarm gently in a low oven, covered, or in a skillet with a splash of broth. High heat pushes the pink center past medium-rare and turns the edges dry before the middle is warm.
Questions I Get Asked About This Recipe
Tri-Tip - Grilled or Oven-Roasted
Ingredients
Equipment
Method
- In a mixing bowl, combine kosher salt, black pepper, garlic powder, paprika, onion powder, and dried oregano to make a dry rub.
- Stir until the seasonings are evenly distributed, forming a consistent coarse mixture with visible herbs and spices.
- Rub olive oil all over the tri-tip roast so the surface is lightly coated and tacky.
- Press the dry rub onto the tri-tip roast, coating generously on all sides for a crusty exterior.
- Let the seasoned tri-tip sit at room temperature for 30 minutes to absorb flavor before cooking, keeping it uncovered.
- Sear the tri-tip over high heat for 5 minutes per side to build a deep, crusty exterior.
- Move the tri-tip to indirect heat and continue cooking until the center reaches 130-135°F for medium-rare, closing the grill lid between checks.
- Sear the tri-tip in a hot skillet, turning as needed until browned on the surface to match the grilled crust.
- Roast at 425°F for 20-25 minutes, checking until the center reaches 130-135°F for medium-rare.
- Rest the tri-tip for 15 minutes before slicing so the juices redistribute and the pink center stays tender.
- Slice against the grain after resting to keep each piece juicy and easy to chew.