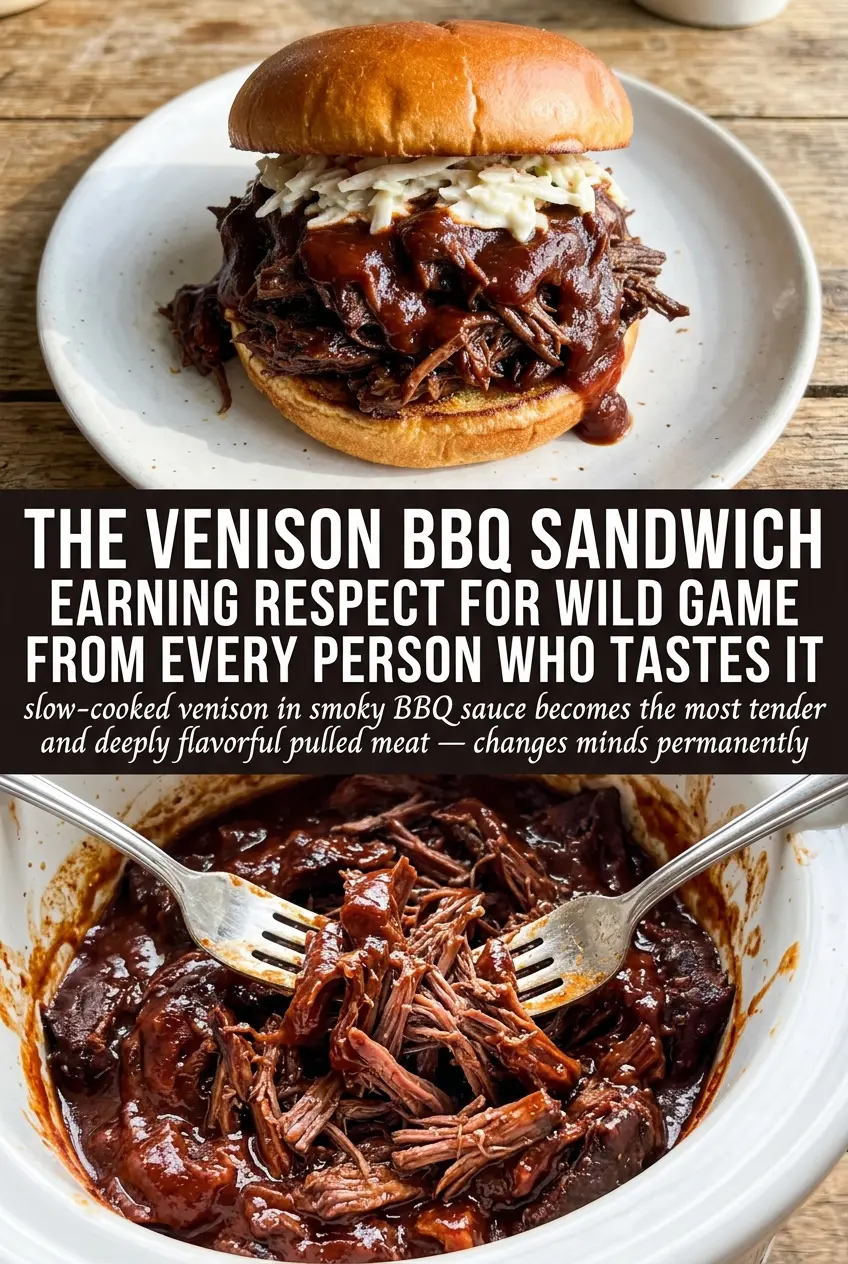
Tender pulled venison piled high on a toasted bun is the kind of sandwich that disappears fast, even with people who usually claim they “don’t do” wild game. The meat turns soft and shreddable after a long, gentle cook, and the BBQ sauce clings to every strand instead of pooling at the bottom of the bun. Add a little crunch from coleslaw and it goes from good to the kind of meal people start asking about before the platter hits the table.
What makes this version work is the balance between a quick sear and a slow finish. The grill gives the venison a deeper, roasted edge before it goes into the slow cooker, and the onion, garlic, Worcestershire, and brown sugar build enough base flavor that the sauce tastes layered instead of one-note. Venison is lean, so the low-and-slow method matters here; high heat would dry it out long before it got tender.
Below, I’ve added the details that matter most: how to keep venison from tasting dry, which BBQ sauce style works best, and the small finishing move that keeps the sandwiches from turning soggy the second they’re assembled.
The venison shredded beautifully after 7 hours on low, and the sauce soaked in without getting greasy. Toasting the buns made a big difference, especially with the coleslaw on top.
Save this BBQ venison sandwich for the next time you want tender pulled wild game with smoky sauce and toasted buns.
The Sear That Keeps Venison From Going Flat
Venison needs a little surface browning before it goes into the slow cooker. That quick grill sear gives you a deeper savory note and keeps the finished sandwich from tasting like plain shredded roast in sauce. Don’t chase a hard crust here; two minutes per side is enough to build flavor without starting the long cook with a dried-out exterior.
The other mistake is crowding the meat into the cooker with no liquid base. The onion, garlic, Worcestershire, brown sugar, and that first cup of BBQ sauce create a flavored braising environment, which matters because venison is lean and won’t self-baste the way a fattier cut of pork would. If the roast sits in a dry cooker too long, the outside can tighten before the center breaks down.
What Each Ingredient Is Actually Doing Here
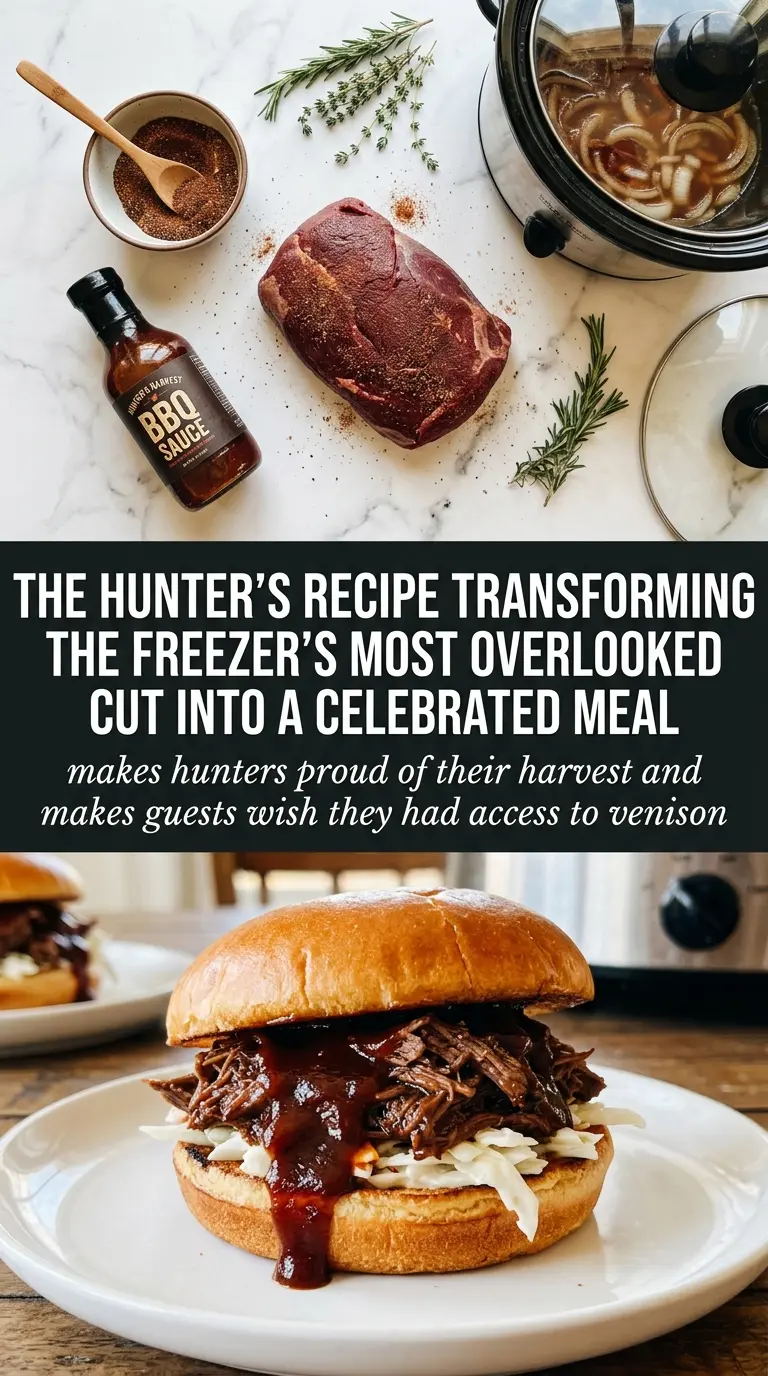
- Venison roast — This is the whole point of the dish. A roast with some structure is what you want, because it can handle a long cook and shred cleanly. If your roast is very lean, the slow cooker method matters even more; there’s no fat to cover for a rushed cook.
- BBQ sauce — Use a sauce you’d actually eat on its own. A sweet, smoky sauce works best here because venison has a darker, more assertive flavor than pork. If your sauce is very thick, it will still loosen as the meat cooks and releases juices.
- Onion and garlic — These do more than add flavor. They give the sauce a savory backbone and keep the finished meat from tasting one-dimensional. Slice the onion thin so it softens completely instead of staying stringy.
- Worcestershire sauce — This brings salt, tang, and that deep umami note that makes wild game taste rounded instead of sharp. There isn’t a great substitute that does all of that at once, though soy sauce plus a splash of vinegar works in a pinch.
- Brown sugar and smoked paprika — The sugar helps the sauce read as sticky and finished, while the paprika adds a little smoke without making the whole sandwich taste like a spice rub. If you use a heavily smoked BBQ sauce, keep the paprika modest so the flavor doesn’t turn bitter.
- Toasted buns and coleslaw — These are not extras. Toasted buns hold up under the saucy meat, and coleslaw adds the cool crunch that keeps each bite from feeling heavy.
How to Build the Sandwich So It Stays Juicy, Not Watery
Seasoning and Searing the Roast
Season the venison with salt, pepper, and smoked paprika before it ever touches the grill. You’re looking for a quick, aggressive sear that browns the outside in spots without cooking the center through. If the surface starts sticking badly, the grate isn’t hot enough yet. Let each side release on its own before turning so you keep the best color on the meat instead of tearing it.
Starting the Slow Cooker Base
Put the sliced onion and minced garlic in the cooker first, then set the seared roast on top. Add Worcestershire, brown sugar, and just one cup of BBQ sauce at this stage so the meat braises in a balanced liquid rather than a thick glaze. If you dump in all the sauce at the start, it can taste too sweet and concentrated by the time the venison is done.
Cooking Until It Shreds
Cook on low until the roast gives up easily to a fork and starts pulling apart in long strands. That usually takes 6 to 8 hours, depending on the shape of the roast and your slow cooker. If it slices cleanly but doesn’t shred, it needs more time; tough-looking venison that hasn’t fully broken down will still feel chewy in the sandwich.
Shredding and Finishing the Sauce
Shred the meat right in the cooker so it soaks up the juices while it’s still hot. Stir in the remaining BBQ sauce only after shredding, which lets you control the final texture and keeps the mixture glossy instead of soupy. If the sauce looks thin, let the shredded venison sit uncovered for a few minutes and it will tighten up as it absorbs liquid.
Building the Bun
Toast the buns before assembling. That small step keeps the bottom from collapsing under the sauce, especially once coleslaw goes on top. Pile the venison on first, then add the slaw so the sandwich has structure from the bottom up.
Swap the BBQ Sauce for a Spicier Finish
Use a smoky sauce with a little heat, or stir hot sauce into the final batch of sauce after the venison is shredded. The heat reads brighter once the meat is pulled, and it cuts through the richness without overpowering the wild game flavor.
Make It Dairy-Free Without Changing the Texture
This recipe is naturally dairy-free as written. The only thing to watch is the coleslaw dressing if you’re serving a store-bought version; choose one without buttermilk or mayo if that matters for your table. The venison itself doesn’t need any dairy to stay tender.
Use Different Bread When Buns Aren’t Enough
Pile the pulled venison onto hoagie rolls, potato buns, or even toasted sandwich bread if that’s what you have. Just pick something sturdy enough to hold sauce, because soft bread will fall apart fast under the weight of the meat and slaw.
Stretch It for a Crowd
If you need more servings, shred the venison and mix in extra BBQ sauce plus a splash of the cooking liquid before serving. That makes the meat feel fuller without making it dry, and it helps you feed more people without sacrificing tenderness.
Storage and Reheating
- Refrigerator: Store the pulled venison in its sauce for up to 4 days. The flavor deepens overnight, and the texture stays best when the meat is kept submerged in sauce.
- Freezer: It freezes well for up to 3 months. Cool it fully, portion it into airtight containers, and freeze with a little extra sauce so it doesn’t dry out when thawed.
- Reheating: Warm it gently on the stove or in a covered dish in the oven with a splash of sauce or broth. The common mistake is blasting it on high heat, which tightens lean venison and makes it stringy.
Questions I Get Asked About This Recipe
BBQ Venison Sandwich
Ingredients
Equipment
Method
- Season the venison roast with salt, pepper, and smoked paprika, coating all sides. Aim for even coverage so the crust flavors the meat.
- Sear on a grill over high heat for 2 minutes per side, until browned. Use the visible color change as your cue before moving it to the slow cooker.
- Place the venison in a slow cooker with the onion, garlic, Worcestershire sauce, brown sugar, and 1 cup BBQ sauce. Spread the aromatics around the roast so they steam during cooking.
- Cook on low for 6-8 hours, until the meat is very tender. The visual cue is that the roast yields easily and pulls apart with light pressure.
- Shred the venison and mix with the remaining BBQ sauce. Stir thoroughly so the strands look evenly coated.
- Serve on toasted hamburger buns with coleslaw. Keep the filling hot and let the coleslaw add crunch and moisture alongside the saucy meat.