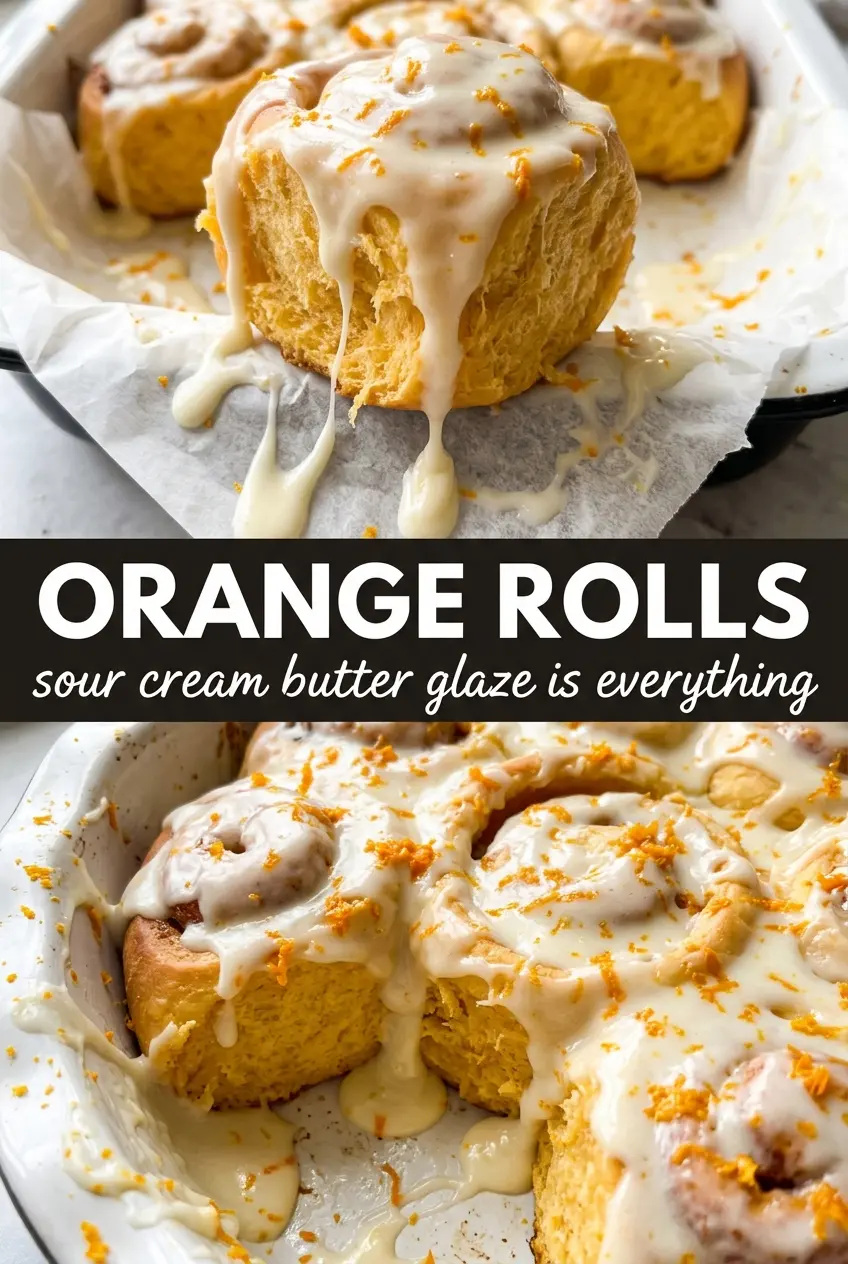
Soft orange rolls bake up with tender spirals, a buttery citrus filling, and a sour cream butter glaze that melts into every crevice. The best ones have that pull-apart center and a golden top that gives way to a sticky, glossy finish once the glaze hits warm rolls straight from the oven.
What makes this version work is the balance. The dough stays simple and enriched enough to stay soft, but not so heavy that it turns bready. The orange zest goes into the filling with the butter and sugar, which helps release the oils before the rolls even hit the oven. That gives you a brighter orange flavor than tossing zest on top at the end.
Below, I’ll walk through the tiny choices that matter: how warm the liquid should be, how tight to roll the dough, and why the glaze needs to go on while the rolls are still warm. Those details are the difference between decent sweet rolls and the kind people keep reaching for while they’re still in the pan.
The rolls baked up soft and fluffy, and the sour cream glaze soaked into the swirls instead of sitting on top. I loved that the orange zest came through in every bite without tasting too sweet.
Like these orange rolls with sour cream butter glaze? Save them to Pinterest for the mornings when you want soft citrus swirls with a glossy glaze that melts into every layer.
The Part That Keeps Orange Rolls Soft Instead of Dry
Orange rolls usually go wrong in one of two ways: the dough gets overfloured and tough, or the filling leaks out and leaves the center dry. The fix starts before you even roll anything. This dough should be soft and slightly tacky, not sticky enough to smear all over your hands, but definitely not stiff. If it feels dry at the kneading stage, the rolls will bake up dense and the spirals won’t stay tender.
The other detail that matters is the filling texture. Butter, sugar, and zest should become a paste, not a loose sandy mixture. That paste clings to the dough and stays where you spread it, which means the orange flavor is trapped in the swirl instead of disappearing into the pan. Slice the log with a sharp knife or unflavored dental floss so you don’t smash the layers flat.
What Each Ingredient Is Actually Doing in These Rolls

- Instant yeast — This gives the rolls a fast, reliable rise without a separate proofing step. If you only have active dry yeast, use the same amount and expect a slightly longer rise.
- Warm milk and warm water — The combination keeps the dough soft without making it heavy. The liquid should feel warm, not hot; too much heat will slow the yeast instead of waking it up.
- Butter in both the dough and filling — The dough butter adds tenderness, while the filling butter helps the sugar and zest spread evenly. Softened butter matters here because melted butter leaks out before the rolls bake.
- Fresh orange zest — This is the real flavor driver. Bottled orange flavoring won’t give you the same bright oils, and the zest needs to be rubbed into the filling so it perfumes the whole spiral.
- Sour cream in the glaze — It gives the glaze a little tang that keeps the sweetness from flattening out. Plain milk can work in a pinch, but the glaze will be thinner and less balanced.
Getting the Swirl, Rise, and Glaze to Work Together
Mixing the Dough Until It’s Smooth and Springy
Stir the flour, yeast, sugar, and salt first so the yeast and salt are distributed evenly. Then add the warm milk, warm water, egg, and softened butter, and knead until the dough turns smooth and elastic. It should feel soft under your hands and spring back slowly when pressed. If it tears instead of stretching, keep kneading for a few more minutes before adding extra flour.
Making the Orange Filling
Beat the softened butter, sugar, and orange zest together until the mixture looks like damp, fragrant sand that holds together when pressed. That texture matters because it spreads without ripping the dough. If the butter is too cold, the filling will clump and leave bare spots in the swirl. Let it sit out until it smears easily with a spoon.
Rolling, Cutting, and Setting the Pan
Roll the dough into a rectangle that’s even in thickness so the rolls bake at the same rate. Spread the filling all the way to the edges, then roll tightly from the long side to keep the spirals neat. Slice into 12 even pieces and set them cut-side up in a greased 9×13 dish. After the rolls go into the pan, the short rest lets them puff before baking, which gives you lighter layers and less chance of a tight center.
Baking Until Golden, Then Glazing While Warm
Bake until the tops are golden and the centers look set but still soft. If the tops brown too quickly, the rolls are usually too close to the upper rack or the oven runs hot; pull them when they’re baked through, not when the top is the darkest. Beat the glaze until completely smooth, then pour it over the warm rolls right away. That’s when it sinks into the swirls and turns the whole pan glossy instead of leaving a thick layer on top.
How to Adapt These Orange Rolls Without Losing the Soft Center
Dairy-free version
Use plant-based butter in both the dough and filling, and replace the milk with an unsweetened non-dairy milk that warms up gently. The glaze can be made with a dairy-free sour cream alternative, but pick one that’s thick and tangy or the finish will taste thin.
Extra-orange filling
Add a little more zest if you want the citrus to stand out above the glaze. Don’t add orange juice to the filling itself; extra liquid makes the filling runny and pushes it out of the rolls as they bake.
Make-ahead overnight rolls
Assemble the rolls in the pan, cover them tightly, and refrigerate overnight after shaping. The next morning, let them sit at room temperature until they look puffy before baking. Cold dough straight from the fridge bakes unevenly and can stay dense in the middle.
Storage and Reheating
- Refrigerator: Store covered for up to 4 days. The rolls stay soft, but the glaze will soak in more as they sit.
- Freezer: Freeze baked rolls without the glaze for up to 2 months. Wrap them well and glaze after reheating for the best texture.
- Reheating: Warm individual rolls in the microwave for 15 to 20 seconds, or cover the pan with foil and reheat in a low oven. High heat dries out the dough fast, so go gentle.
Questions I Get Asked About This Recipe
Orange Rolls with Sour Cream Butter Glaze
Ingredients
Equipment
Method
- In a large mixing bowl, combine all-purpose flour, instant yeast, sugar, and salt. Stir well to evenly distribute the yeast.
- Add warm milk, warm water, egg, and softened butter to the dry ingredients. Knead until smooth and elastic, with no dry flour remaining.
- Cover the dough and let it rise for 1 hour, until doubled in size. The dough should look puffy and slightly airy when pressed gently.
- In a small bowl, mix softened butter, sugar, and zest of 2 oranges until it forms a spreadable filling. Look for even zest flecks throughout.
- Turn the dough onto a lightly floured surface and roll it into a rectangle. Aim for an even thickness so the swirls bake uniformly.
- Spread the orange filling evenly over the dough. Leave a small border bare so it seals when rolled.
- Roll the dough up tightly into a log, then slice into 12 rolls. Keep the roll snug so the layers stay defined.
- Place the rolls in a greased 9x13 dish. Cover and let rest for 20 minutes to puff up slightly.
- Bake at 375°F for 20–25 minutes until the tops are golden. The rolls should feel set and look lightly browned across the surface.
- Beat powdered sugar, sour cream, softened butter, fresh orange juice, and vanilla extract until smooth. The glaze should be pourable with a thick consistency.
- Pour the glaze over the warm rolls immediately. Let it flow into every crevice, then serve.