I love baking, especially when the weather gets a little cooler. There’s something so comforting about the smell of apples and cinnamon in the air. Today, I’m sharing two fantastic apple cheesecake recipes that are perfect for this time of year.
Whether you’re looking for a quick treat or a show-stopping dessert, these apple-filled cheesecakes are simple to make and always a hit. Get ready to bake some wonderful apple desserts with me!
Jump to Recipe:
Perfect Apple Cheesecake Bites
These little apple cheesecake bites are so easy to make and perfect for sharing. Each one is a creamy, apple-studded treat with a simple graham cracker crust.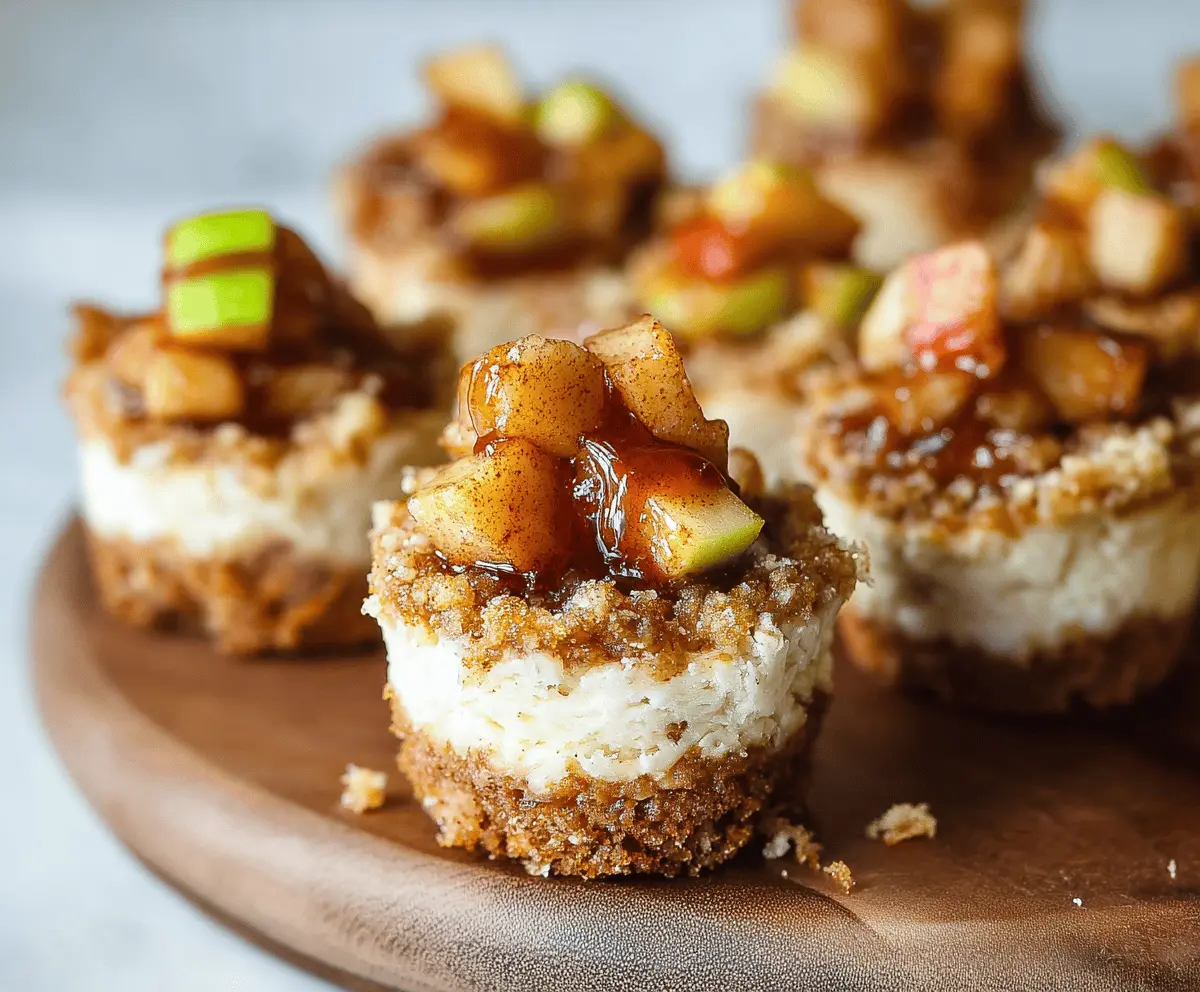
Key Ingredients & Tips for Apple Bites
- Softened Cream Cheese: Make sure your cream cheese is at room temperature for a smooth, lump-free batter.
- Small Apple Pieces: Dice your apples very small so they bake evenly and spread throughout the bites.
- Muffin Liners: Using paper liners makes these apple cheesecake bites easy to remove and serve.
What You Need for Apple Cheesecake Bites
- 1.5 cups graham cracker crumbs
- 1/4 cup melted butter
- 2 blocks (8 oz each) cream cheese, softened
- 3/4 cup granulated sugar
- 2 large eggs
- 1 teaspoon vanilla extract
- 1 medium apple, peeled and finely diced
- 1/2 teaspoon ground cinnamon
⏱️ Time: 45 minutes🍽️ Yields: 12-16 bites
How to Make Apple Cheesecake Bites
Step 1: Prepare the Crust
Preheat your oven to 350°F (175°C). Line a 12-cup muffin tin with paper liners. In a small bowl, mix the graham cracker crumbs and melted butter. Press about 1 tablespoon of the mixture firmly into the bottom of each muffin liner to form the crust.
Step 2: Make the Cheesecake Filling
In a large bowl, beat the softened cream cheese and granulated sugar together until it’s smooth and creamy. Beat in the eggs one at a time, then add the vanilla extract. Gently fold in the finely diced apple and cinnamon until just combined.
Step 3: Bake the Bites
Spoon the cheesecake filling evenly over the crusts in the muffin tin, filling each liner almost to the top. Bake for 18-22 minutes, or until the centers are mostly set. Let them cool in the pan completely before moving to the fridge to chill for at least 2 hours.
📝 Final Note
These apple cheesecake bites taste best when chilled. You can store them in an airtight container in the refrigerator for up to 3 days.
Creamy Apple Cider Cheesecake
This apple cider cheesecake brings together a classic dessert with the comforting taste of apple cider. It’s rich, creamy, and wonderful for any special occasion or fall gathering.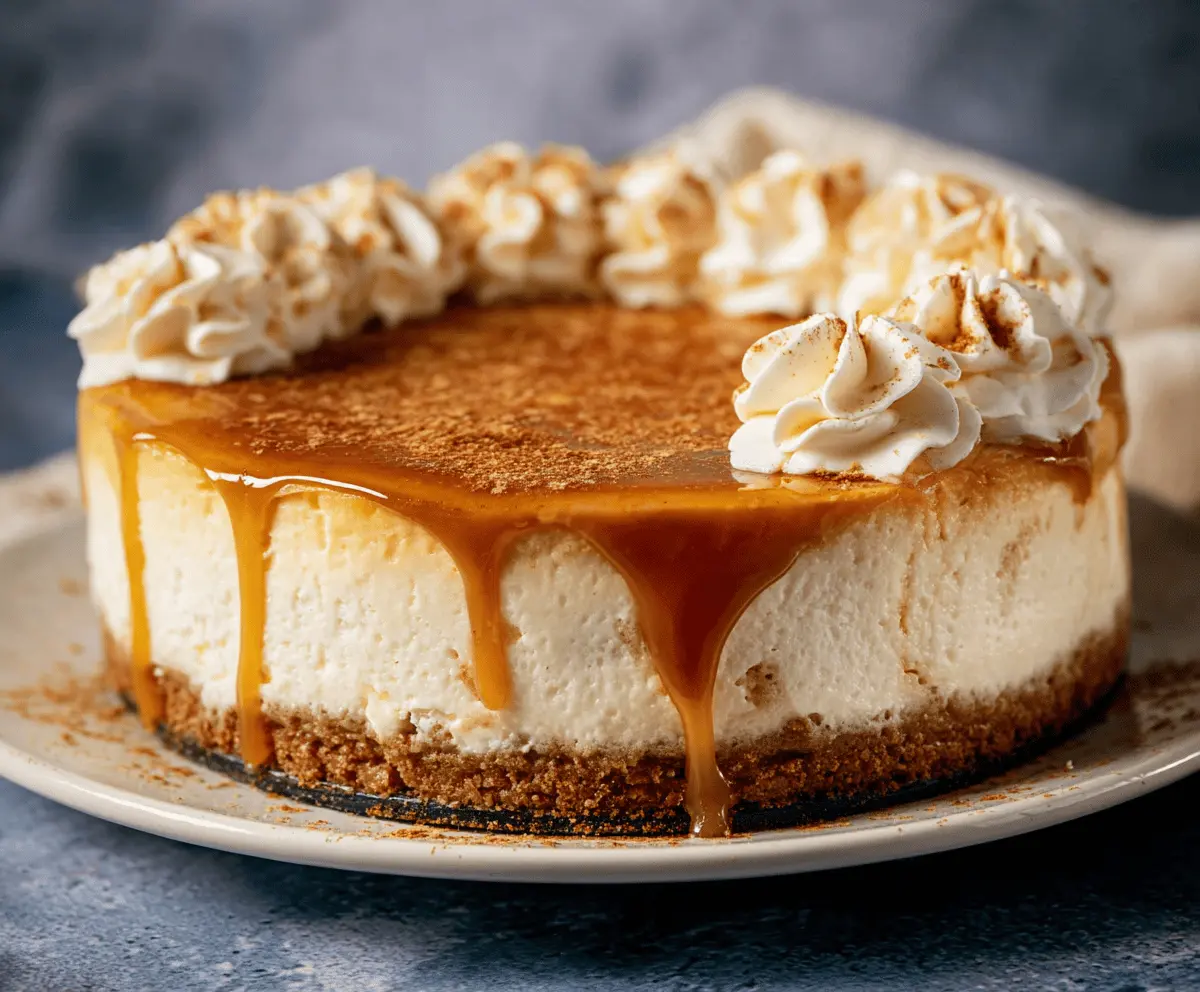
Key Ingredients & Tips for Apple Cider Cheesecake
- Reduced Apple Cider: Boiling down the cider makes its apple flavor much stronger and more concentrated in the cheesecake.
- Water Bath Baking: Baking this cheesecake in a water bath helps it cook gently and prevents cracks on the surface.
- Springform Pan: Use a springform pan to make removing and serving your beautiful cheesecake very easy.
What You Need for Apple Cider Cheesecake
- 2 cups apple cider
- 1.5 cups graham cracker crumbs
- 1/4 cup melted butter
- 3 blocks (8 oz each) cream cheese, softened
- 1 cup granulated sugar
- 3 large eggs
- 1 teaspoon vanilla extract
- 2 tablespoons all-purpose flour
- 1/2 teaspoon ground cinnamon
⏱️ Time: 1 hour 30 minutes + chilling🍽️ Yields: 8-10 servings
How to Make Apple Cider Cheesecake
Step 1: Reduce Cider & Prepare Crust
Pour the apple cider into a small saucepan and bring it to a boil. Reduce the heat and let it simmer until it has reduced to about 1/4 cup, about 15-20 minutes. Let it cool. Preheat your oven to 325°F (160°C). Mix graham cracker crumbs and melted butter, then press into the bottom of a 9-inch springform pan.
Step 2: Make the Cheesecake Filling
In a large bowl, beat the softened cream cheese and sugar until smooth. Beat in the eggs one at a time, then add the vanilla extract. Mix in the flour, cinnamon, and the cooled reduced apple cider until everything is just combined. Pour the filling over the crust in the springform pan.
Step 3: Bake in a Water Bath
Wrap the bottom of your springform pan tightly with heavy-duty foil to prevent water from getting in. Place the pan inside a larger roasting pan. Carefully pour hot water into the roasting pan until it comes halfway up the sides of the springform pan. Bake for 60-75 minutes, or until the edges are set but the center still jiggles slightly.
Step 4: Cool and Chill
Turn off the oven and let the cheesecake cool inside with the oven door ajar for 1 hour. Remove from the water bath, take off the foil, and cool completely on a wire rack. Once cool, refrigerate for at least 4 hours, or ideally overnight, before serving.
📝 Final Note
For the best texture and flavor, chilling this cheesecake completely is important. You can serve it plain or with a drizzle of caramel sauce.