I know you love a good apple dessert, especially as the weather gets cooler. There’s just something so comforting about warm, spiced apples with a delicious topping. Today, I’m sharing some of my absolute favorite apple crisp recipes to make your kitchen smell amazing and your taste buds happy.
Whether you like a classic fruit crisp, handy apple crisp bars, or a crunchy shortbread base, I have something here for you. These recipes are easy to follow and perfect for sharing with family and friends.
Jump to Recipe:
Easy Apple Crisp Bars Recipe
These apple crisp bars are perfect for a snack or dessert on the go. They feature a soft apple filling and a classic crumb topping, all in a convenient bar form.
I find these bars are fantastic for parties or when you want something easy to grab and enjoy. You’ll appreciate the simple method.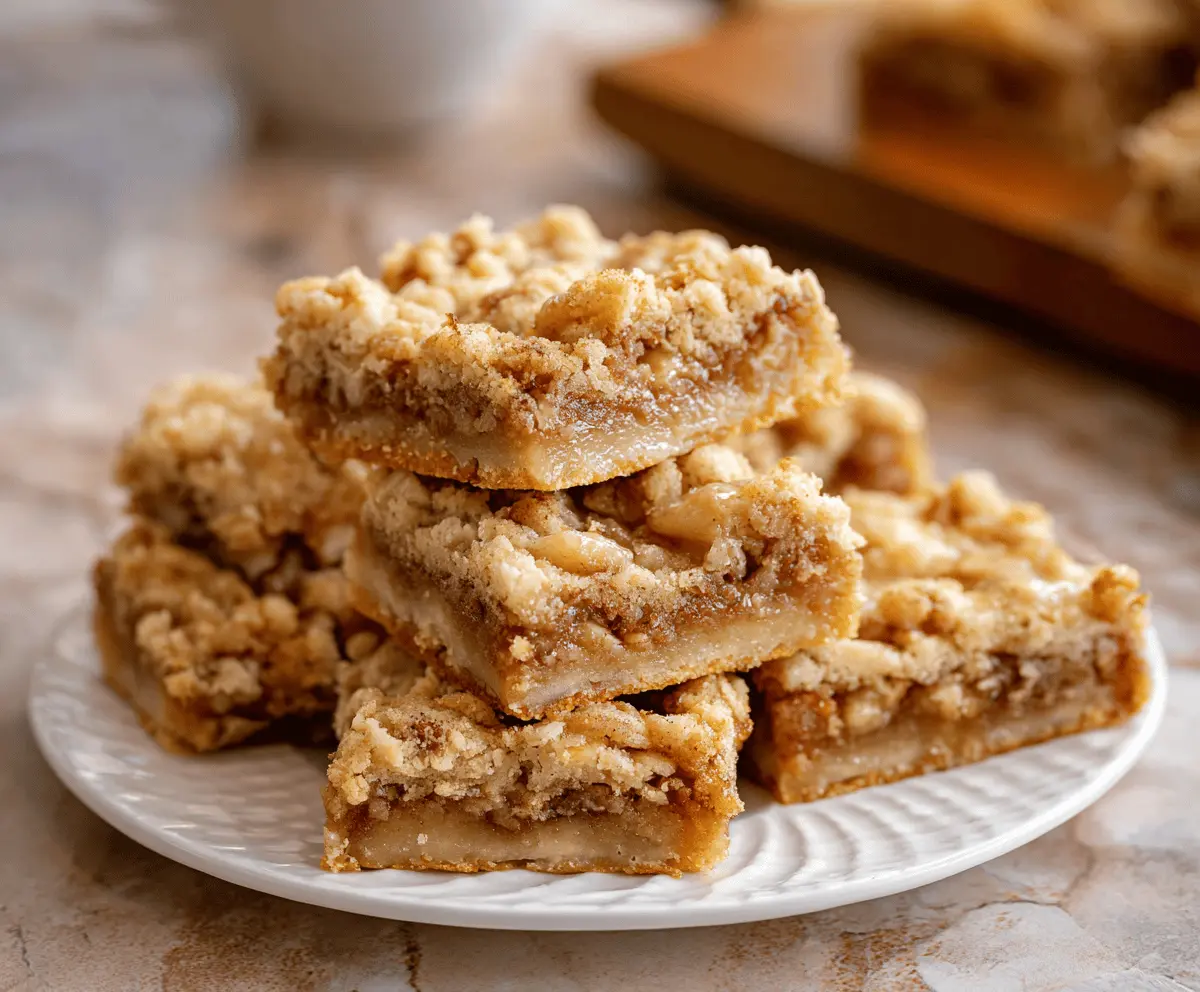
Key Ingredients & Tips for Apple Crisp Bars
- Apple Slices: Cut your apple slices evenly so they cook at the same rate. This helps ensure a tender apple filling in every bar.
- Pressing the Base: Press the bottom crust firmly into the pan to make sure it holds together well when you cut the bars.
What You Need for Apple Crisp Bars
- For the Base:
- 1 1/2 cups all-purpose flour
- 1/2 cup granulated sugar
- 1/4 teaspoon salt
- 1/2 cup unsalted butter, melted
- For the Filling:
- 4 medium apples, peeled, cored, and finely diced
- 1/4 cup brown sugar
- 1 teaspoon ground cinnamon
- 1 tablespoon lemon juice
- For the Topping:
- 1 cup rolled oats
- 1/2 cup all-purpose flour
- 1/4 cup brown sugar
- 1/4 cup cold unsalted butter, cubed
⏱️ Time: 1 hour 30 minutes🍽️ Yields: 12-16 bars
How to Make Apple Crisp Bars
Step 1: Make and Bake the Base
Preheat oven to 350°F (175°C). Line a 9×13 inch baking pan with parchment paper, leaving an overhang on the sides. In a bowl, mix flour, granulated sugar, and salt for the base. Pour in melted butter and stir until well combined. Press this mixture evenly into the bottom of the prepared pan. Bake for 10-12 minutes until lightly golden.
Step 2: Prepare Filling and Topping
While the base bakes, mix the diced apples with brown sugar, cinnamon, and lemon juice for the filling. For the topping, combine oats, flour, and brown sugar. Cut in the cold butter with your fingers or a pastry blender until it forms coarse crumbs.
Step 3: Assemble and Finish Baking
Spread the apple filling evenly over the partially baked crust. Sprinkle the crumb topping over the apples. Return to the oven and bake for another 35-40 minutes, or until the apples are tender and the topping is golden brown. Let cool completely in the pan before lifting out with the parchment paper and cutting into bars.
📝 Final Note
Allowing the bars to cool completely before cutting is key to getting neat slices. You can store them in an airtight container at room temperature for up to 3 days.
Apple Crisp Shortbread Bars for Treats
These apple crisp shortbread bars combine a rich, buttery shortbread crust with a sweet apple filling and a crumbly crisp topping. They are a delightful treat that offers different textures in every bite.
I find the shortbread base makes these bars extra special and a little more elegant. You will love how the flavors come together.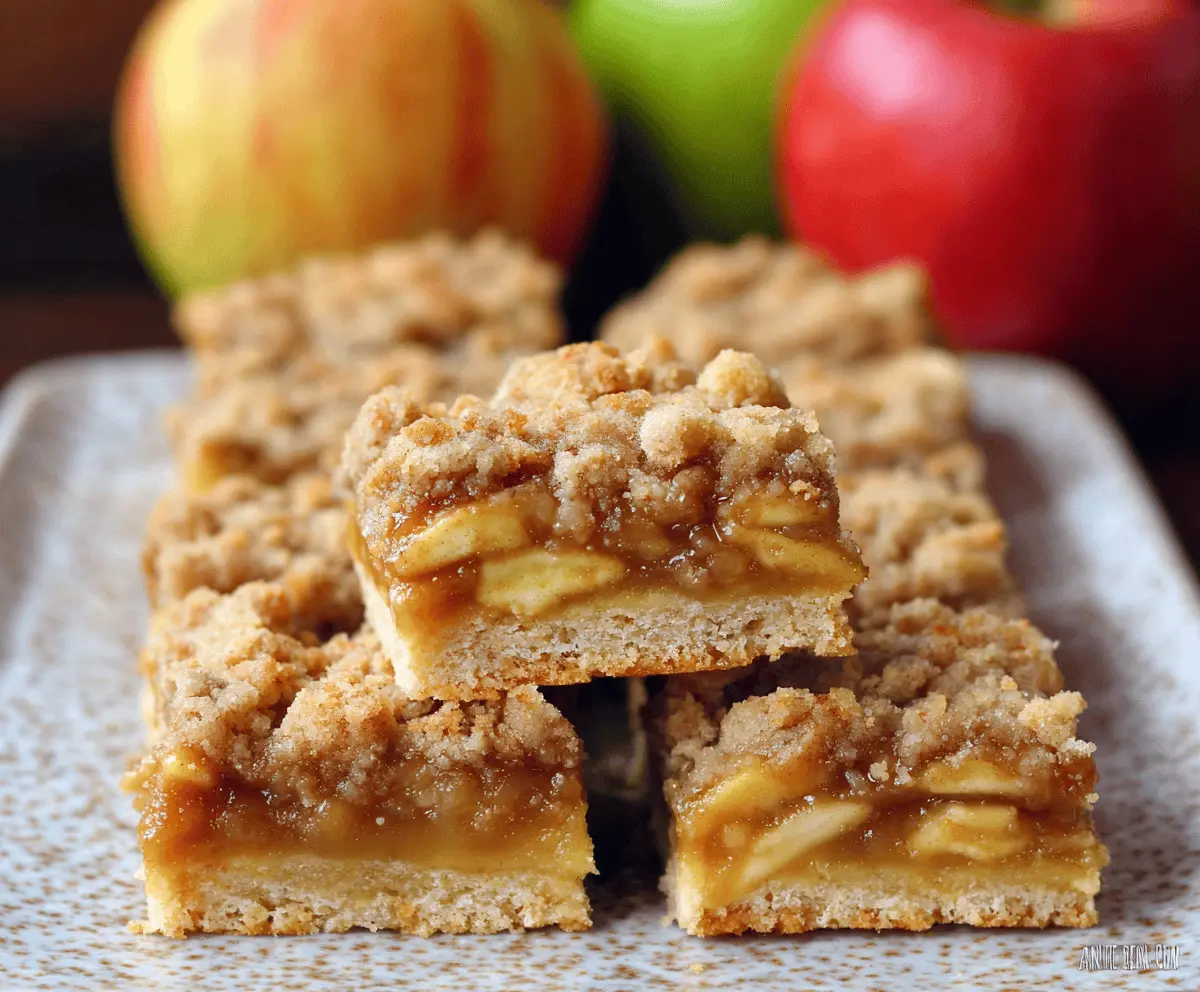
Key Ingredients & Tips for Apple Crisp Shortbread Bars
- Shortbread Quality: Use good quality butter for the shortbread crust. It makes a big difference in the flavor and texture of the base.
- Cooling is Crucial: Let these bars cool completely before cutting. The shortbread needs time to set fully, which helps prevent crumbling.
What You Need for Apple Crisp Shortbread Bars
- For the Shortbread Crust:
- 1 cup cold unsalted butter, cubed
- 1/2 cup granulated sugar
- 2 cups all-purpose flour
- 1/4 teaspoon salt
- For the Apple Filling:
- 5 medium apples, peeled, cored, and thinly sliced
- 1/4 cup brown sugar
- 1/2 teaspoon ground cinnamon
- 1 tablespoon cornstarch
- For the Crisp Topping:
- 1/2 cup rolled oats
- 1/4 cup all-purpose flour
- 1/4 cup brown sugar
- 1/4 cup cold unsalted butter, cubed
⏱️ Time: 1 hour 45 minutes🍽️ Yields: 16 bars
How to Make Apple Crisp Shortbread Bars
Step 1: Prepare the Shortbread Crust
Preheat your oven to 375°F (190°C). In a large bowl, combine the cold, cubed butter, granulated sugar, flour, and salt. Use a pastry blender or your fingers to mix until the mixture is crumbly and holds together when pressed. Press this firmly into a parchment-lined 9×13 inch baking pan. Bake for 15 minutes, then remove from oven.
Step 2: Assemble Filling and Topping
While the crust bakes, combine the thinly sliced apples, brown sugar, cinnamon, and cornstarch in a bowl for the filling. Mix well. In another bowl, combine the oats, flour, and brown sugar for the crisp topping. Cut in the cold butter until coarse crumbs form.
Step 3: Layer and Bake the Bars
Spread the apple filling evenly over the warm shortbread crust. Sprinkle the crisp topping over the apple layer. Return the pan to the oven and bake for an additional 40-50 minutes, or until the apples are tender and the topping is golden and crisp.
📝 Final Note
These bars are best after they have fully cooled and set, which can take a couple of hours. Slice them with a sharp knife. Store in an airtight container for up to 4 days.