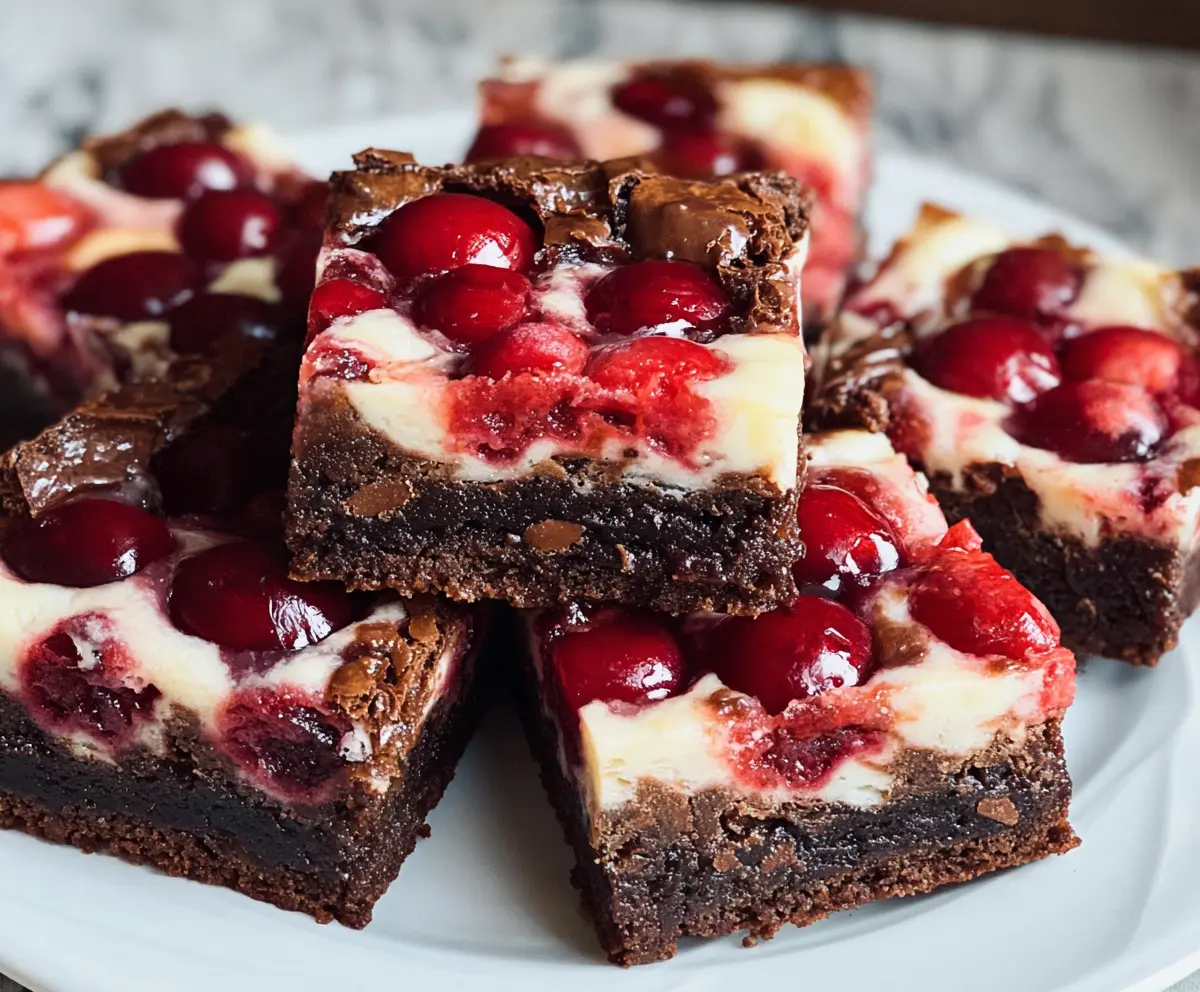
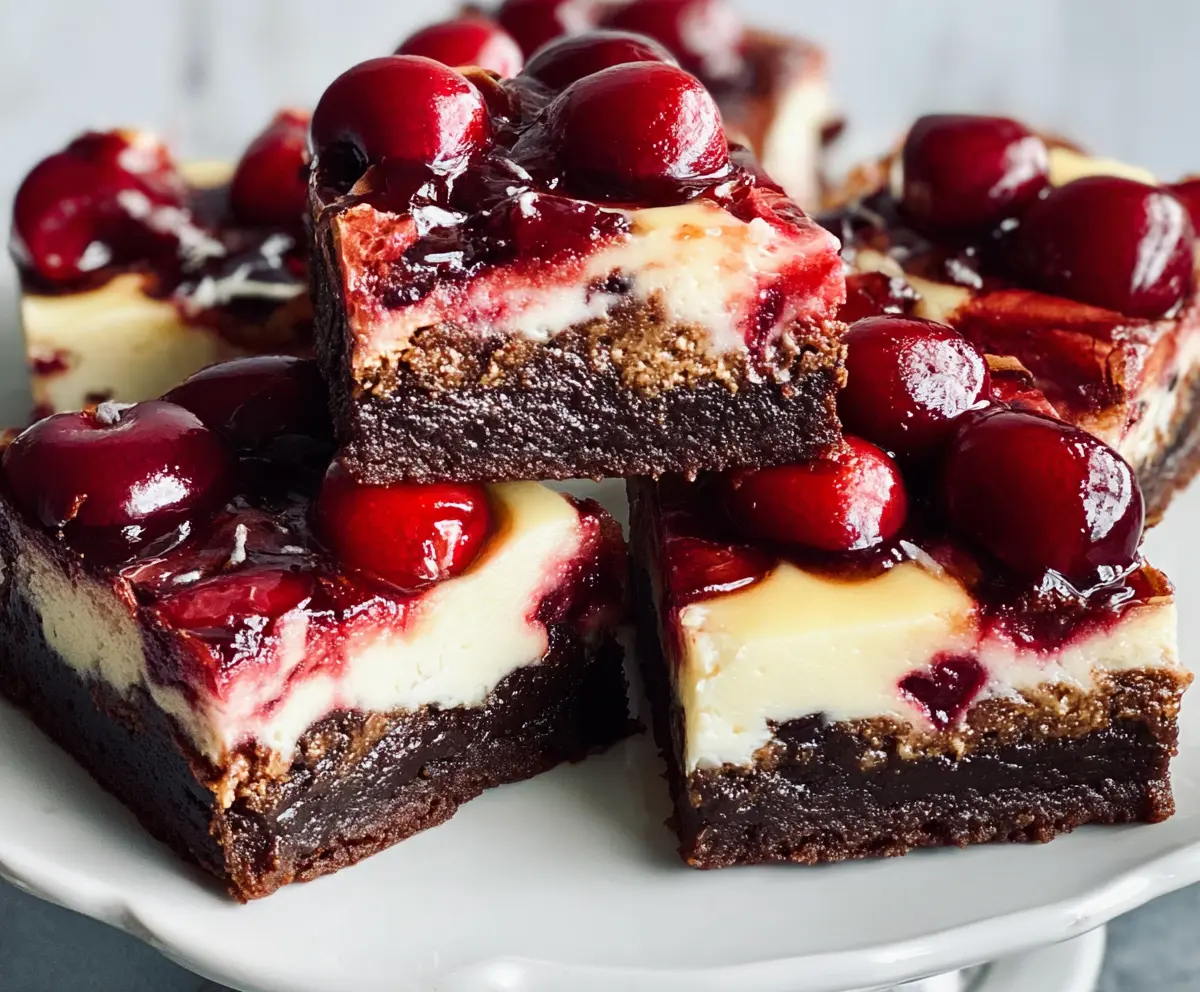
Cherry Cheesecake Brownies are a delightful twist on two classic treats. They have a rich brownie base topped with a creamy cheesecake layer, just bursting with sweet cherry flavor!
Who can resist that mix of fudgy chocolate and smooth cheesecake? I usually have to hide these from my family, or they disappear too fast! 😄 The best part? It’s easy to make and enjoy any day!
Key Ingredients & Substitutions
Unsalted Butter: This is key for richness in the brownies. If you’re out, you can substitute with coconut oil or margarine, but butter gives the best flavor!
Cocoa Powder: Unsweetened cocoa powder is essential for that chocolatey goodness. In a pinch, Dutch-processed cocoa works too, but it may alter the flavor slightly.
Granulated Sugar: You can substitute some sugar with brown sugar for added moisture and a slight caramel flavor. Alternatively, for a healthier option, try coconut sugar.
Cream Cheese: Full-fat cream cheese provides a creamy texture, but low-fat works if you prefer a lighter version. Vegan cream cheese can also be swapped if you’re dairy-free.
Cherries: Fresh cherries are fantastic, but frozen can work too. If they’re packed in juice or syrup, make sure to drain them well to avoid a soggy dessert!
How Do I Achieve Perfectly Swirled Cheesecake?
Swirling the cheesecake into the brownie layer takes a bit of finesse but can be done easily! Here’s how:
- Use a knife or skewer and gently dip into the cheesecake layer, then swirl towards the brownie layer. Avoid going too deep to keep layers distinct.
- Start from one corner and work your way across in simple, smooth motions to create a lovely marbled effect.
- Don’t overdo it! A little swirling will show the brownie and cheesecake layers beautifully without mixing them completely.
Taking your time with the swirl makes the presentation pop, which is just as important as the taste. Have fun with it!
Cherry Cheesecake Brownies
Ingredients You’ll Need:
For the Brownie Layer:
- 1 cup (2 sticks) unsalted butter
- 2 cups granulated sugar
- 4 large eggs
- 1 teaspoon vanilla extract
- 1 cup all-purpose flour
- 3/4 cup unsweetened cocoa powder
- 1/2 teaspoon salt
- 1 cup semi-sweet chocolate chips (optional)
For the Cheesecake Layer:
- 16 oz (450 g) cream cheese, softened
- 2/3 cup granulated sugar
- 2 large eggs
- 1 teaspoon vanilla extract
For the Cherry Topping:
- 1½ cups fresh or frozen pitted cherries (if frozen, thaw and drain excess moisture)
- 2 tablespoons granulated sugar (optional, to sweeten cherries)
How Much Time Will You Need?
This recipe takes about 20 minutes for preparation and 40 to 45 minutes for baking. You’ll need some additional time to cool the brownies, so plan for at least an hour before you can enjoy these tasty treats. Altogether, you can expect about 1 hour and 15 minutes before they’re ready to slice and serve!
Step-by-Step Instructions:
1. Preheat the Oven:
Start by setting your oven to preheat at 350°F (175°C). To make sure the brownies come out easily, grease or line a 9×13 inch baking pan with parchment paper, leaving a bit of overhang on the sides for easy lifting later on.
2. Make the Brownie Layer:
In a medium saucepan, melt the unsalted butter over medium heat. Once melted, remove it from the heat and stir in the granulated sugar until it’s well combined. Next, beat in the eggs one by one, mixing in the vanilla extract afterwards to blend. This will create a gooey and sweet base for your brownies!
3. Combine Dry Ingredients:
In another bowl, whisk together the all-purpose flour, unsweetened cocoa powder, and salt. Gradually add this dry mixture to the wet ingredients in the saucepan, stirring until everything is well combined. If you’d like, fold in the semi-sweet chocolate chips for extra deliciousness!
4. Pour the Brownie Batter:
Evenly pour the brownie batter into the prepared baking pan and use a spatula to spread it smooth. This will be the bottom layer of your brownies.
5. Prepare the Cheesecake Layer:
In a mixing bowl, beat the cream cheese until it’s nice and smooth. Then add in the granulated sugar, eggs, and vanilla extract, mixing until all ingredients are creamy and well combined. This will be the delicious cheesecake topping!
6. Add the Cheesecake Layer:
Carefully pour the cheesecake mixture over the brownie layer, spreading it out gently to cover without disturbing the brownie layer beneath.
7. Top with Cherries:
Spread the cherries evenly over the cheesecake layer. If you want a sweeter touch, you can toss the cherries lightly in 2 tablespoons of sugar before placing them on top. They’ll add flavor and a lovely pop of color!
8. Create the Marble Effect:
Using a knife or skewer, gently swirl the cheesecake into the brownie layer. Be careful not to mix them completely; you want to keep that beautiful marbled appearance!
9. Bake!
Place your pan in the oven and bake for 40 to 45 minutes. You’ll know they’re done when the cheesecake topping is set and the edges start to pull away slightly from the pan.
10. Cool and Slice:
Once baked, remove the brownies from the oven and let them cool completely in the pan on a wire rack. For the best flavor and slicing, chill them in the refrigerator before cutting into squares. Enjoy these rich, fudgy, and creamy Cherry Cheesecake Brownies!
Can I Use Different Fruits Instead of Cherries?
Absolutely! You can use blueberries, raspberries, or even diced strawberries. Just make sure they’re fresh or well-drained if frozen to avoid excess moisture!
What If I Don’t Have Unsweetened Cocoa Powder?
If you’re out of unsweetened cocoa powder, you can substitute it with Dutch-processed cocoa or unsweetened baking chocolate. Just remember that the flavors may change slightly, so adjust your sugar accordingly if using sweet chocolate.
Can I Make These Brownies Gluten-Free?
Yes! You can substitute the all-purpose flour with a gluten-free blend designed for baking. Just ensure it’s a 1:1 mix for best results, and check that all other ingredients are gluten-free!
How Should I Store Leftover Brownies?
Store any leftovers in an airtight container in the refrigerator for up to 5 days. To enjoy them at their best, consider warming them slightly in the microwave for a cozy treat!