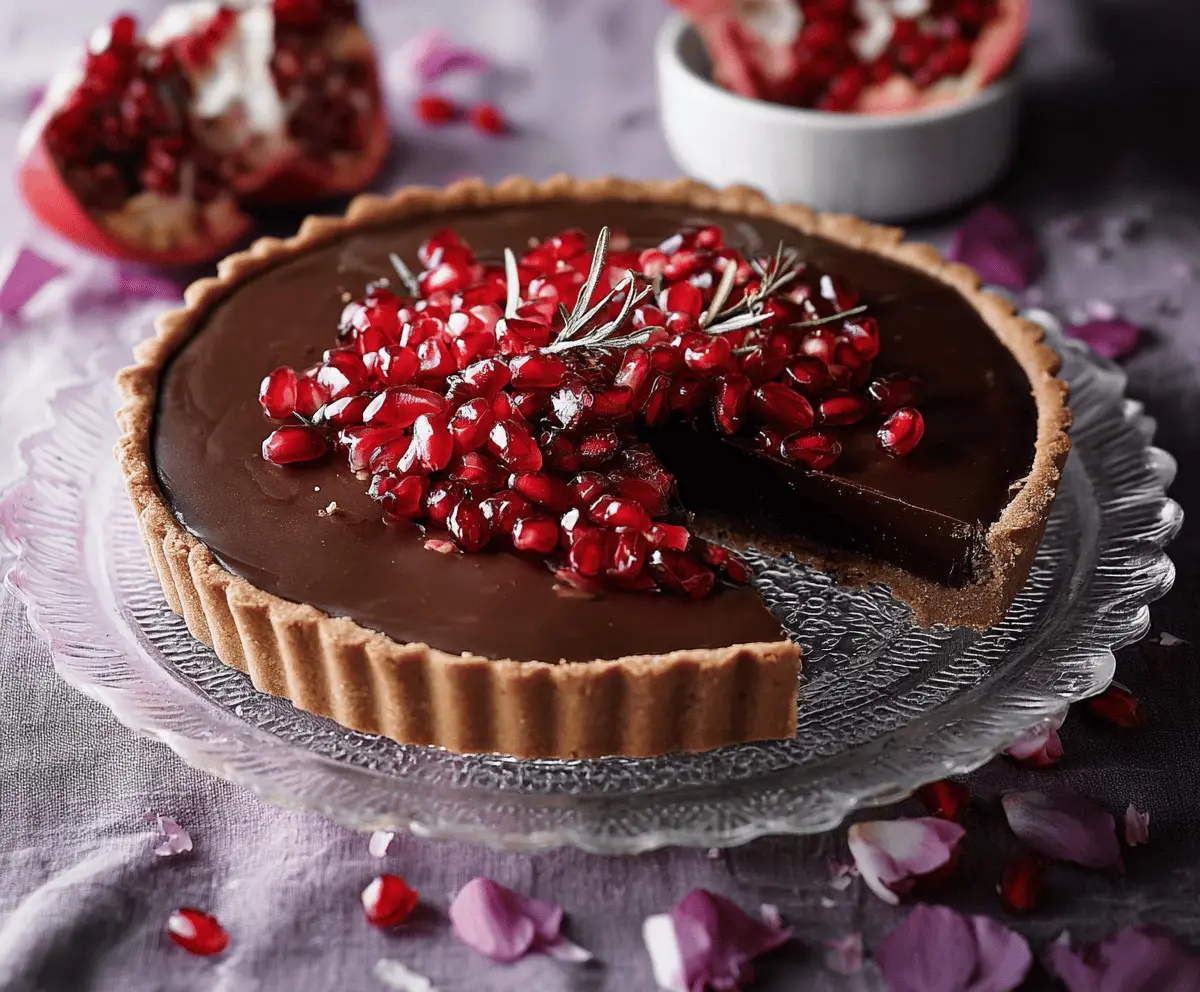
This Chocolate Pomegranate Tart is a delightful mix of rich chocolate and tart pomegranate. It’s both sweet and slightly tangy, making each bite a treat for your taste buds!
Honestly, who can resist that glossy chocolate layer topped with crunchy pomegranate seeds? I love serving it at gatherings; it always impresses my friends and family! 🍫❤️
Key Ingredients & Substitutions
All-purpose flour: This is the base for the tart crust. If you’re looking for a gluten-free option, you can use a gluten-free flour blend. Just be sure to check the blend contains xanthan gum for texture!
Pomegranate: Fresh pomegranate seeds add crunch and a tangy flavor. If out of season, try raspberries or strawberries for a similar fruity pop. They won’t have the same tartness, but they’re delicious!
Chocolate: Semi-sweet chocolate is great for balancing sweetness. If you prefer a darker flavor, go for bittersweet or dark chocolate. Milk chocolate can also work, but the tart may end up quite sweet.
Butter: Unsalted butter lets you control the saltiness. In a pinch, you can use margarine or a dairy-free alternative in equal amounts.
How Do I Blind Bake the Crust Perfectly?
Blind baking is important for keeping your tart crust crisp. Here’s how to do it:
- Preheat your oven to 350°F (175°C).
- After rolling out the dough, make sure it fits snugly in the tart pan. Pricking the bottom with a fork will prevent bubbles.
- Use parchment paper or foil to cover the dough and fill it with pie weights or dried beans. This keeps the crust from puffing up!
- Bake for 15 minutes covered, then remove the weights and bake for another 8-10 minutes until golden.
Let it cool completely before adding your filling. This helps the crust stay nice and flaky!
Chocolate Pomegranate Tart
Ingredients You’ll Need:
For the Crust:
- 1 1/4 cups (150g) all-purpose flour
- 1/4 cup (30g) powdered sugar
- 1/4 teaspoon salt
- 1/2 cup (115g) unsalted butter, cold and cubed
- 1 large egg yolk
For the Chocolate Filling:
- 1 cup (240ml) heavy cream
- 8 oz (225g) semi-sweet or dark chocolate, chopped
- 2 tablespoons unsalted butter, softened
- 1 teaspoon pure vanilla extract
For Topping:
- 1 pomegranate, seeded (about 1 cup of arils)
- Optional: shaved dark chocolate for garnish
How Much Time Will You Need?
This delightful tart will take you about 30 minutes to prepare and an additional 2 hours to chill in the refrigerator. So, all in all, you’re looking at around 2 and a half hours before you can dig in and enjoy this delicious dessert!
Step-by-Step Instructions:
1. Prepare the Crust:
First, grab your food processor! Combine the all-purpose flour, powdered sugar, and salt. Next, add the cold, cubed butter and pulse until the mixture looks like coarse crumbs. Now, add the egg yolk and pulse until the dough starts to come together. If it’s too dry, you can help it along with a little cold water—just 1 to 2 teaspoons should do! Once ready, turn the dough out onto a lightly floured surface, form it into a disc, wrap it in plastic wrap, and stick it in the fridge for at least 30 minutes.
2. Blind Bake the Crust:
Preheat your oven to 350°F (175°C). Roll out the chilled dough until it fits a 9-inch tart pan with a removable bottom. Press it into the pan and trim off any excess. Prick the bottom with a fork and line the crust with parchment paper. Fill it with pie weights or dried beans to keep it from bubbling up. Bake it for about 15 minutes, remove the weights and parchment, and bake for an additional 8-10 minutes until golden. Once it’s done, let it cool completely.
3. Make the Chocolate Filling:
For the chocolatey goodness, heat the heavy cream in a small saucepan over medium heat until it’s just about to simmer (but don’t let it boil!). In a heatproof bowl, place your chopped chocolate. Once the cream is hot, pour it over the chocolate and let it sit for 2 minutes to melt. After that, stir gently until completely smooth. Then, add the softened butter and vanilla extract, mixing until it’s glossy and perfect.
4. Assemble the Tart:
Pour the luscious chocolate filling into your cooled tart crust. Smooth out the top using a spatula, and then pop it in the refrigerator for at least 2 hours to set.
5. Add Pomegranate Topping:
Once your tart has set, it’s time to make it pop! Sprinkle the fresh pomegranate seeds evenly over the top of the chocolate filling. If you’d like, you can garnish with some shaved dark chocolate for an extra touch of elegance!
6. Serve:
When you’re ready to serve, slice the tart and enjoy it chilled. The delicious combination of rich chocolate and juicy pomegranate will surely be a hit!
This tart beautifully combines a crisp, buttery crust with a smooth chocolate ganache and the vibrant freshness of pomegranate seeds, making it a stunning and delicious dessert.

Can I Use A Different Type of Chocolate for the Filling?
Absolutely! While semi-sweet or dark chocolate works best for a rich flavor, you can use milk chocolate if you prefer a sweeter tart. Just keep in mind that this may change the overall sweetness of the dessert.
How Should I Store Leftovers?
Store any leftover tart in an airtight container in the refrigerator. It will keep well for about 3 days. Just allow it to come to room temperature a bit before serving again for the best texture!
Can I Make the Tart in Advance?
Yes, you can! The tart can be made up to a day ahead. Just cover it tightly and keep it in the refrigerator. Add the pomegranate seeds just before serving to keep them fresh and vibrant.
What Can I Substitute for Egg Yolks in the Crust?
If you’re looking for a vegan or egg-free option, you can use a flaxseed meal mixed with water (1 tablespoon of flaxseed meal + 2.5 tablespoons of water) as a binder. It works well to help hold the crust together!