
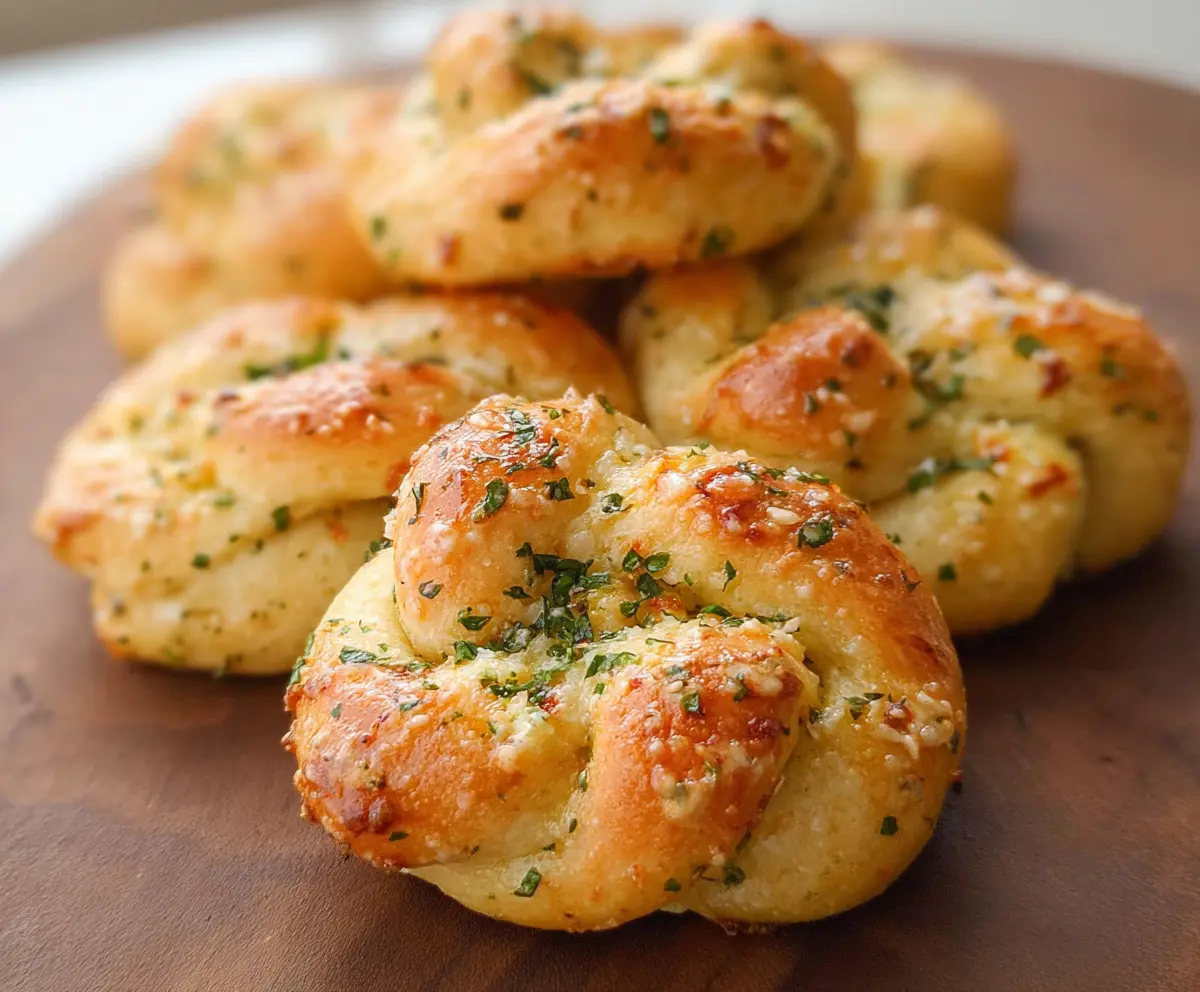
These Cottage Cheese Garlic Knots are fluffy, tasty bites that pack a punch of garlic flavor! Made with cottage cheese, they are fun to snack on or share with friends.
Baking these knots is such a treat! The aroma of garlic fills the kitchen, and I can never resist sneaking a warm one right off the tray. Yum! 🧄❤️
Key Ingredients & Substitutions
Cottage Cheese: This ingredient adds a unique texture and flavor. If you’re not a fan of cottage cheese, you can use ricotta cheese for a similar effect, though it might be slightly creamier.
All-Purpose Flour: Standard flour works well here. If you need a gluten-free option, consider using a gluten-free all-purpose blend. Just note that texture might vary, so you might need to adjust the water content.
Active Dry Yeast: Always check the expiration date! You can swap this with instant yeast, which does not need to be dissolved beforehand. Just mix it directly with the dry ingredients.
Olive Oil: Olive oil brings great flavor, but you can also use melted butter for richer tasting knots. When working with garlic knots, extra flavor never hurts!
Garlic: Fresh garlic gives the best flavor. If you have garlic powder on hand, use 1 teaspoon instead, but fresh will always be tastier!
How Do I Achieve the Perfect Knot Shape?
Tying the knots might seem tricky, but with a little practice, you’ll nail it! Here’s how:
- After dividing the dough, roll each piece gently on a floured surface to form a rope. Don’t stress about making it perfect—just aim for an even thickness.
- To tie the knot, cross the ends of the rope over each other, then wrap one end under the other and pull through. Pull it snug, but don’t overdo it!
- Place your tied knots on the baking sheet. If they seem a bit loose, don’t worry; they will puff up while baking!
Mastering this technique will give your knots a lovely, rustic look. Plus, they’ll be fun to share with family and friends!
How to Make Cottage Cheese Garlic Knots
Ingredients You’ll Need:
For the Dough:
- 1 cup cottage cheese
- 2 ½ cups all-purpose flour (plus extra for dusting)
- 1 packet (2¼ tsp) active dry yeast
- ½ cup warm water (about 110°F/43°C)
- 1 tbsp sugar
- 1 tsp salt
- 2 tbsp olive oil (plus extra for greasing)
For the Garlic Butter Mixture:
- 4 cloves garlic, minced
- ¼ cup fresh parsley, finely chopped
- ¼ cup unsalted butter, melted
- Optional: grated Parmesan cheese for topping
How Much Time Will You Need?
This recipe takes about 20 minutes of preparation and 1-1½ hours for the dough to rise. After that, you’ll bake the knots for 15-20 minutes. So, overall, set aside about 2 hours to make these delicious Cottage Cheese Garlic Knots!
Step-by-Step Instructions:
1. Prepare the Yeast:
In a small bowl, mix the warm water and sugar. Then sprinkle the active dry yeast on top. Let it sit for about 5-10 minutes until it looks frothy on top. This means it’s activated and ready to use!
2. Blend the Cottage Cheese:
In a food processor or blender, combine the cottage cheese until it’s smooth. This will help give the dough a nice texture.
3. Make the Dough:
In a large mixing bowl, add the flour and salt. Then create a well in the center and pour in the blended cottage cheese, the frothy yeast mixture, and the olive oil. Mix everything together until a sticky dough forms. Knead the dough on a floured surface for about 7-10 minutes until it’s nice and elastic. If it’s too sticky, feel free to add a little more flour, but keep it slightly soft.
4. Let It Rise:
Place the dough into a greased bowl and cover it with a clean kitchen towel or plastic wrap. Let it rise in a warm spot until it doubles in size, which usually takes about 1-1½ hours.
5. Preheat the Oven:
While the dough is rising, preheat your oven to 375°F (190°C) and prepare a baking sheet by lining it with parchment paper.
6. Shape the Knots:
Once the dough has risen, punch it down gently and divide it into 12 equal pieces. Roll each piece into a long rope about 8-10 inches in length. Tie each rope into a knot and place them on the prepared baking sheet.
7. Prepare the Garlic Butter:
In a small bowl, mix together the melted butter, minced garlic, and chopped parsley. This will be the delicious topping for your knots!
8. Brush the Knots:
Generously brush each knot with the garlic butter mixture, making sure to get every nook and cranny covered in that garlic goodness.
9. Bake the Knots:
Pop the baking sheet into your preheated oven and bake for 15-20 minutes, or until the knots turn golden brown and look irresistible!
10. Final Touch:
After baking, you can brush them once more with any leftover garlic butter and sprinkle with grated Parmesan cheese if desired.
11. Serve and Enjoy!
Serve these warm and enjoy the light, fluffy texture along with the wonderful garlic flavor. Perfect as an appetizer, side dish, or just a tasty snack!
These Cottage Cheese Garlic Knots will surely become a favorite in your home. Happy baking! 🍞🧄
Can I Use Low-Fat Cottage Cheese?
Yes, you can use low-fat cottage cheese, but the knots might be slightly less rich and fluffy compared to using full-fat cottage cheese. The flavor should still be delightful!
How Can I Store Leftover Garlic Knots?
Store any leftovers in an airtight container in the refrigerator for up to 3 days. To reheat, simply warm them in the oven at 350°F (175°C) for about 10 minutes, or until heated through.
Can I Freeze the Dough for Later Use?
Absolutely! You can freeze the dough after the first rise. Wrap it tightly in plastic wrap and then place it in a freezer bag. When you’re ready to use it, thaw in the fridge overnight, shape the knots, and let them rise again before baking.
What Can I Substitute for Fresh Garlic?
If you don’t have fresh garlic, you can use garlic powder as a substitute. Use about 1 teaspoon of garlic powder in the garlic butter mixture. However, fresh garlic gives the best flavor and aroma!