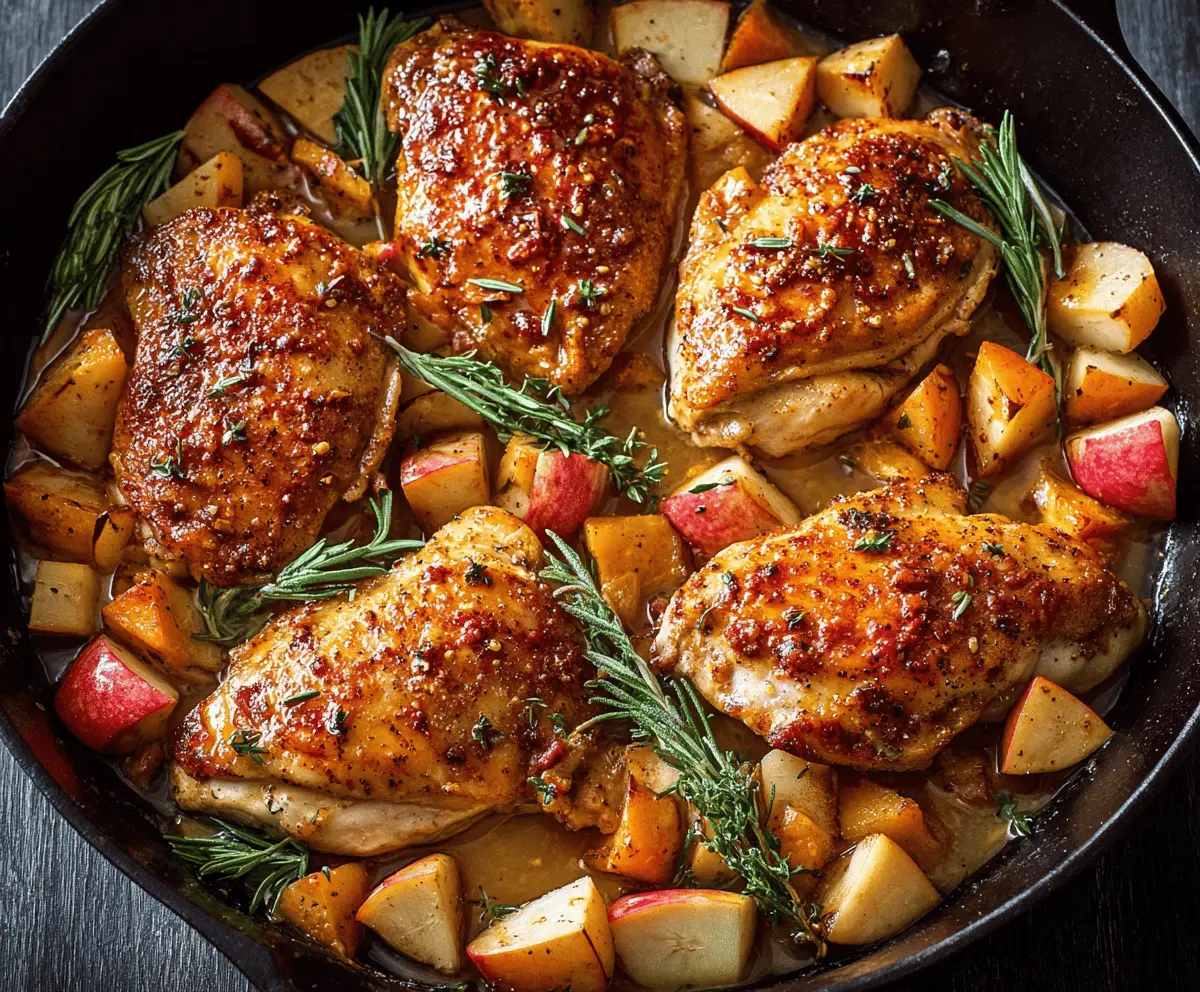
This Cozy Apple Cider Glazed Chicken is the perfect comfort dish for chilly days! Tender chicken is kissed with a sweet and tangy apple cider glaze, making each bite warm and tasty.
With just a few simple ingredients, it’s easy to whip up this delightful meal. I love serving it with mashed potatoes to soak up that delicious glaze. Yum!
Key Ingredients & Substitutions
Chicken Thighs: Bone-in, skin-on chicken thighs provide the best flavor and tenderness. If you prefer, you can use boneless thighs or even chicken breasts, but they may dry out more quickly.
Apple Cider: Fresh apple cider is key for a rich flavor. If it’s hard to find, you can substitute with apple juice mixed with a bit of vinegar for tanginess.
Mustard: I love Dijon mustard for its sharpness in this dish, but yellow mustard or even whole grain mustard can work. Try adjusting based on your taste preference.
Apples: Sweet-tart apples like Honeycrisp or Gala enhance the glaze. If you want a different flavor, Braeburn or Fuji are good options. Just avoid very soft apples like McIntosh, they won’t hold up well.
How Do You Get the Chicken Skin Extra Crispy?
The secret to crispy chicken skin lies in the cooking technique! Start by patting the chicken thighs dry to remove excess moisture. Properly seasoning and browning the chicken in a preheated skillet helps render the fat, resulting in nice, crispy skin.
- Use medium-high heat to achieve a good sear—this locks in flavor.
- Don’t overcrowd the skillet; cook in batches if necessary for an even sear.
- Avoid flipping the chicken too early; let it cook undisturbed for optimal crispness.
By keeping these tips in mind and following the steps, you’ll have deliciously crispy and flavorful chicken that pairs beautifully with the sweet apple cider glaze!
Cozy Apple Cider Glazed Chicken
Ingredients You’ll Need:
- 7-8 bone-in, skin-on chicken thighs
- Salt and freshly ground black pepper, to taste
- 2 tablespoons olive oil or vegetable oil
- 3 cloves garlic, minced
- 1 small onion, finely chopped
- 1 cup apple cider (unfiltered if possible)
- 1 tablespoon apple cider vinegar
- 2 tablespoons Dijon mustard
- 2 tablespoons honey or maple syrup
- 1 large apple, cored and chopped into chunks (use a sweet-tart variety like Honeycrisp or Gala)
- 2-3 sprigs fresh rosemary
- 1-2 sprigs fresh thyme
- Optional: pinch of red pepper flakes for a subtle heat
How Much Time Will You Need?
This recipe will take approximately 15 minutes to prepare and about 30 minutes to cook in the oven. So, you can have a delicious, hearty meal ready in around 45 minutes!
Step-by-Step Instructions:
1. Preheat the oven:
Begin by preheating your oven to 375°F (190°C). This will ensure it’s ready for roasting the chicken when you’re done prepping.
2. Prepare the chicken:
Pat the chicken thighs dry with paper towels. This step is essential for crispy skin! Once dry, season them generously with salt and pepper on both sides for added flavor.
3. Brown the chicken:
In a large oven-safe skillet or cast-iron pan, heat the olive oil over medium-high heat. Carefully place the chicken thighs skin side down into the skillet. Sear for about 5-7 minutes, or until the skin is golden brown and crisp. Flip the thighs and cook the other side for an additional 3 minutes. Once browned, remove the chicken from the skillet and set aside on a plate.
4. Sauté aromatics:
In the same skillet, add the chopped onion and sauté until softened, about 3-4 minutes. Stir in the minced garlic and cook for 30 seconds or until fragrant, being careful not to let it burn.
5. Make the glaze:
Pour in the apple cider, apple cider vinegar, Dijon mustard, and honey. Stir to combine and use a wooden spoon to scrape any delicious browned bits from the bottom of the pan. Allow the mixture to simmer for 3-4 minutes to reduce slightly and intensify the flavors.
6. Add apples and herbs:
Now it’s time to add in the chopped apple chunks along with the sprigs of rosemary and thyme. Toss everything together in the skillet to coat in the glaze.
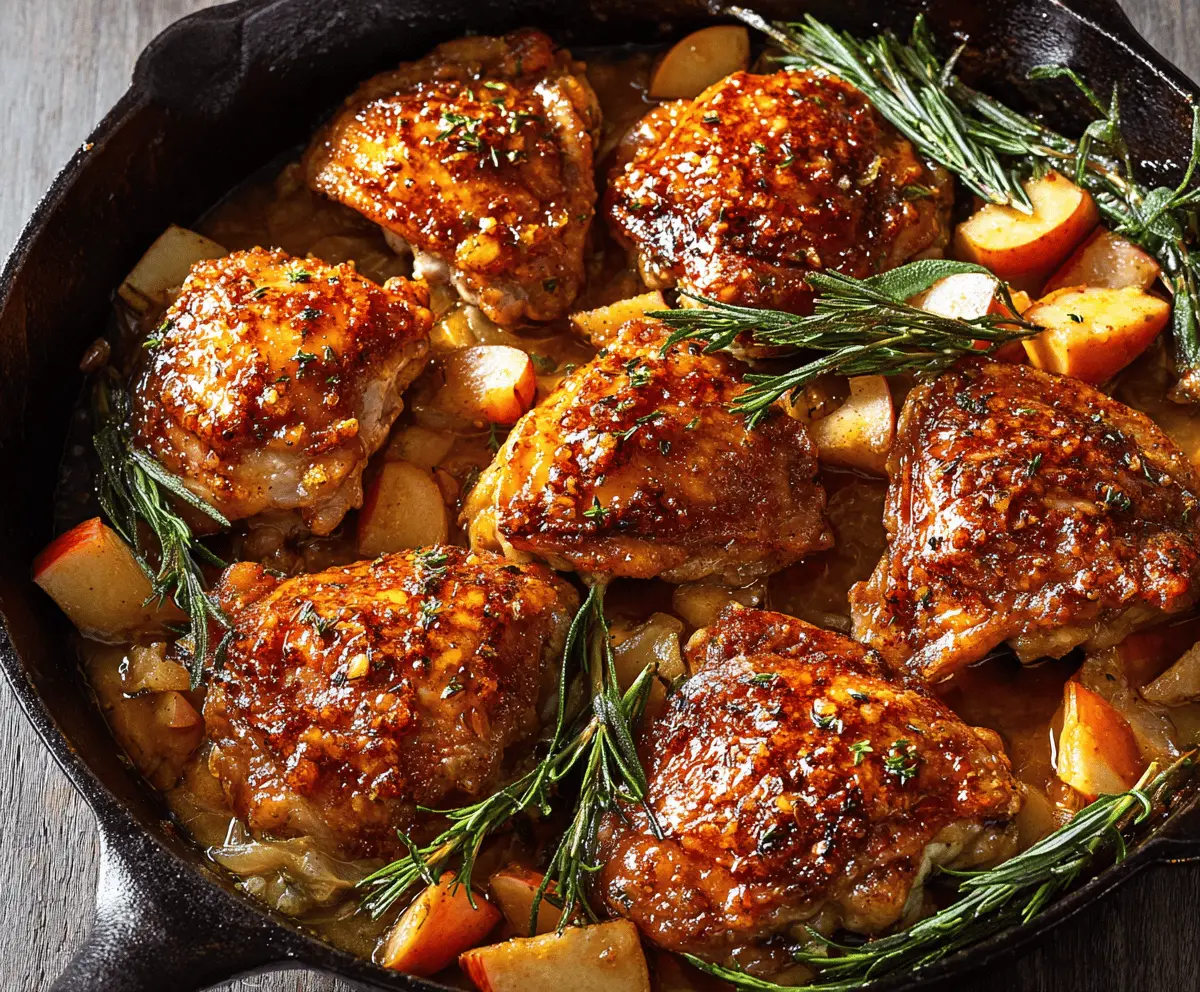
7. Return chicken to skillet:
Place the chicken thighs back into the skillet, skin side up. Make sure to spoon some of that tasty glaze over the tops of the chicken. This will keep it moist and flavorful as it bakes!
8. Bake:
Transfer the skillet to the preheated oven and bake uncovered for 25-30 minutes. The chicken is done when its juices run clear, and the internal temperature reaches 165°F (74°C).
9. Finish and serve:
Once cooked, take the skillet out of the oven and remove the rosemary and thyme sprigs. To serve, spoon the apple cider glaze and the tender apples over the chicken. For an extra touch, garnish with fresh herbs if desired.
This Cozy Apple Cider Glazed Chicken pairs beautifully with mashed potatoes, roasted vegetables, or buttery noodles to soak up that delicious glaze. Enjoy the warm, comforting flavors of fall with every bite!
Can I Use Chicken Breasts Instead of Thighs?
Yes, you can use boneless, skinless chicken breasts, but keep in mind that they may dry out faster than thighs. Be sure to adjust the cooking time, cooking until they reach an internal temperature of 165°F (74°C).
Can I Make This Recipe with Store-Bought Apple Cider?
Absolutely! Store-bought apple cider works great in this recipe. Just opt for unfiltered cider if possible, as it adds a richer, more authentic flavor to the glaze.
How Do I Store Leftovers?
Store leftovers in an airtight container in the refrigerator for up to 3 days. To reheat, gently warm in the oven or on the stovetop until heated through. Adding a splash of apple cider or water can help keep the chicken moist during reheating.
Can I Add Other Vegetables to This Dish?
Yes! Root vegetables like carrots or parsnips would be a wonderful addition. Just chop them into similar-sized pieces as the apples and add them to the skillet along with the apples before baking for extra flavor and texture.