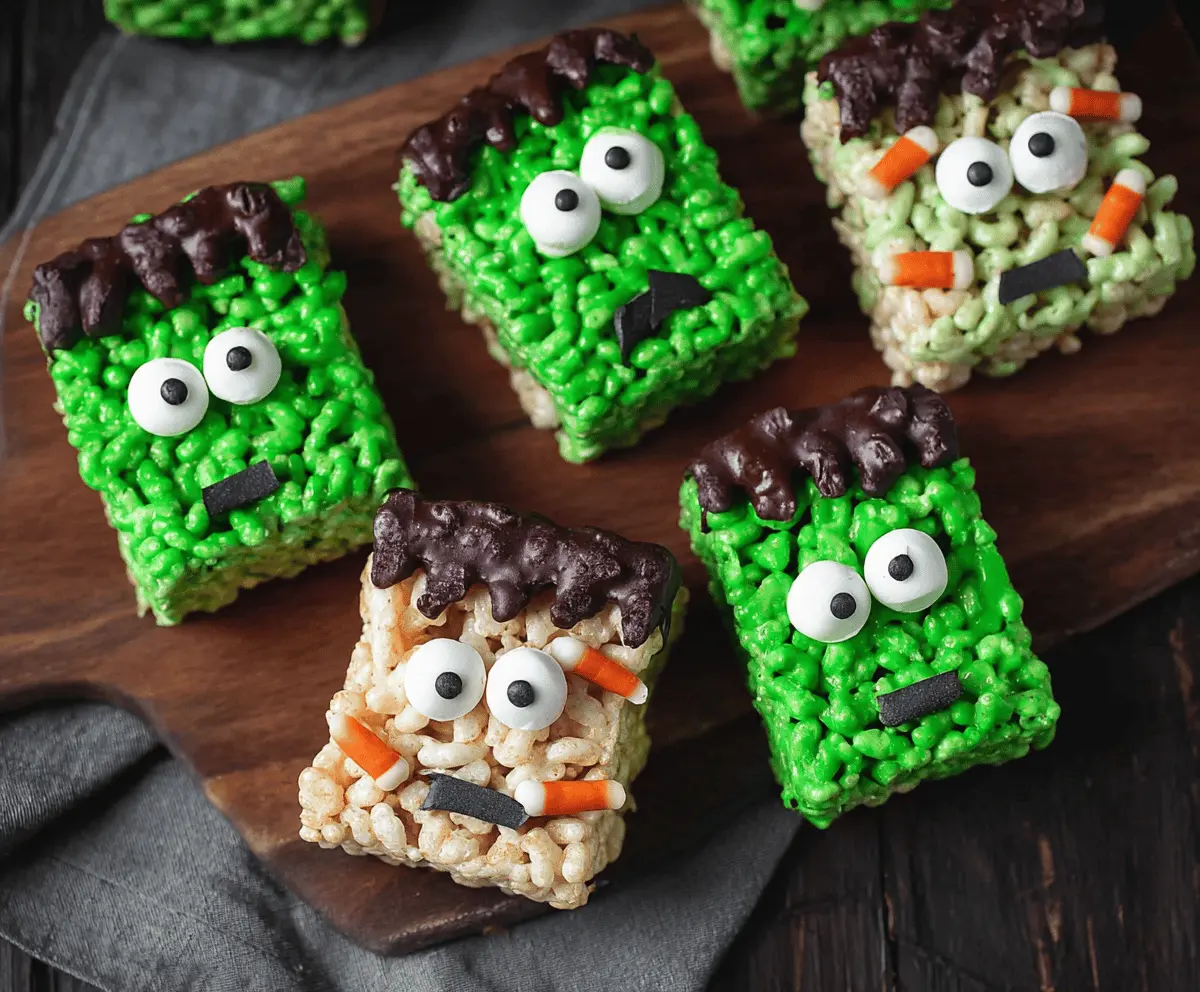
These fun Frankenstein Rice Krispie Treats are perfect for Halloween! They’re made with gooey marshmallows, crispy rice cereal, and green icing to bring the monster to life.
Making these treats is so easy, even a monster could do it! 😄 I love how they add a spooky touch to parties, and they taste as good as they look—who can resist that sweet crunch?
Key Ingredients & Substitutions
Rice Krispies Cereal: This is the base of our treats. If you don’t have Rice Krispies, any puffed cereal works. Try using Cocoa Puffs for a chocolatey twist!
Mini Marshmallows: They create that gooey texture. If you can’t find mini marshmallows, you can use regular marshmallows; just cut them into smaller pieces.
Green Gel Food Coloring: This is key for that Frankenstein look! If you prefer natural colors, try using matcha powder or spirulina for a green tint. It may change the flavor slightly, but it’s a fun option!
Decorations: Mini chocolate chips make great pupils. For a nut-free option, use raisins or dried cranberries. Alternatives for the black details could include dark chocolate or a thick chocolate sauce.
How Do You Make Rice Krispie Treats That Stay Soft and Chewy?
Getting that perfect soft and chewy Rice Krispie treat is all about the right melting technique. Here’s how to ensure yours turn out great.
- Use low heat when melting the butter and marshmallows to prevent burning. Stir continuously for a smooth mixture.
- Don’t overcook the marshmallows! Once they’re melted, remove them from the heat immediately.
- Be gentle when mixing in the cereal to avoid smashing the puffed rice, which keeps the treats light.
- Press the mixture into the pan firmly but not too hard; you want them to hold shape but not become dense.
By following these tips, you’ll achieve delicious, soft, and perfectly textured Frankenstein Rice Krispie Treats! Enjoy making these with friends and family!
Frankenstein Rice Krispie Treats
Ingredients You’ll Need:
- 6 cups Rice Krispies cereal
- 3 tablespoons unsalted butter
- 1 package (10 oz) mini marshmallows
- Green gel food coloring
- White mini marshmallows (for eyes)
- Mini chocolate chips (for eyeballs)
- Black decorating gel or melted black chocolate (for hair and facial features)
How Much Time Will You Need?
This recipe should take about 20 minutes of active prep time, plus about 10 minutes for the treats to set. In total, you can whip these spooky snacks up in about 30 minutes! Perfect for a last-minute Halloween gathering!
Step-by-Step Instructions:
1. Prepare the Pan:
Start by greasing a 9×13-inch baking pan with butter or non-stick spray. This will ensure your treats come out easily later. Set the greased pan aside while you prepare the mixture.
2. Melt the Butter and Marshmallows:
In a large pot, melt the unsalted butter over low heat. Once the butter is melted, add in the mini marshmallows. Stir continuously until the marshmallows are completely melted and the mixture is smooth. This is where all the gooey goodness starts!
3. Add Color:
Remove the pot from heat and stir in several drops of green gel food coloring. Keep adding until you get that perfect Frankenstein green. It should be bright and vibrant, just like our beloved monster!
4. Mix in the Cereal:
Now, add the Rice Krispies cereal to the melted marshmallow mixture. Use a spatula to gently fold the cereal in until every piece is coated in that delicious green marshmallow mixture. Be careful not to crush the cereal!
5. Transfer to the Pan:
Immediately transfer the mixture into your prepared pan. Press it evenly into the pan using a buttered spatula or a piece of wax paper. Make sure it’s packed in well but not too hard, so they stay chewy!
6. Let It Set:
Let your green Rice Krispie layer set at room temperature for about 10 minutes. While that’s happening, you can prepare the plain Rice Krispie treats.
7. Prepare the Plain Layer:
While waiting, melt more butter and mini marshmallows in a separate pot, just like before (steps 2-3). Once melted, mix this with Rice Krispies cereal again, but without adding any food coloring. Press this mixture smoothly on top of the green layer if you’re doing it all in one pan.
8. Shape the Treats:
Once the layered mixture is set, take a sharp knife and cut the treats into rectangular shapes resembling Frankenstein’s head. Aim for fun sizes, perhaps 2×4 inches!
9. Decorate the Treats:
To bring your monsters to life, attach two white mini marshmallows on each treat as eyes. Use a small dab of melted marshmallow or frosting as glue to stick them on.
10. Final Touches:
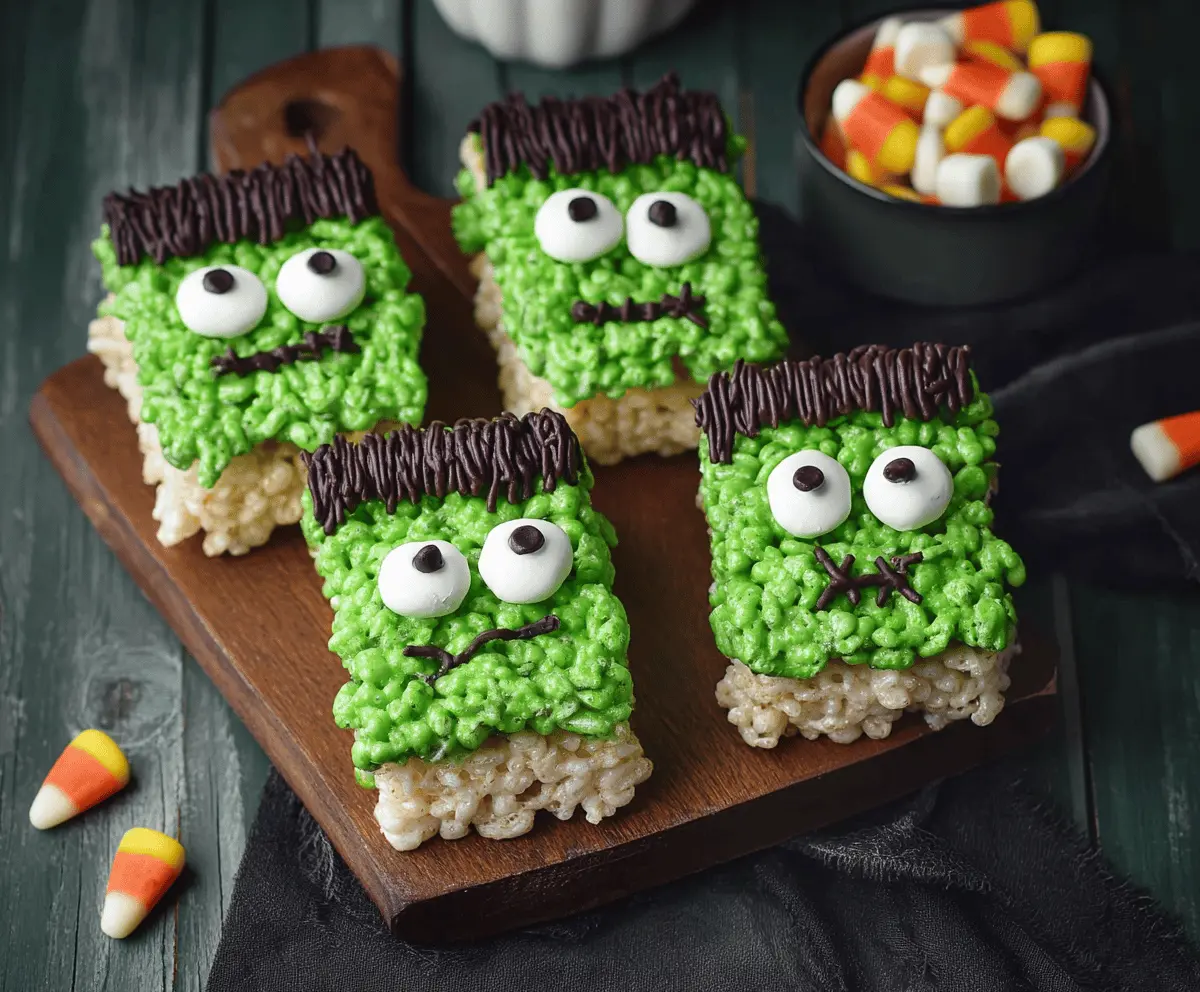
Next, use mini chocolate chips as pupils by placing them on the white marshmallows. For the hair, use black decorating gel or melted black chocolate to pipe straight lines across the top of each treat. Don’t forget to draw on a mouth and some stitches to give them personality!
11. Serve and Enjoy:
Let your creative decorations set for a few minutes before serving. Place these spooky delights on a platter, and watch them disappear happy munchers!
Happy Halloween baking! Enjoy your spooky and delicious Frankenstein Rice Krispie Treats!
Can I Use Different Cereal for This Recipe?
Absolutely! While Rice Krispies give the classic texture, you can substitute with any puffed cereal like Corn Puffs or even Cocoa Puffs for a chocolatey twist. Just keep in mind that the flavor and texture may slightly vary!
Can I Make These Treats Dairy-Free?
Yes! To make these treats dairy-free, simply substitute the unsalted butter with a dairy-free butter substitute or coconut oil. The flavor will still be delicious!
How Do I Store Leftovers?
Store any leftover Frankenstein Rice Krispie Treats in an airtight container at room temperature. They’ll stay fresh for about 3 days. If you’d like them to last longer, you can freeze them, but eat them within a month for the best texture and flavor!
Can I Customize the Decorations?
Of course! Feel free to get creative with the decorations. You can use different types of candies or homemade icing. Get colorful with the eyes or add more spooky features like candy corn teeth!