
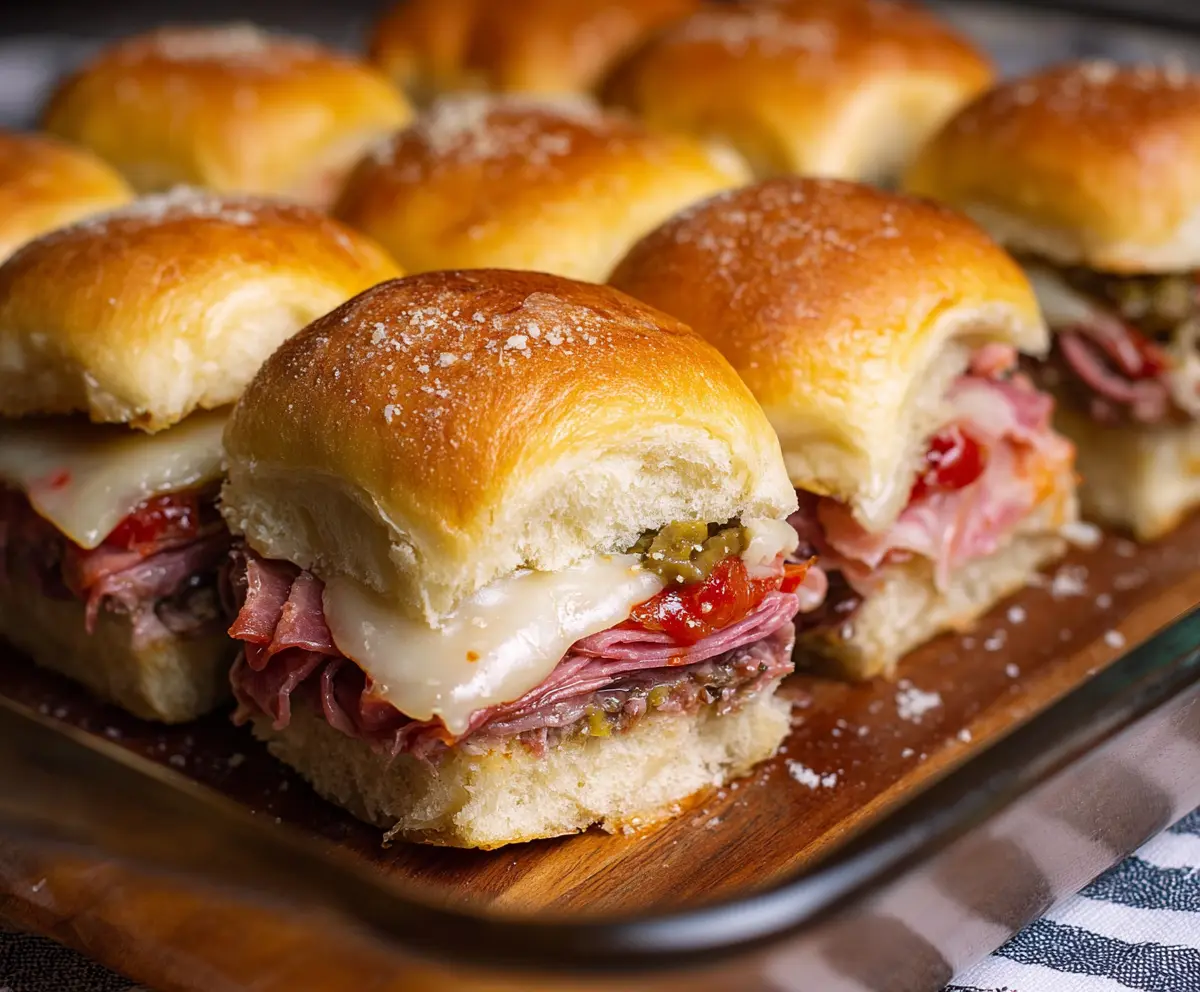
Muffuletta sliders are mini sandwiches packed with lots of flavor! They are filled with layers of ham, salami, mortadella, and a tasty olive salad that gives a nice kick.
These little bites are perfect for parties or a fun snack. I love making them ahead and then watching them disappear as everyone munches away! So good and so easy! 😋
Key Ingredients & Substitutions
Slider Buns: I love using soft potato buns for these sliders. They’re fluffy and hold up well with all the tasty fillings. If you can’t find those, brioche buns add a nice touch too. You could even use whole wheat if that’s your preference.
Meats: The classic combination includes salami, ham, and mortadella. If you’re looking for a healthier option, turkey or chicken deli meat works well too. Prosciutto can replace mortadella for a fancier touch, and for a vegetarian option, try roasted peppers or grilled veggies!
Cheese: Provolone is a great choice for flavor, but mozzarella adds delicious creaminess. If you’re dairy-free, there are plant-based cheeses available that melt nicely. Just check the packaging!
Olive Salad: If you’re short on time, you can buy jarred olive salad or mix your own using any olives you have plus some chopped pickles and a drizzle of olive oil. Don’t stress if you can’t find all the ingredients; use what you enjoy!
How Do I Get My Sliders Extra Flavorful?
One of the best parts of these sliders is the flavor packed into every bite. Here are some tips for maximum taste:
- Layering: Be sure to spread olive salad liberally. It offers a briny kick that pairs beautifully with the meats.
- Butter and Garlic Topping: Mixing garlic powder into the melted butter and brushing it over the buns makes a big difference. It creates a delicious crust that’s hard to resist.
- Letting It Rest: After baking, allow the sliders to sit for a few minutes. This helps the juices soak in and enhances the flavors.
With these tricks, your Muffuletta Sliders will have everyone asking for seconds!
Muffuletta Sliders
Ingredients You’ll Need:
For the Sliders:
- 12 soft slider buns (potato or brioche buns work well)
- 6 oz thinly sliced salami
- 6 oz thinly sliced ham
- 6 oz thinly sliced mortadella or prosciutto
- 6 oz sliced provolone cheese
- 6 oz sliced mozzarella cheese (optional for extra cheesiness)
- 1 cup olive salad (a mix of chopped green and black olives, pickled vegetables like giardiniera, capers, and olive oil)
- 3 tbsp mayonnaise or Italian dressing (optional, for spreading)
- 2 tbsp unsalted butter, melted
- 1 tsp garlic powder
- Grated Parmesan cheese for topping
How Much Time Will You Need?
This recipe takes about 15 minutes to prepare and another 20-25 minutes to bake. You’ll spend a little time arranging all those delicious layers, and then just let the oven do the work!
Step-by-Step Instructions:
1. Preheat the Oven:
Start by preheating your oven to 350°F (175°C). This helps the sliders get nice and toasty while cooking.
2. Prepare the Buns:
Slice the slider buns in half horizontally and lay the bottom halves on a baking tray. You want to create a sturdy base for all those tasty fillings!
3. Layer with Olive Salad:
Spread a thin layer of olive salad onto the bottom buns. This adds lots of flavor! If you’d like, you can also add a bit of mayonnaise or Italian dressing for extra moisture on top of the salad.
4. Add the Meats:
Layer the sliced meats evenly over the olive salad. Start with the ham, followed by the mortadella (or prosciutto), and finish with the salami to create a hearty stack!
5. Cheese Time:
Place slices of provolone cheese over the meats. If you really love cheese, don’t hesitate to add the mozzarella on top for that extra cheesy goodness!
6. Finish with More Olive Salad:
Add another spoonful of olive salad on top of the cheese layer. This punch of flavor will really make your sliders sing!
7. Cover with Top Buns:
Take the top halves of the buns and place them over the prepared fillings, completing your sliders.
8. Brush with Garlic Butter:
In a small bowl, mix the melted butter with garlic powder. Brush this mixture generously over the tops of the buns. This gives a nice golden brown crust!
9. Sprinkle with Parmesan:
Sprinkle grated Parmesan cheese over the buttered tops to add extra flavor and a lovely golden finish.
10. Bake:
Cover the sliders loosely with foil and bake for about 15 minutes. After that, remove the foil and bake for an additional 5-7 minutes, or until the tops are golden brown and the cheese has melted.
11. Cool and Serve:
Let the sliders cool slightly before serving. This allows the flavors to meld together nicely. Serve warm and watch them disappear!
These Muffuletta Sliders capture the authentic New Orleans muffuletta flavors in a fun slider form, featuring the perfect balance of salty meats, creamy cheeses, and tangy olive salad! Enjoy every bite!
Can I Use Different Types of Meats?
Absolutely! While the classic Muffuletta uses salami, ham, and mortadella, feel free to substitute with your favorite deli meats. Turkey or chicken can be great alternatives for a lighter version, and you could even use grilled veggies for a vegetarian option!
How Can I Prepare These Sliders for a Party?
These sliders are perfect for making ahead! You can assemble them up to a day in advance and store them wrapped tightly in the refrigerator. Just bake them when you’re ready to serve, and they’ll be fresh and delicious!
What Should I Serve with Muffuletta Sliders?
These sliders are fantastic on their own, but you can pair them with a simple side salad, chips, or even some roasted vegetables for a complete meal. A nice pickled side dish would also complement the sliders well!
How Do I Store Leftover Sliders?
Store any leftovers in an airtight container in the fridge for up to 3 days. To reheat, place them in the oven for a few minutes at 350°F (175°C) to restore their crispiness and melt the cheese again. Enjoy!