Fall is here, and you know what that means for me – pumpkin everything! I love baking delicious cookies, and when pumpkin season arrives, my kitchen gets busy making all sorts of pumpkin treats. If you’re like me and enjoy warm, spiced pumpkin flavors, you’ve come to the right place for some amazing pumpkin cookie recipes.
Today, I’m sharing a round-up of my favorite pumpkin cookie ideas. From chewy brown sugar delights to festive Oreo versions, there’s a pumpkin cookie for everyone. Get ready to bake some new favorites!
Jump to Recipe:
- 1. Pumpkin Glazed Cookies
- 2. Pumpkin Oreo Cookies
- 3. Pumpkin Oreo White Chocolate Cookies
- 4. Pumpkin Smores Cookies
- 5. Pumpkin Toffee Cookies
Pumpkin Glazed Cookies
These soft pumpkin cookies are topped with a sweet, spiced glaze, making them extra special. The glaze adds a lovely touch of sweetness that balances the earthy pumpkin flavor perfectly.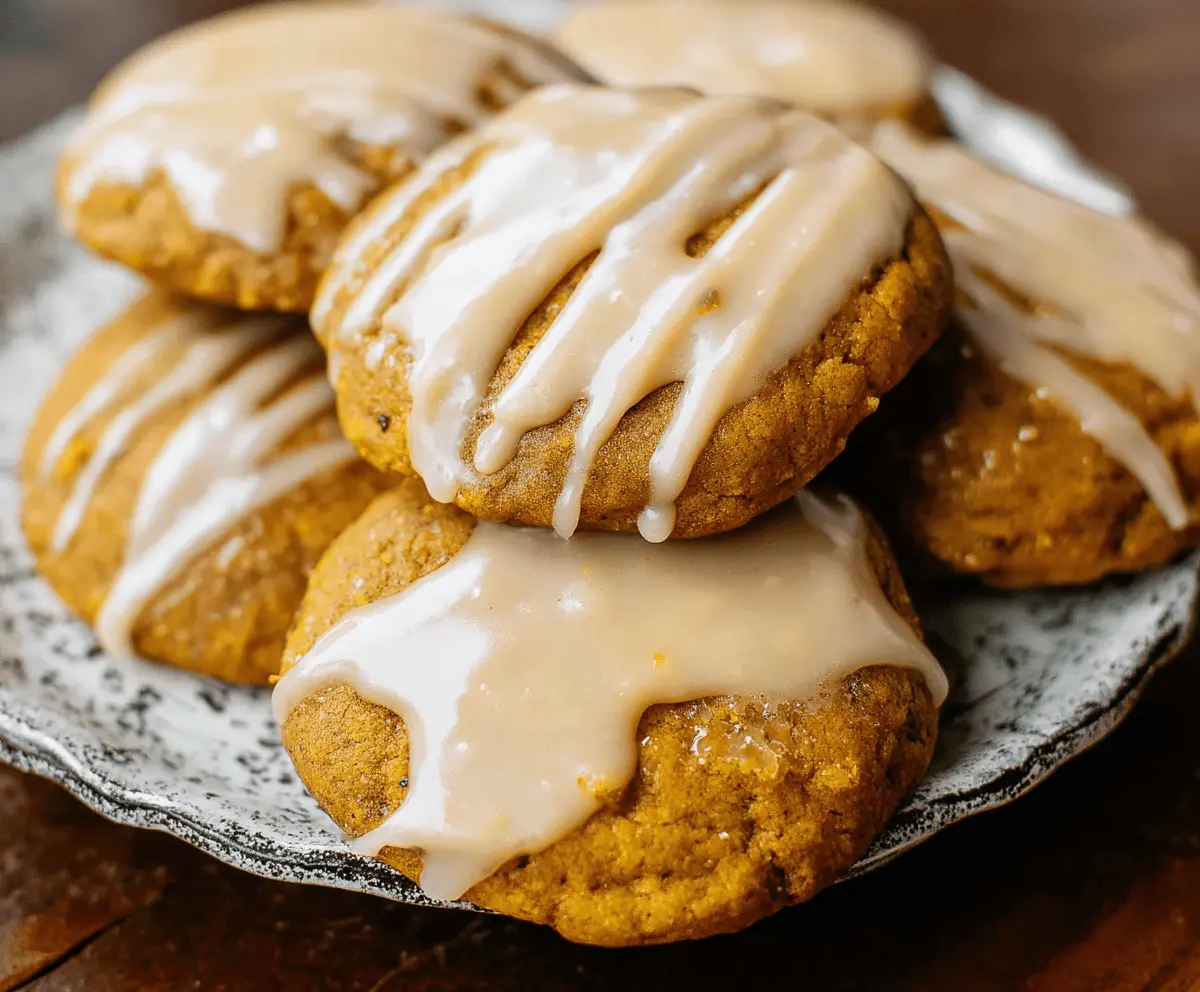
Key Ingredients & Tips for Glazed Pumpkin Cookies
- Perfect Glaze Consistency: Add milk or water to your powdered sugar slowly to get a glaze that drizzles but isn’t too runny.
- Cool Cookies First: Make sure your pumpkin cookies are completely cool before glazing them, otherwise the glaze will melt right off.
What You Need for Pumpkin Glazed Cookies
- All-purpose flour
- Pumpkin puree
- Granulated sugar
- Powdered sugar (for glaze)
- Unsalted butter
- Eggs
- Baking powder
- Cinnamon
⏱️ Time: 40 minutes🍽️ Yields: 2-3 dozen cookies
How to Make Pumpkin Glazed Cookies
Step 1: Prepare Cookie Dough
Preheat oven to 350°F (175°C). Cream together butter and granulated sugar. Beat in pumpkin puree and egg. Combine flour, baking powder, and cinnamon in another bowl. Add dry ingredients to wet, mixing until just combined.
Step 2: Bake and Cool
Drop dough onto baking sheets. Bake for 12-15 minutes until edges are lightly golden. Let cookies cool completely on a wire rack before moving on.
Step 3: Make and Apply Glaze
Whisk powdered sugar, a splash of milk or water, and a pinch of cinnamon until smooth. Drizzle or spread the glaze over the cooled cookies. Let the glaze set before stacking.
📝 Final Note
For a stronger spice flavor in your glaze, add a tiny dash of pumpkin pie spice along with the cinnamon.
Pumpkin Oreo Cookies
These fun pumpkin cookies are studded with crushed Oreo cookies, offering a delightful crunch and chocolatey contrast. They are a playful take on classic pumpkin cookies that everyone will enjoy.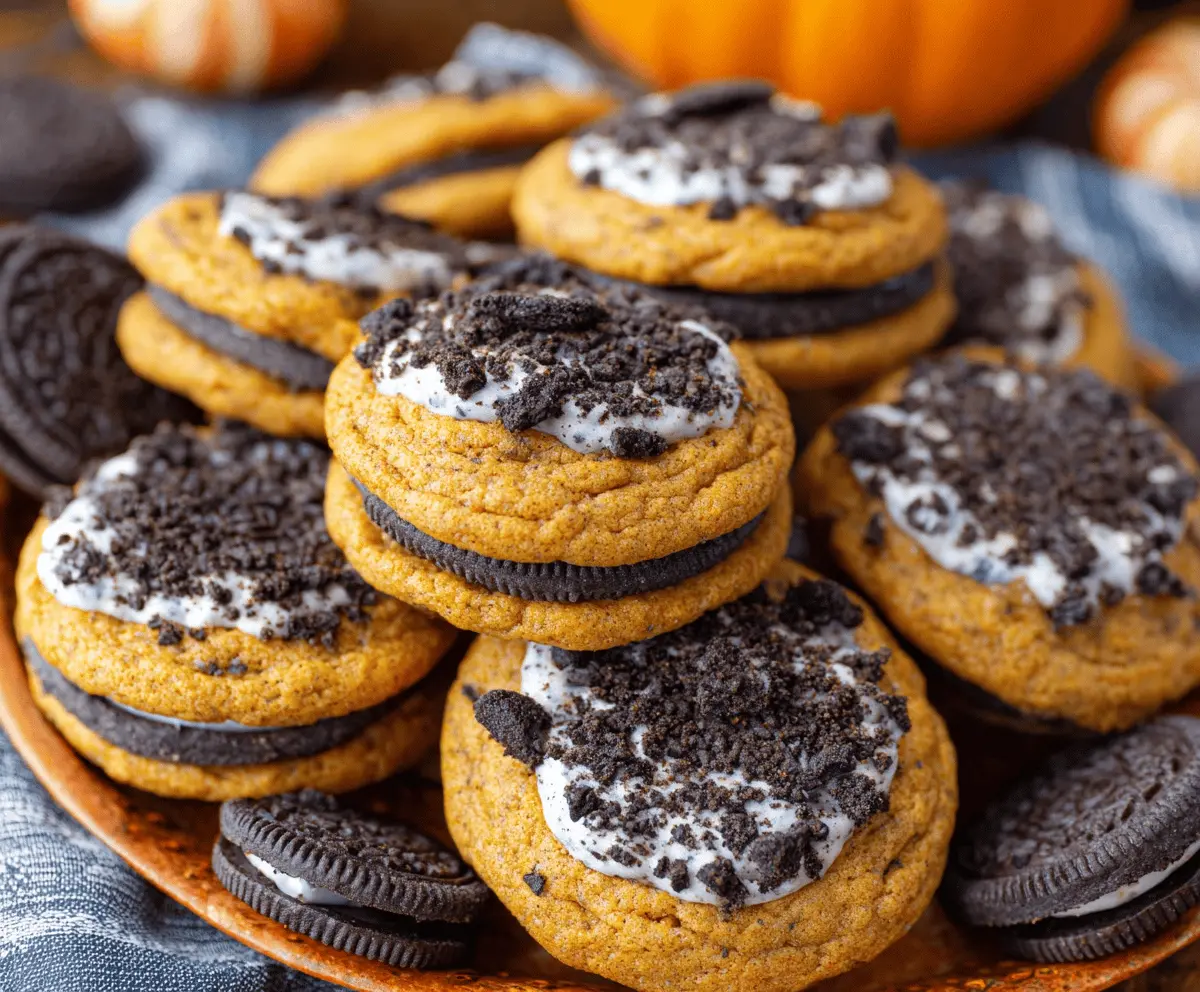
Key Ingredients & Tips for Pumpkin Oreo Cookies
- Chunky Oreos: Don’t crush the Oreos too finely; small chunks give the best texture and visual appeal in the cookies.
- Gentle Mixing: Fold in the crushed Oreos gently at the very end to avoid overmixing the dough and crushing them completely.
What You Need for Pumpkin Oreo Cookies
- All-purpose flour
- Pumpkin puree
- Granulated sugar
- Crushed Oreo cookies
- Unsalted butter
- Egg
- Baking soda
- Nutmeg
⏱️ Time: 35 minutes🍽️ Yields: 20-24 cookies
How to Make Pumpkin Oreo Cookies
Step 1: Make Pumpkin Cookie Base
Preheat oven to 350°F (175°C). Cream butter and sugar. Mix in pumpkin puree and egg. Whisk flour, baking soda, and nutmeg, then gradually add to the wet ingredients.
Step 2: Fold in Oreos and Bake
Gently fold in the crushed Oreo cookies. Drop spoonfuls of dough onto a baking sheet. Bake for 11-14 minutes, until set around the edges.
📝 Final Note
Try refrigerating the cookie dough for 30 minutes before baking to help prevent spreading and keep the Oreo pieces firm.
Pumpkin Oreo White Chocolate Cookies
These pumpkin cookies bring together the rich flavors of pumpkin, crunchy Oreos, and sweet white chocolate chips. It’s a delightful combination that adds an extra layer of sweetness and texture.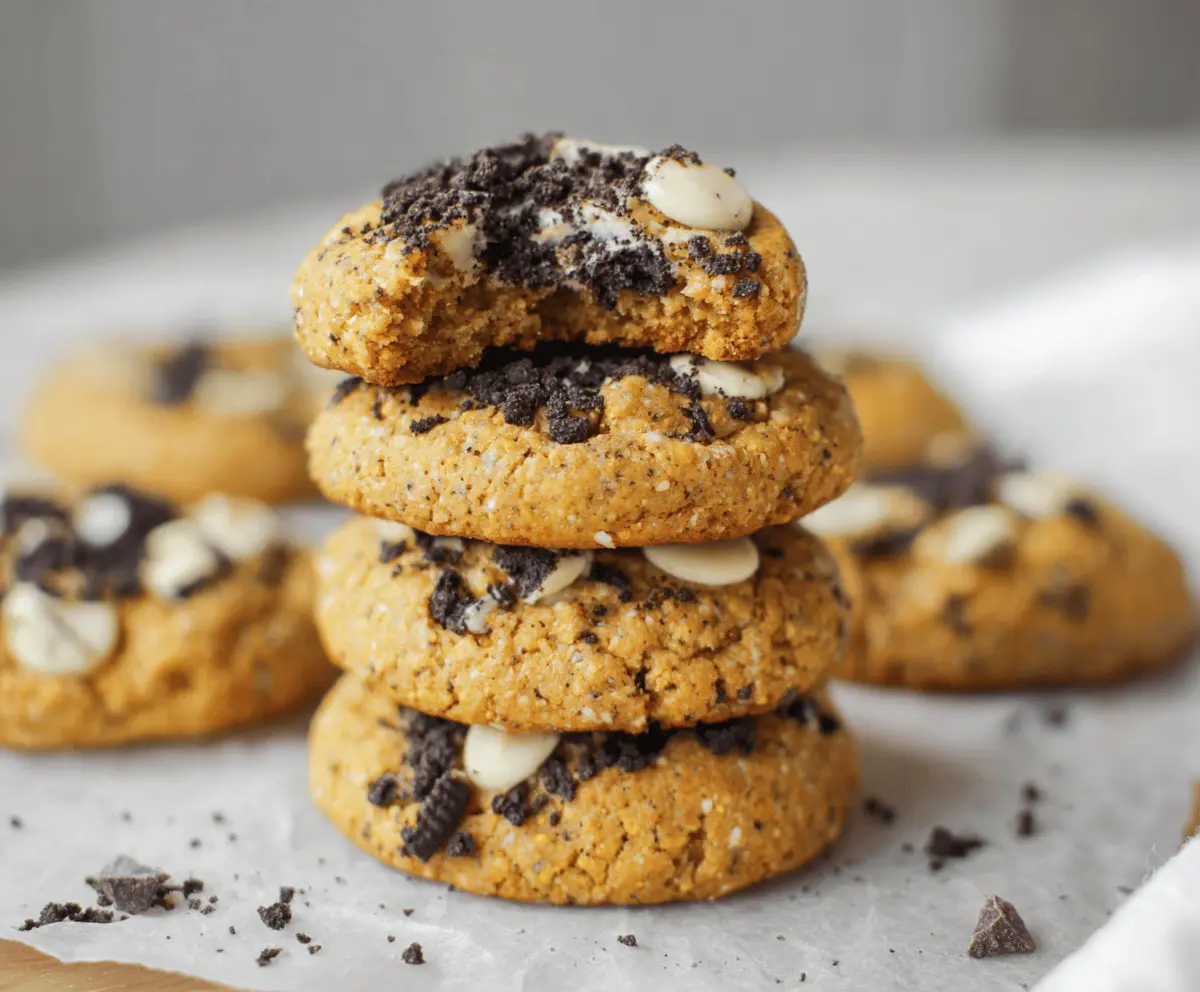
Key Ingredients & Tips for Pumpkin Oreo White Chocolate Cookies
- Quality White Chocolate: Use good quality white chocolate chips or chopped white chocolate bars for the best melting and flavor.
- Don’t Overmix: When adding the Oreos and white chocolate, fold them in just until evenly distributed to keep the dough light and the cookies tender.
What You Need for Pumpkin Oreo White Chocolate Cookies
- All-purpose flour
- Pumpkin puree
- Granulated sugar
- Crushed Oreo cookies
- White chocolate chips
- Unsalted butter
- Egg
- Baking powder
- Cinnamon
⏱️ Time: 40 minutes🍽️ Yields: 24-28 cookies
How to Make Pumpkin Oreo White Chocolate Cookies
Step 1: Combine Wet and Dry
Preheat your oven to 375°F (190°C). Cream softened butter with granulated sugar until fluffy. Beat in pumpkin puree and the egg. In a separate bowl, mix flour, baking powder, and cinnamon. Gradually add dry ingredients to wet until just combined.
Step 2: Add Mix-Ins and Bake
Gently fold in the crushed Oreo cookies and white chocolate chips. Drop spoonfuls of dough onto a lined baking sheet. Bake for 10-13 minutes, or until the edges are golden.
📝 Final Note
For a pretty finish, press a few extra white chocolate chips and Oreo pieces onto the tops of the cookie dough before baking.
Pumpkin Smores Cookies
These cozy pumpkin cookies combine classic s’mores elements with a warm pumpkin flavor. Each bite offers gooey marshmallow, melty chocolate, and a hint of graham cracker crunch, all in a pumpkin cookie base.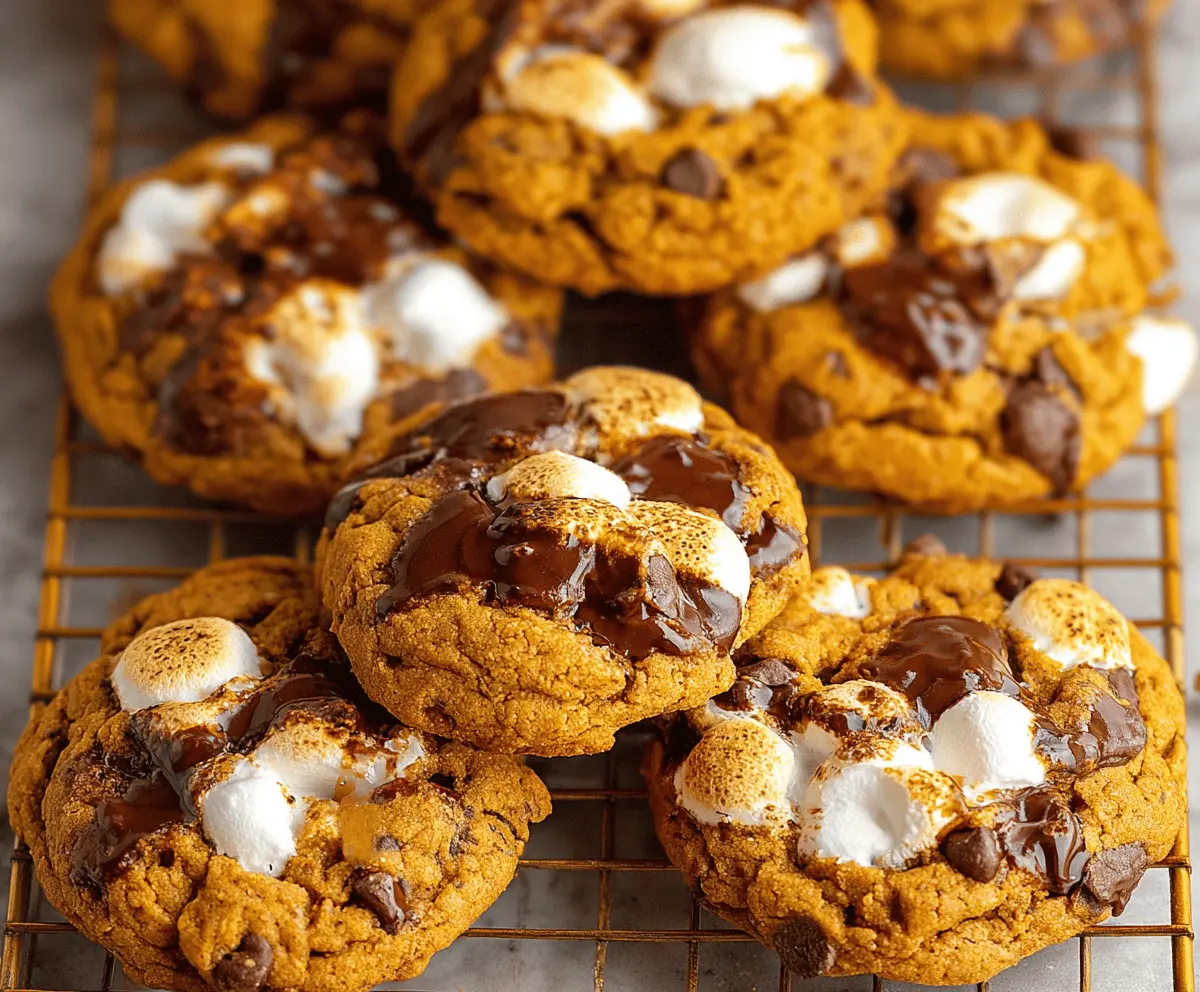
Key Ingredients & Tips for Pumpkin Smores Cookies
- Marshmallow Timing: Add the marshmallows to the top of the cookies during the last few minutes of baking to prevent them from burning.
- Chocolate Choice: Use milk chocolate chunks or squares for that traditional s’mores taste, as they melt beautifully.
What You Need for Pumpkin Smores Cookies
- All-purpose flour
- Pumpkin puree
- Granulated sugar
- Crushed graham crackers
- Mini marshmallows
- Milk chocolate chunks
- Unsalted butter
- Egg
- Baking soda
⏱️ Time: 35 minutes🍽️ Yields: 18-20 cookies
How to Make Pumpkin Smores Cookies
Step 1: Mix Dough and Add Mix-ins
Preheat oven to 375°F (190°C). Cream butter and sugar. Beat in pumpkin puree and egg. Combine flour, baking soda, and a pinch of salt. Mix wet and dry ingredients. Fold in crushed graham crackers and chocolate chunks.
Step 2: Bake and Add Marshmallows
Drop dough onto a baking sheet. Bake for 8-10 minutes. Remove from oven, place a few mini marshmallows on each cookie, and return to oven for 2-3 more minutes until marshmallows are puffed and lightly golden.
📝 Final Note
These cookies are best eaten warm, right after the marshmallows have cooled slightly but are still gooey.
Pumpkin Toffee Cookies
These delightful pumpkin cookies are filled with crunchy toffee bits, adding a sweet and buttery chewiness. The toffee pairs wonderfully with the warm pumpkin spice, creating a truly comforting treat.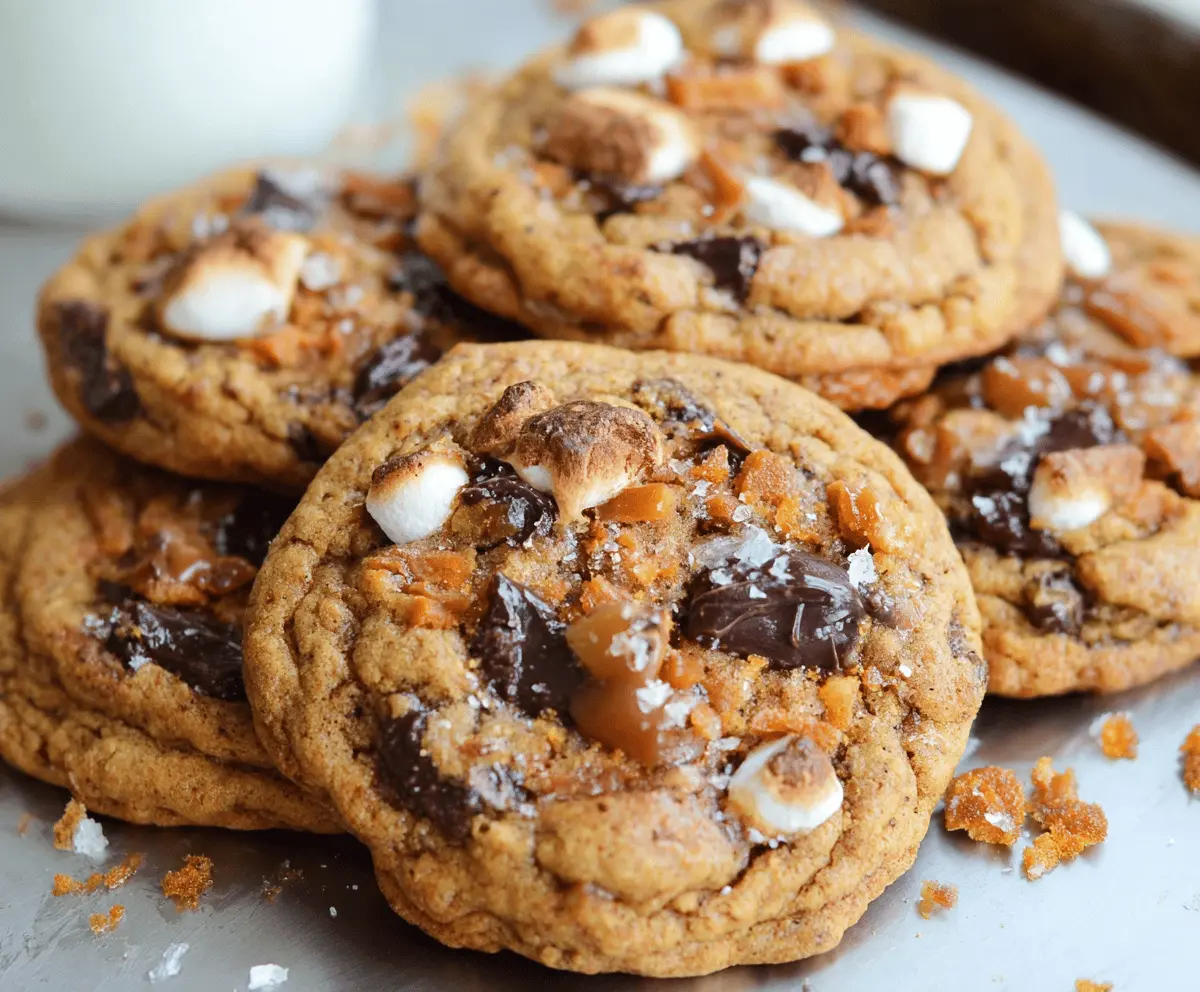
Key Ingredients & Tips for Pumpkin Toffee Cookies
- English Toffee Bits: Look for toffee bits without chocolate if you want the pure buttery toffee flavor to shine through.
- Chilling Dough: Chilling the dough for at least 30 minutes can help the cookies hold their shape better and prevent excessive spreading.
What You Need for Pumpkin Toffee Cookies
- All-purpose flour
- Pumpkin puree
- Brown sugar
- Granulated sugar
- Toffee bits (Heath bar bits work great!)
- Unsalted butter
- Egg
- Baking soda
- Ground ginger
⏱️ Time: 45 minutes🍽️ Yields: About 2 dozen cookies
How to Make Pumpkin Toffee Cookies
Step 1: Cream and Mix Dough
Preheat your oven to 375°F (190°C). In a large bowl, cream together butter, brown sugar, and granulated sugar until fluffy. Beat in pumpkin puree and the egg. In another bowl, whisk together flour, baking soda, and ground ginger. Add the dry ingredients to the wet mixture slowly.
Step 2: Fold in Toffee and Bake
Gently fold in the toffee bits until they are well distributed throughout the dough. Drop spoonfuls of dough onto a lined baking sheet. Bake for 10-12 minutes, or until the edges are golden brown. Let cool on the baking sheet for a few minutes before moving to a wire rack.
📝 Final Note
If you love extra toffee flavor, sprinkle a few more toffee bits on top of the cookies right after they come out of the oven.