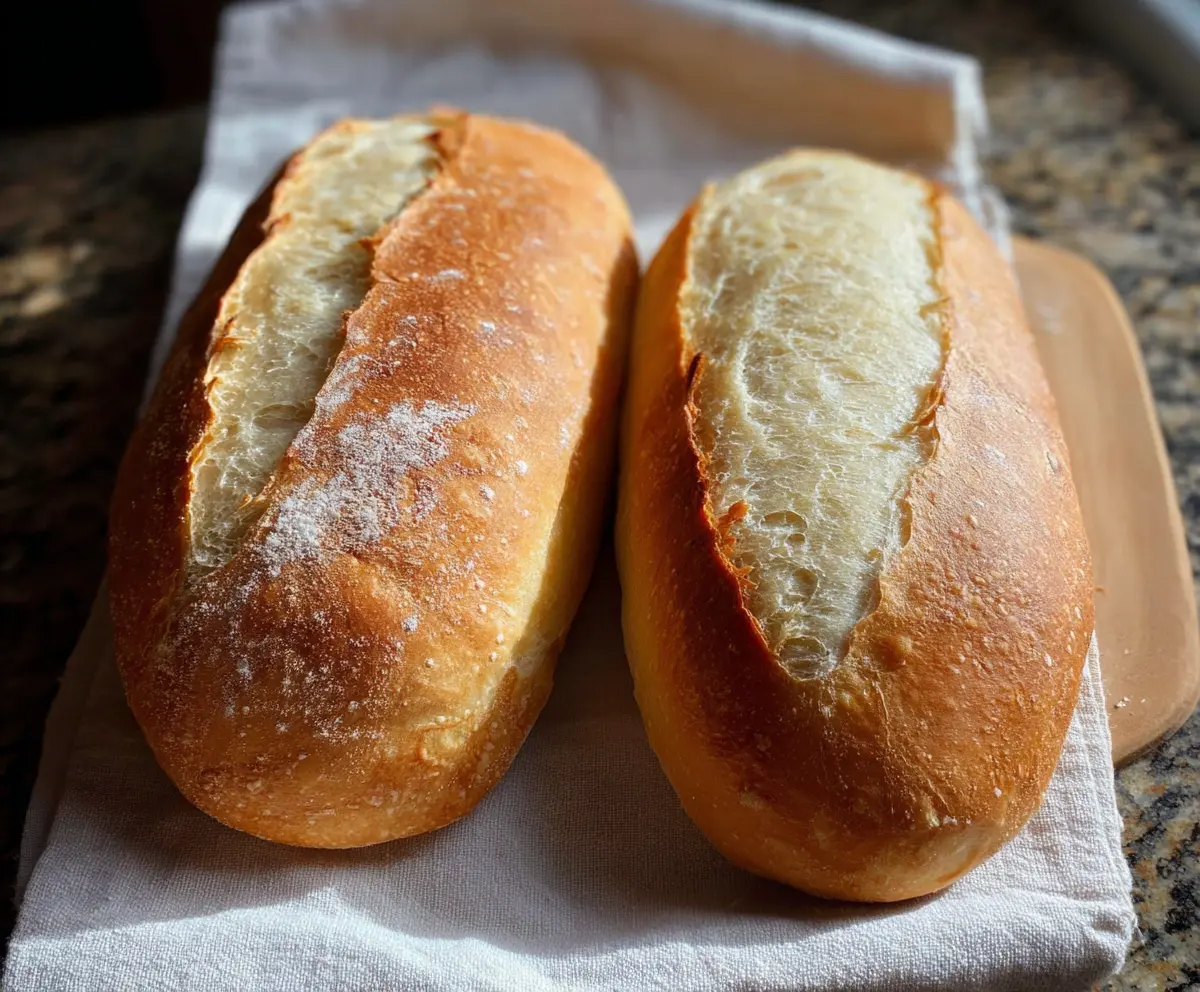
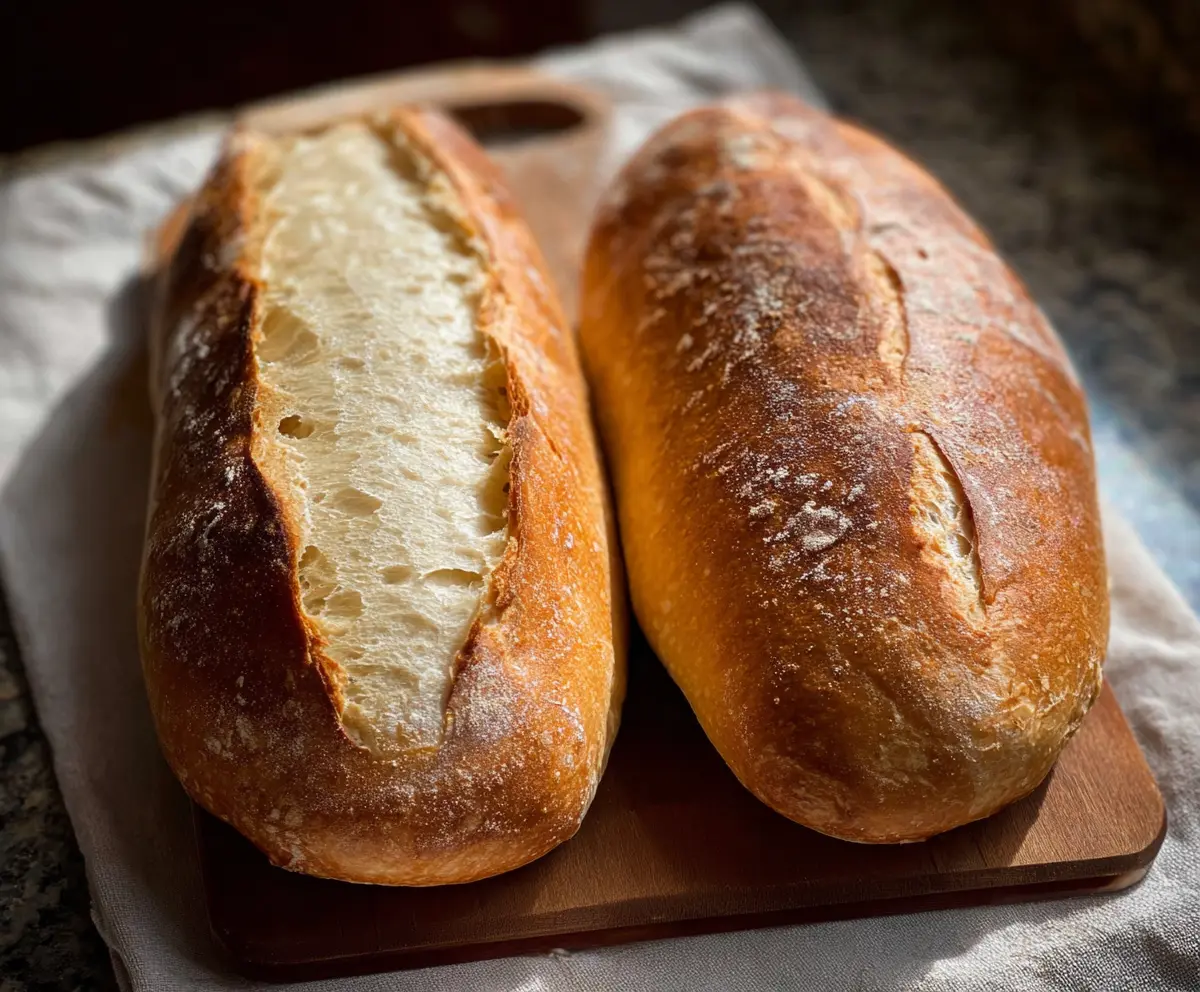
This Sourdough Discard French Bread is a fun way to use up leftover sourdough starter! It’s soft on the inside with a crispy crust, making it perfect for sandwiches or just enjoying with butter.
Every bite is a little taste of joy! I love how easy it is to make, and it fills my kitchen with such a wonderful smell. You’ll want to have a loaf ready for your next meal! 🍞
Key Ingredients & Substitutions
Sourdough Discard: This ingredient is the star! If you don’t have any discard, you can use a small portion of regular unfed sourdough starter. It will still give you that delicious flavor.
Warm Water: The temperature is important for activating the yeast. If you don’t have warm water, just microwave regular water for a few seconds. Just be cautious—too hot will kill the yeast!
All-Purpose Flour: If you want a different flavor or texture, whole wheat flour can be used as a substitute. You’ll just need to adjust the water slightly as whole wheat absorbs more moisture.
Olive Oil or Butter: This is optional, but I recommend brushing the bread after baking for an extra touch of flavor. You can replace olive oil with melted coconut oil if that’s what you have on hand.
How Can I Ensure My Dough Rises Well?
Getting that perfect rise is crucial for airy bread! Here are some tips:
- Make sure your yeast is fresh and bubbly. A quick test is to mix it with water and sugar; it should bubble up.
- Warmth is key! If your kitchen is cool, consider using an oven with just the light on to create a warm environment.
- After shaping the loaves, make sure to cover them properly to trap warmth and moisture, helping them rise faster.
Following these tips will help you achieve that perfect rise and soft texture. Happy baking!
How to Make Sourdough Discard French Bread
Ingredients You’ll Need:
- 1 cup (240g) sourdough discard (unfed starter)
- 1 1/2 cups (360ml) warm water (about 80°F/27°C)
- 1 tablespoon sugar
- 1 teaspoon active dry yeast
- 3 1/2 cups (440g) all-purpose flour, plus extra for dusting
- 2 teaspoons salt
- 2 tablespoons olive oil or softened butter (optional, for brushing)
How Much Time Will You Need?
This recipe will take about 2 to 3 hours in total. You’ll spend about 15 minutes preparing and kneading the dough. Then let it rise for 1 to 1.5 hours, followed by another rise for 30 to 45 minutes before baking. Allow for about 20-25 minutes of baking time. Make sure to let it cool before slicing, but don’t worry – it’s worth the wait!
Step-by-Step Instructions:
1. Activate the Yeast:
In a large mixing bowl, combine the warm water, sugar, and yeast. Give it a gentle stir and let it sit for 5-10 minutes until foamy. This shows that your yeast is active and ready to help your bread rise!
2. Mix in the Sourdough Discard:
Add the sourdough discard to the activated yeast mixture. Stir well until everything is well combined. You should have a wet, thick mixture at this stage.
3. Add Flour and Salt:
Now it’s time to add the flour and salt to the bowl. Mix everything together with a wooden spoon or a dough hook until a shaggy dough forms. It should look a bit messy, and that’s perfectly okay!
4. Knead the Dough:
Turn the dough out onto a lightly floured surface. Knead the dough for about 8-10 minutes until it’s smooth and elastic. If you’re using a stand mixer, a good 5 minutes with a dough hook should do the trick!
5. First Rise:
Place your kneaded dough into a lightly oiled bowl. Cover it with a damp cloth or plastic wrap. Find a warm spot in your kitchen and let the dough rise for 1 to 1.5 hours, or until it has grown to about double in size.
6. Shape the Loaves:
After the first rise, punch down the dough gently to release the air. Divide the dough in half and shape each piece into a loaf by flattening it slightly and rolling it up tightly. Tuck the edges underneath to create a nice tension on the top.
7. Second Rise:
Place your loaves on a baking sheet lined with parchment paper or a floured cloth. Cover them again and let them rise for another 30-45 minutes until puffy and ready for baking.
8. Preheat the Oven:
While your loaves are rising, preheat the oven to 450°F (230°C). This is a great time to place a shallow pan of water on the bottom rack to create steam, which helps make the crust crispy.
9. Score the Loaves:
Using a sharp knife or lame, make a long slash down the center of each loaf. This allows the bread to expand while baking and gives it that lovely artisan look!
10. Bake:
Place the loaves in your preheated oven on the middle rack. Bake them for about 20-25 minutes, or until they are golden brown and sound hollow when you tap the bottom. The delicious aroma will fill your kitchen!
11. Optional Brushing:
If you like, brush the tops of the loaves with olive oil or melted butter right after baking. This gives them extra flavor and softness.
12. Cool and Slice:
Let the loaves cool completely on a wire rack before slicing. This helps the crumb set nicely and makes for cleaner slices!
Enjoy your crusty, airy Sourdough Discard French Bread, perfect for sandwiches or dipping in soups! Happy baking! 🍞
Can I Use Different Types of Flour?
Absolutely! You can substitute part of the all-purpose flour with whole wheat flour for a nuttier flavor and added nutrients. Just keep an eye on the hydration levels; whole wheat flour tends to absorb more water.
What Should I Do If My Dough Isn’t Rising?
If your dough isn’t rising, check that your yeast is fresh and actively bubbling. Make sure the dough is kept in a warm, draft-free area, as cooler temperatures can slow down the yeast activity significantly.
Can I Use Cold Sourdough Discard?
It’s best to use the sourdough discard at room temperature, but if you only have cold discard, use it directly. Just remember that it may affect the rise slightly, so give it a little extra time to rise.
How Should I Store the Bread Once Baked?
Store the baked bread in a paper bag at room temperature to maintain its crustiness. If you need to keep it longer, wrap it tightly in plastic wrap and freeze it for up to 3 months. Just thaw it at room temperature when you’re ready to enjoy!