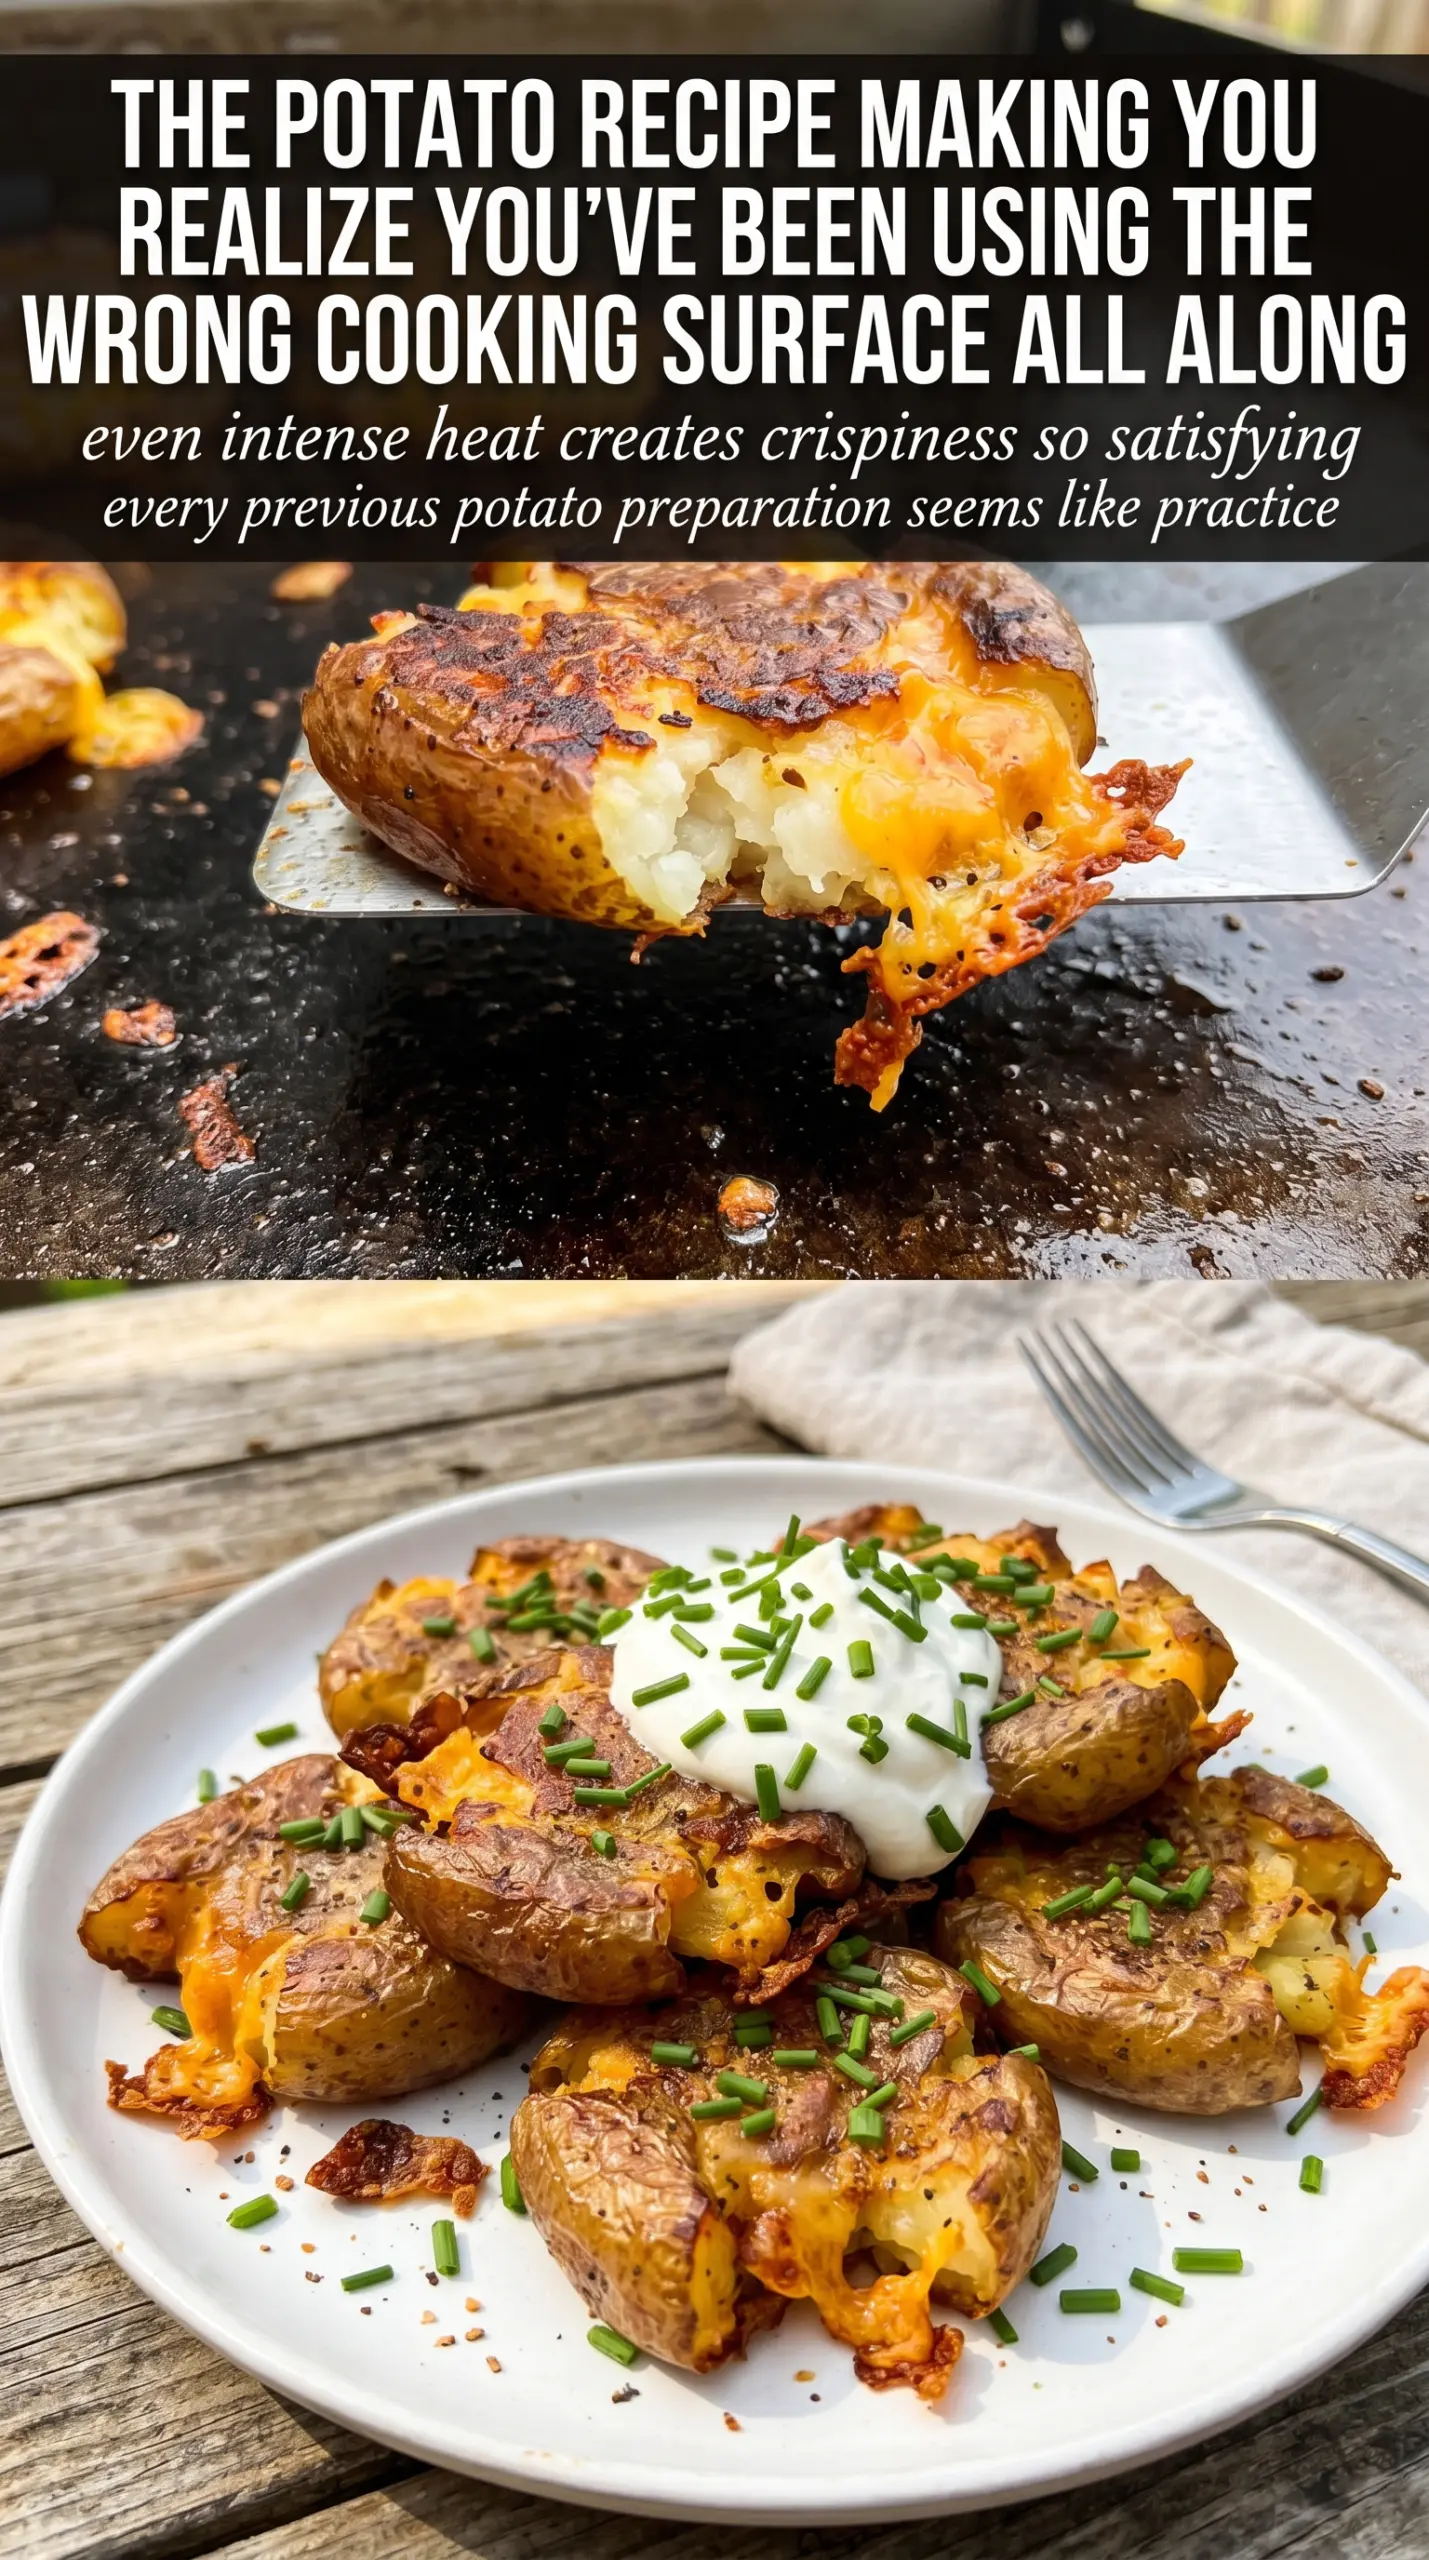
Blackstone smashed potatoes hit that sweet spot between crisp and creamy that keeps people going back for one more piece before dinner even starts. The edges shatter when you lift them off the griddle, but the centers stay soft and fluffy, and that contrast is what makes them worth cooking on a hot flat top instead of in the oven.
The trick is in the balance of moisture and fat. The potatoes need to be fully tender before they ever touch the griddle, then they need enough space and heat to dry out and brown instead of steaming. Butter brings flavor, oil keeps the heat steady, and the smashed shape gives you all those ragged edges that turn deeply golden.
Below, I’ve included the small details that matter most: how cool the potatoes should be before smashing, how to keep them from sticking, and what to change if you want to make them dairy-free or turn them into a full loaded side.
The potatoes got unbelievably crisp on the griddle, and the garlic in the butter around them made the whole batch smell amazing. I followed the timing exactly and the centers stayed creamy instead of drying out.
Save these Blackstone smashed potatoes for the night you want crispy griddle edges, soft centers, and loaded toppings all in one pan.
The Crisp Edge Starts With a Dry Surface
The biggest mistake with smashed potatoes is rushing them from the pot to the griddle while they’re still dripping wet. Steam is the enemy here. If the potatoes are wet on the outside, they’ll soften the hot surface and you’ll get pale, stuck-together bottoms instead of those lacy, browned edges.
Let them drain well, then give them a few minutes to steam off before smashing. That short rest helps the skins tighten a little, which keeps the potatoes from falling apart when you press them. You want them tender enough to collapse under pressure, but not so hot that they splatter or so soft that they smear across the griddle.
- Baby potatoes — Waxy baby potatoes hold together best after boiling, which is why they smash into sturdy rounds instead of turning to mash. Yukon golds work especially well. Avoid starchy russets here; they fall apart too easily.
- Olive oil and butter — Oil gives you the high-heat crisping power, and butter adds the browned, nutty flavor people expect from loaded potatoes. If you use only butter, it can scorch before the potatoes finish. If you need dairy-free, use all oil and finish with dairy-free toppings.
- Garlic — Minced garlic cooks fast on the hot griddle and perfumes the fat around the potatoes. Add it near the potatoes, not directly on top at the start, so it doesn’t burn before the edges are crisp.
- Toppings — Sour cream, cheddar, chives, and bacon turn this from a side dish into a loaded plate. Use sharp cheddar for the best contrast. If you want them cleaner and less heavy, skip the bacon and keep the chives and sour cream.
What Each Ingredient Is Actually Doing in Blackstone Smashed Potatoes
- Protein (quality, proper thickness) — Good quality protein tastes better. Even thickness ensures even cooking.
- Seasoning (bold, distributed throughout) — Don’t be shy with salt and pepper. Quality seasoning elevates everything.
- Oil or fat (protective and flavorful) — The fat helps develop crust and carries flavors. Use generously.
- Heat management (appropriate temperature for the protein) — Too high and the outside burns before the inside cooks. Too low and it steams.
- Technique (sear, then finish based on thickness) — Proper technique creates flavor. Sear for crust, then cook through gently.
- Aromatics and seasonings (garlic, herbs, spices) — These add complexity and depth. Distribute them throughout the cooking process.
- Resting time (let it rest before serving) — Resting allows juices to reabsorb. This keeps the protein moist and tender.
- Optional: finishing sauce or glaze — A light sauce adds richness without overwhelming. Apply at the very end.
How to Get Both Sides Crispy Without Breaking the Potatoes
Boiling to the Right Tenderness
Start the potatoes in salted water and cook them until a fork slides in with almost no resistance. If they’re undercooked, they’ll resist the smash and split at the edges; if they’re overcooked, they’ll collapse into rough bits on the griddle. Drain them well and let them sit long enough for the surface moisture to disappear.
Smashing on the Hot Griddle
Heat the Blackstone to medium-high, then add the oil and butter and let them shimmer before the potatoes go down. Set the potatoes down with space between them, then press firmly with a heavy spatula or potato masher until they’re flattened but still in one piece. If they stick when you lift the tool, wait a few seconds longer; the crust needs a moment to set before it releases cleanly.
Turning Browning Into a Full Crust
Leave the potatoes alone once they’re smashed. That’s the part people rush, and it’s where they lose the crust. When the bottoms are deep golden and the edges look crisp and frilly, slide a spatula underneath and flip carefully. After the second side crisps up, season right away so the salt lands on hot fat and clings to the potatoes instead of bouncing off.
Turn Them Into Loaded Smashed Potatoes
Pile on sour cream, cheddar, chives, and bacon while the potatoes are still hot enough to melt the cheese slightly. The result is heavier and more indulgent, with the toppings softening the crisp edge just enough to make each bite feel like a baked potato and a griddle potato at the same time.
Make Them Dairy-Free
Use olive oil or avocado oil instead of butter, then top with dairy-free sour cream and a sharp-style plant-based cheese if you want the loaded finish. You’ll lose a little of the buttery richness, but the crispy texture stays intact as long as the griddle stays hot.
Keep Them Gluten-Free and Naturally Simple
This recipe is naturally gluten-free as written, so the main job is checking your toppings and bacon bits if you’re using packaged versions. That makes it an easy side for mixed groups because you don’t need to change the cooking method at all.
Storage and Reheating
- Refrigerator: Store leftovers in an airtight container for up to 4 days. The potatoes soften a bit, but they still hold their shape well.
- Freezer: They freeze, but the texture gets softer after thawing, especially once the toppings are added. Freeze the plain smashed potatoes on a tray first, then store them in a bag for the best chance at keeping some crispness.
- Reheating: Reheat on a hot skillet, griddle, or in a 425°F oven until the edges crisp again. The mistake to avoid is microwaving them first, which turns the crust rubbery before the outside has a chance to re-crisp.
Questions I Get Asked About This Recipe

Blackstone Smashed Potatoes
Ingredients
Equipment
Method
- Boil baby potatoes until fork-tender, about 15-20 minutes, then drain and let cool slightly.
- Let the drained potatoes rest briefly so they smash without falling apart.
- Heat a griddle to medium-high and add olive oil and butter.
- Place the potatoes on the griddle and smash flat with a heavy spatula or masher.
- Add minced garlic around the potatoes and cook for 6-7 minutes until the bottoms are crispy and golden.
- Flip the potatoes and cook another 5-6 minutes until both sides are crispy.
- Season with salt and pepper, then top with sour cream, shredded cheddar cheese, chopped chives, and bacon bits.