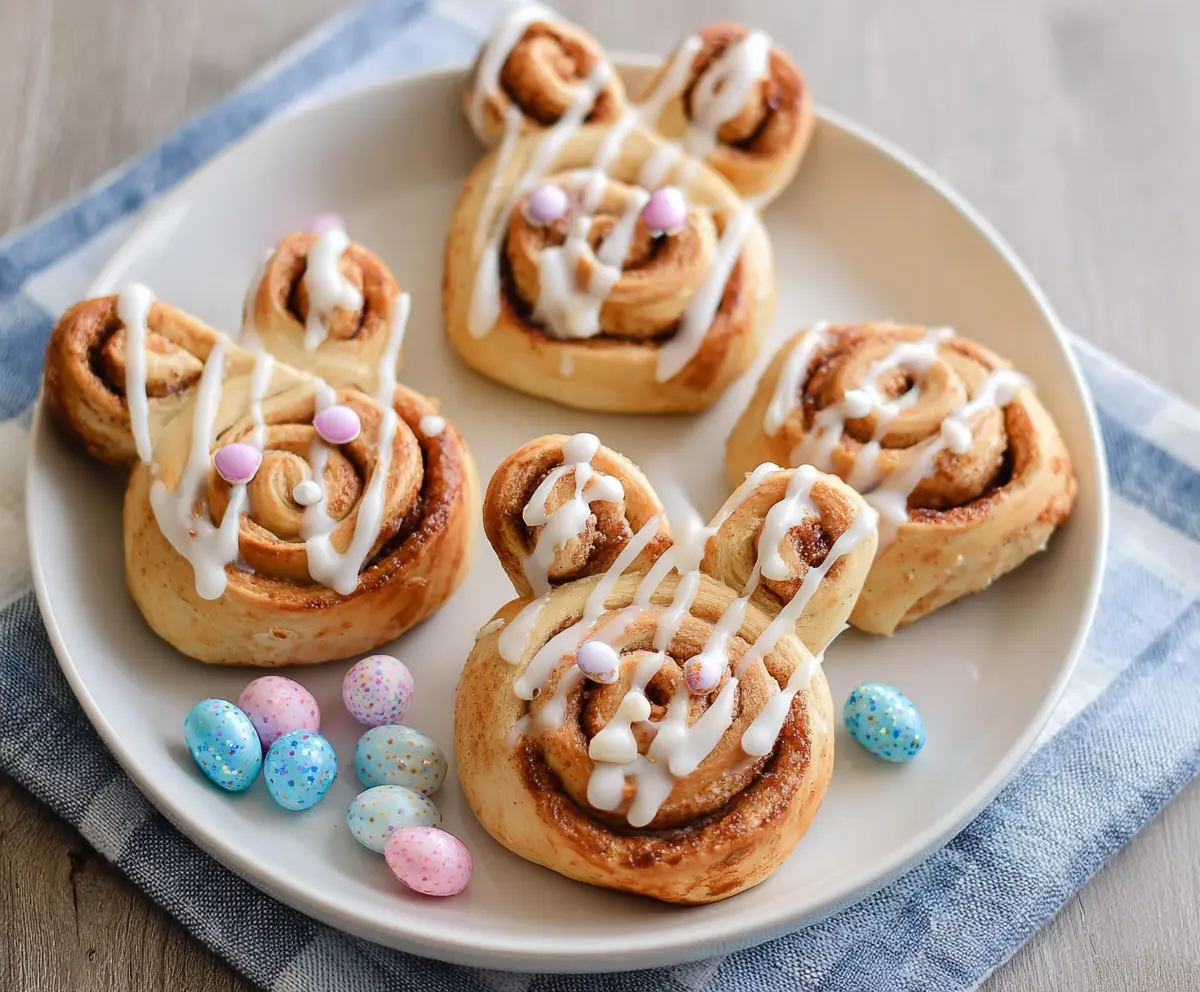
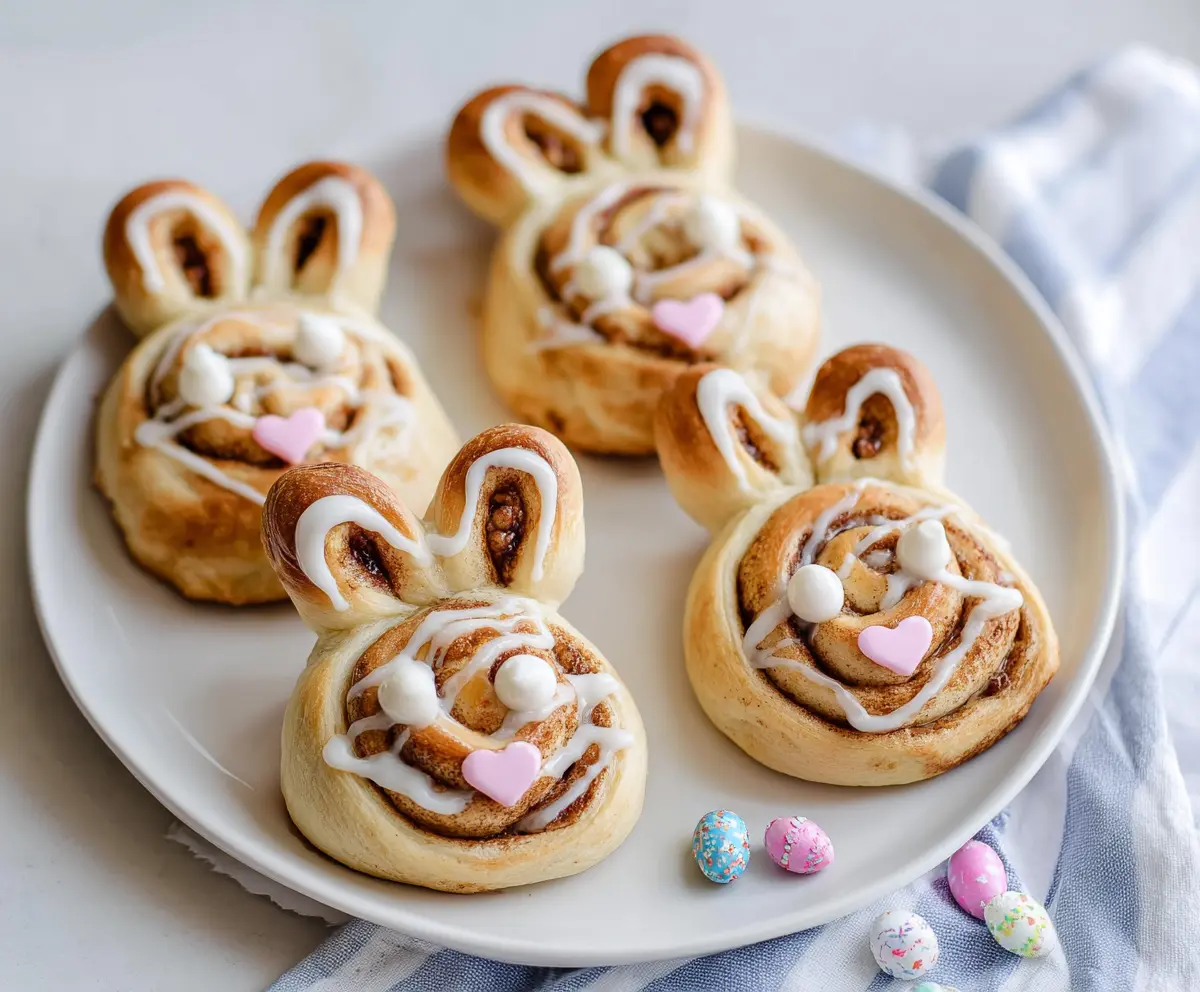
These fun Easter Bunny Cinnamon Rolls are a sweet treat to brighten your holiday! Soft and fluffy dough is filled with cinnamon and sugar, then shaped into adorable bunny designs.
Who knew breakfast could be so cute? I love surprising everyone with these on Easter morning. They taste amazing and make the perfect start to a day filled with fun!
Key Ingredients & Substitutions
Active Dry Yeast: Essential for the dough to rise. If you’re out, you can swap it for instant yeast (use the same amount) or fresh yeast (use about 2-3 times more).
Milk: Warm milk helps activate the yeast. If you’re dairy-free, any non-dairy milk works, but warm it slightly to replicate the yeast activation. I’ve used oat milk and it turned out great.
Unsalted Butter: This adds richness. If you need a lighter option, you can replace half with applesauce or use coconut oil for a different flavor.
Granulated Sugar vs Brown Sugar: I prefer brown sugar for the filling because it adds a deep flavor. If you don’t have brown sugar, you can mix white sugar with a little molasses or honey for a similar taste.
Cinnamon: A must-have for this recipe! You can mix in nutmeg for an extra kick or use pumpkin pie spice as a fun twist.
How Do I Get My Cinnamon Rolls to Rise Properly?
The rising process is crucial for fluffy rolls. Here’s how to ensure your dough rises beautifully:
- Make sure the milk is warm, not hot. Too hot can kill the yeast.
- While the dough is rising, place it somewhere warm and draft-free, like inside an unheated oven with the light on.
- Let it rise until it’s doubled in size, which usually takes about an hour. Patience is key!
If your dough doesn’t rise as expected, give it another try. Sometimes more time is all you need.
How to Make Easter Bunny Cinnamon Rolls
Ingredients You’ll Need:
For the Dough:
- 2 1/4 tsp (1 packet) active dry yeast
- 1 cup warm milk (about 110°F / 43°C)
- 1/2 cup granulated sugar
- 1/3 cup unsalted butter, melted
- 1 tsp salt
- 2 large eggs
- 4 cups all-purpose flour
For the Filling:
- 1/2 cup unsalted butter, softened
- 1 cup brown sugar, packed
- 2 tbsp ground cinnamon
For the Icing:
- 1 cup powdered sugar
- 2-3 tbsp milk (adjust for consistency)
- 1/2 tsp vanilla extract
For Decoration:
- Small pastel-colored candy-coated chocolates (for eyes and noses)
- Optional: speckled candy eggs for garnish
How Much Time Will You Need?
This delightful recipe will take about 15 minutes of prep time, and then you’ll need about 2 to 2.5 hours in total, which includes rising time and baking. It’s a perfect family project that results in scrumptious cinnamon rolls!
Step-by-Step Instructions:
1. Prepare the Dough:
Start by dissolving the yeast in warm milk in a small bowl. Let it sit for 5-10 minutes until it becomes frothy. In a large mixing bowl, mix together the sugar, melted butter, salt, and eggs until smooth. Then, add the yeast mixture to this bowl. Gradually mix in the flour until a soft dough forms. Knead this dough on a floured surface for about 6-8 minutes until it’s smooth and elastic. Now, place it in a greased bowl, cover it, and let it rise in a warm place for 1 to 1.5 hours, until it has doubled in size.
2. Prepare the Filling:
In a small bowl, combine the softened butter with the brown sugar and ground cinnamon. Mix until everything is well blended.
3. Assemble the Cinnamon Rolls:
Once your dough has risen, gently punch it down and roll it out on a floured surface into a rectangle that measures about 16 x 12 inches. Spread the cinnamon-sugar butter filling evenly over the rolled dough. Next, tightly roll the dough from the long edge into a log. Slice this log into 8 large pieces for the bunny faces.
4. Shape the Bunny Ears:
From the ends of the dough or any leftover bits, take two small sections and roll them into smaller logs. Cut these into smaller pieces and attach them on top of each larger roll to create bunny ears. Gently press them to secure.
5. Second Rise:
Place the bunny-shaped rolls on a greased or parchment-lined baking sheet, ensuring there’s space between each one. Cover them and let them rise again for about 30-45 minutes until they look puffy.
6. Bake:
Preheat your oven to 350°F (175°C). Bake the rolls for 20-25 minutes, or until they’re golden brown on top and smell irresistible!
7. Prepare the Icing:
In a bowl, whisk together powdered sugar, milk, and vanilla extract until it’s smooth. You can adjust the amount of milk to reach your desired drizzling consistency.
8. Decorate:
Once the cinnamon rolls are out of the oven, drizzle the icing over the warm rolls. To create the bunny faces, add two pastel-colored candies for the eyes and one for the nose. For extra flair, arrange some speckled candy eggs around the rolls for a festive Easter touch!
Enjoy your adorable and delicious Easter Bunny Cinnamon Rolls! They’re sure to bring smiles to everyone’s faces!
Can I Use Store-Bought Dough Instead?
Absolutely! If you’re short on time, you can use store-bought cinnamon roll dough. Just roll it out, add the filling, shape it into bunnies, and follow the baking instructions on the package.
How Do I Store Leftover Cinnamon Rolls?
Store any leftovers in an airtight container at room temperature for up to 2 days. For longer storage, refrigerate them for up to a week, or freeze for up to 2 months. Just be sure to seal them well!
Can I Make These Cinnamon Rolls Ahead of Time?
Yes! You can prepare the dough and fill it a day in advance. Simply refrigerate the assembled rolls overnight and let them rise in a warm place before baking the next day.
What If My Dough Doesn’t Rise?
If your dough doesn’t rise, it might be due to expired yeast or not enough warmth. Ensure your yeast is fresh and give the dough more time in a warm, draft-free area. Patience is key, so allow it to rise until it has doubled in size!