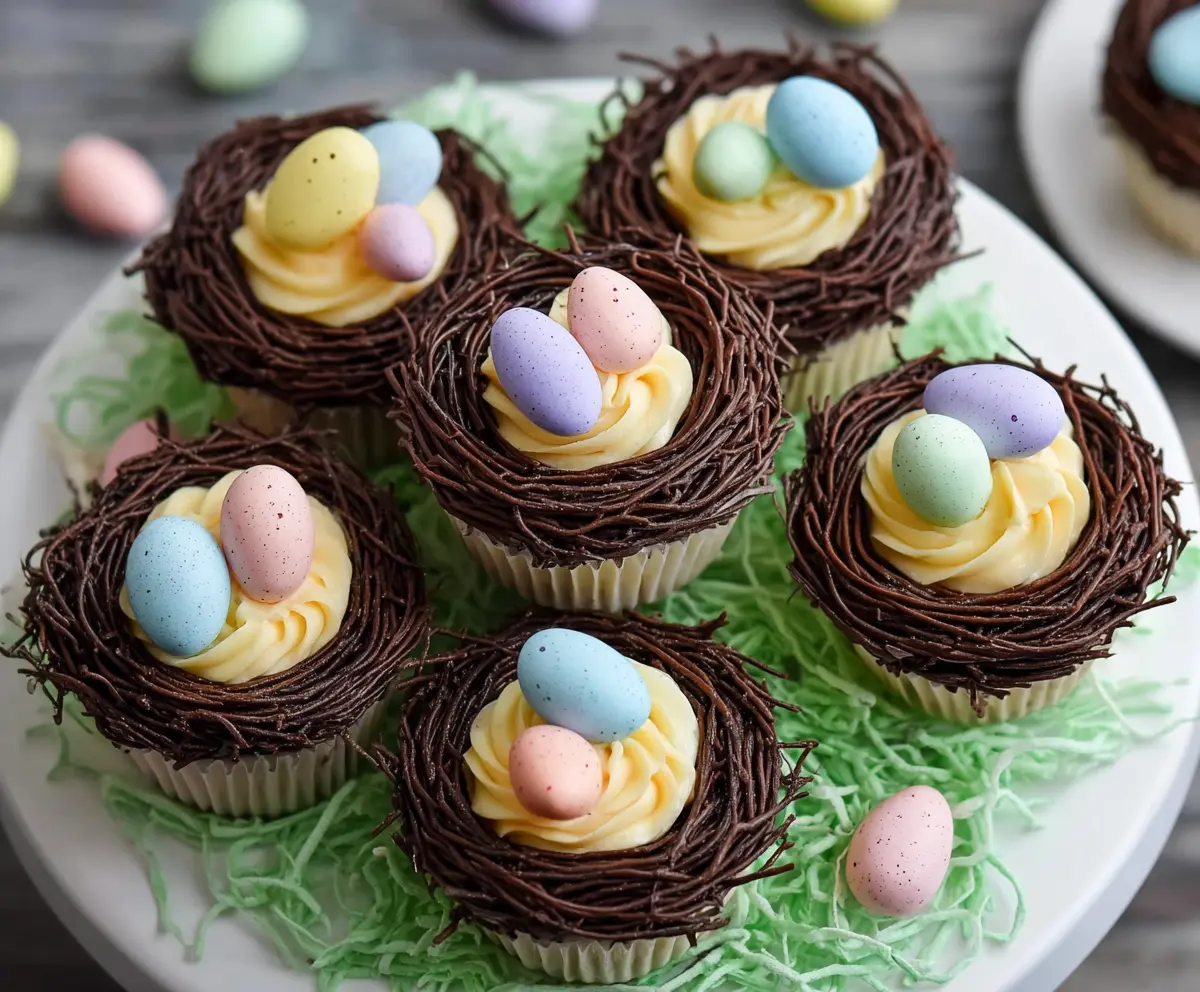
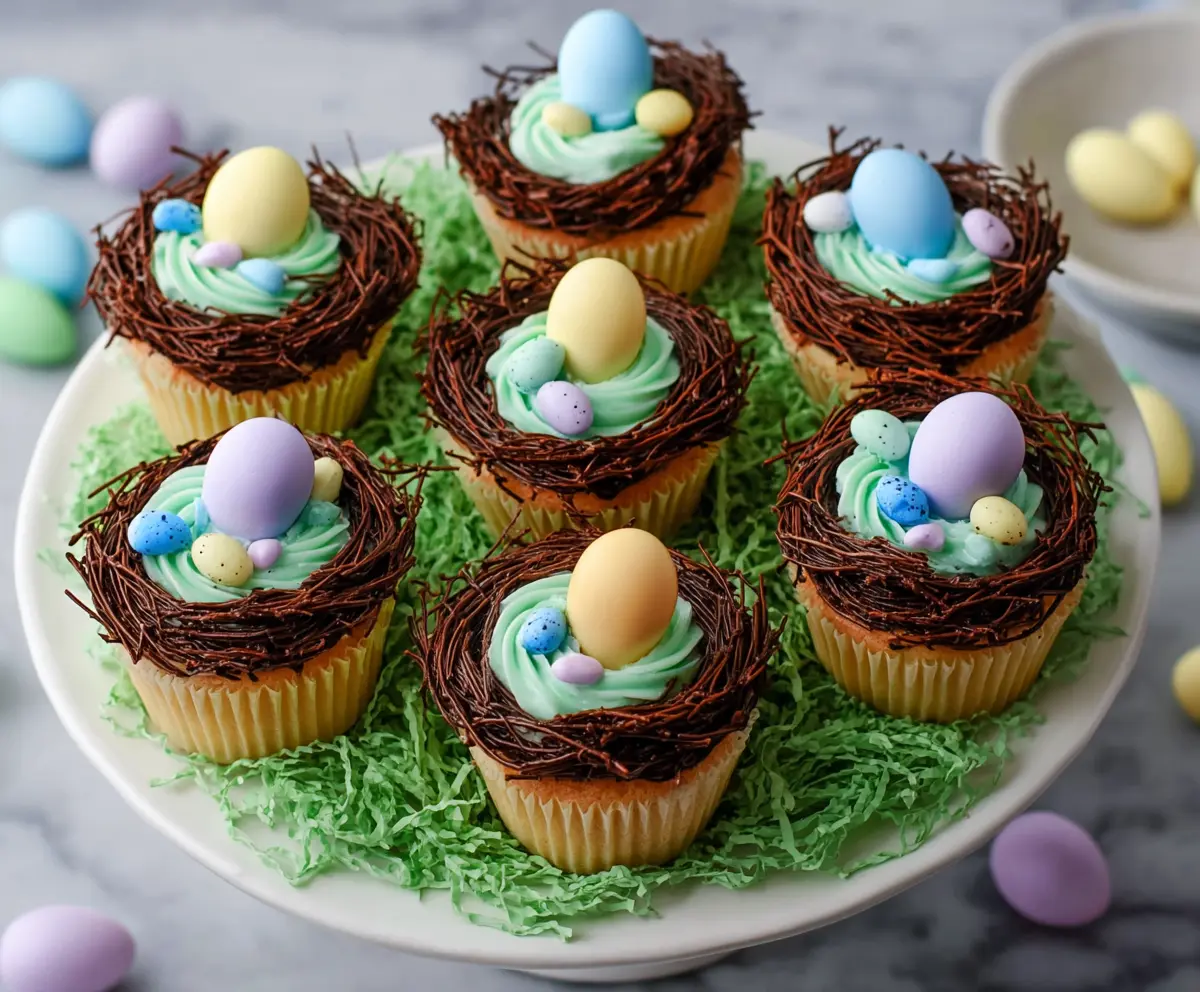
These cute Easter Egg Nest Cupcakes are a fun treat! They are soft and fluffy cupcakes topped with chocolate frosting, and the best part? They have little candy eggs tucked in for a delightful surprise.
Making these is a blast! I love how colorful and festive they are on the table. Plus, it’s always a joy to see kids getting excited about their candy eggs. Who can resist that smile? 🐣
Key Ingredients & Substitutions
All-Purpose Flour: This is the base for your cupcakes, giving them structure. If you’re looking for gluten-free options, you can use a 1:1 gluten-free flour blend!
Unsalted Butter: Softened butter is key for that creamy texture. You can use margarine or coconut oil if you’re looking for dairy-free options. Just note that it may affect the flavor slightly.
Semi-Sweet Chocolate Chips: Essential for the chocolate nests, they provide a rich flavor. If you’re a fan of dark chocolate, feel free to swap these for dark chocolate chips instead!
Candy Coated Chocolate Eggs: These give a festive touch! If you can’t find them, any small candy like jelly beans can work, or even chocolate-covered raisins for a twist.
How Do You Make Light and Fluffy Cupcakes?
Achieving light and fluffy cupcakes is all about the mixing method. Start by creaming the butter and sugar until it’s light and fluffy; this is crucial. It incorporates air, helping your cupcakes rise beautifully!
- Beat butter and sugar together for about 3-5 minutes.
- Add the eggs one at a time, mixing well after each addition.
- When adding flour, mix just until combined; overmixing can lead to dense cupcakes.
What’s the Best Way to Melt Chocolate for Nests?
Melting chocolate needs a bit of patience. Use the microwave in short bursts to prevent burning. Stir often to get the smooth consistency right! Here’s how:
- Combine chocolate chips and oil in a microwave-safe bowl.
- Heat in 30-second intervals, stirring each time until it’s fully melted.
- Transfer to a piping bag to create your nest shape!
How Do You Get a Perfect Buttercream Frosting Consistency?
Getting your buttercream just right can be tricky. It should be smooth and spreadable, but not too runny. Here’s how:
- Beat softened butter until creamy, then gradually add sifted powdered sugar.
- Add milk or cream one tablespoon at a time. This helps you control the thickness.
- Mix until light and fluffy, and adjust with more sugar or milk as needed.
With these tips, you’re well on your way to creating delightful Easter Egg Nest Cupcakes that are not only beautiful but delicious! Enjoy your baking!
How to Make Easter Egg Nest Cupcakes
Ingredients You’ll Need:
For the Cupcakes:
- 1 ½ cups all-purpose flour
- 1 ½ tsp baking powder
- ¼ tsp salt
- ½ cup unsalted butter, room temperature
- 1 cup granulated sugar
- 2 large eggs
- 2 tsp vanilla extract
- ½ cup whole milk
For the Buttercream Frosting:
- 1 cup unsalted butter, room temperature
- 3-4 cups powdered sugar, sifted
- 1-2 tsp vanilla extract
- 2-3 tbsp heavy cream or milk
- Yellow food coloring (optional, for a soft yellow color)
For the Chocolate Nest:
- 1 ½ cups semi-sweet chocolate chips or chopped chocolate
- 2 tbsp vegetable oil or coconut oil
For Decoration:
- Candy-coated chocolate eggs or pastel speckled candy eggs (about 18-24 eggs depending on number of cupcakes)
- Green shredded coconut or green edible grass (optional, for display)
How Much Time Will You Need?
This recipe takes about 50-60 minutes in total: 20-25 minutes for preparation and baking, plus another 20-30 minutes for assembling and decorating. Don’t forget to let the cupcakes cool completely before frosting!
Step-by-Step Instructions:
1. Make the Cupcakes:
First, preheat your oven to 350°F (175°C) and line a 12-cup muffin tin with paper liners. In a medium bowl, whisk together the flour, baking powder, and salt. In a large bowl, cream the room temperature butter and sugar until it’s light and fluffy. Then, add eggs one at a time, mixing well after each addition. Stir in the vanilla extract.
Next, alternately add the flour mixture and milk to the butter mixture, starting and ending with the flour. Mix until just combined; don’t overdo it! Divide the batter evenly into the cupcake liners, filling each about 2/3 full. Bake for 18-22 minutes, or until a toothpick comes out clean when inserted into the center. Once baked, let the cupcakes cool completely on a wire rack.
2. Prepare the Buttercream Frosting:
While the cupcakes are cooling, make the buttercream frosting. In a large bowl, beat the softened butter until creamy. Gradually add sifted powdered sugar, one cup at a time, making sure to mix well after each addition. Then, add the vanilla extract and heavy cream or milk, one tablespoon at a time, until you reach your desired consistency. If you want a soft yellow color, add a few drops of yellow food coloring and mix until combined. Finally, fill a piping bag fitted with a star tip with the frosting.
3. Make the Chocolate Nest:
Now it’s time for the chocolate nests! In a microwave-safe bowl, combine the chocolate chips and oil. Microwave in 30-second intervals, stirring between each time until it’s smooth and melted. Pour the melted chocolate into a zip-top bag or piping bag with no tip. Cut a tiny corner off the bag and on a parchment-lined tray, pipe thin strands or circles to create small nests, overlapping them to create an open shape. Chill these nests in the fridge for about 10-15 minutes until they set.
4. Assemble the Cupcakes:
Once the cupcakes are cool and the nests are set, it’s time to assemble. Pipe a swirl of yellow buttercream frosting onto the center of each cupcake, making sure to leave enough room for the nest. Place one chocolate nest carefully on top of the frosting, and then gently add 2-3 candy eggs inside each nest. If you’d like, you can sprinkle some green shredded coconut or edible grass around the cupcakes on a serving platter to make it really festive!
5. Serve & Store:
These cupcakes are perfect for sharing! Store them at room temperature for up to 1 day or in the fridge for up to 3 days. Just remember to bring them to room temperature before serving so the frosting softens up a bit.
Enjoy your festive Easter Egg Nest Cupcakes that resemble charming little bird nests filled with colorful candy eggs! They’re sure to be a hit at your springtime celebrations!
Can I Use Different Types of Chocolate for the Nests?
Absolutely! While semi-sweet chocolate chips are recommended for a rich flavor, you can use milk chocolate or even dark chocolate if you prefer a different taste. Just remember that the melting process remains the same!
How Can I Prevent My Cupcakes from Sticking to the Liners?
To ensure easy removal, make sure to use high-quality cupcake liners. You can also lightly spray them with non-stick cooking spray before adding the batter, or try using silicone cupcake molds, which release very easily.
Can I Make the Cupcakes Ahead of Time?
Yes! You can bake and cool the cupcakes a day in advance. Just store them in an airtight container at room temperature. Frost them on the day you plan to serve for the freshest flavor and presentation.
What’s the Best Way to Pipe the Frosting?
For an eye-catching swirl, use a piping bag fitted with a star tip. Start in the center and work your way outward, gradually building up height. For a fun effect, you can always use different colored frostings in the same piping bag to create a ombre or rainbow effect!