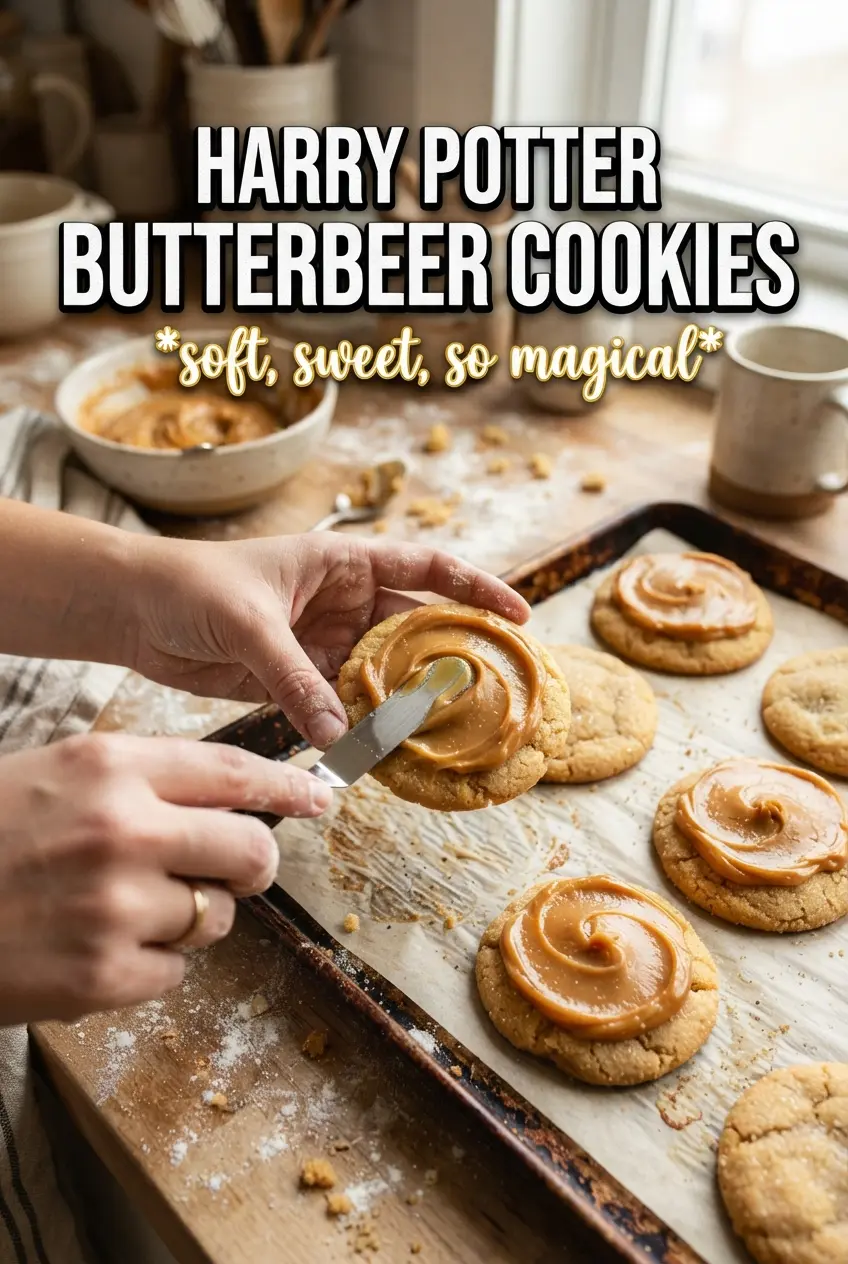
Harry Potter Butterbeer Cookies bake up soft in the center with lightly crisp edges, and that butterscotch-cream soda combination gives them the kind of nostalgic bakery flavor that makes people reach for a second one before they’ve finished the first. The cookie itself stays tender instead of turning cakey, and the frosting adds a smooth finish that tastes like a mash-up of vanilla, caramel, and buttered candy.
The trick is keeping the dough balanced. Melted butterscotch chips deepen the flavor without making the cookies greasy, while a small amount of cream soda adds that signature butterbeer note without thinning the dough too much. The frosting follows the same idea: enough cream soda to make it pipeable and fragrant, but not so much that it turns loose or sugary in the wrong way.
Below, I’ll walk through the small details that keep the cookies soft, how to keep the frosting fluffy, and the best way to decorate them so they look as fun as they taste.
The cookies stayed soft for days, and the frosting set up just enough to pipe cleanly without sliding off. The butterscotch flavor came through in every bite without being too sweet.
Love these soft butterbeer cookies? Save them to Pinterest for the days when you want butterscotch frosting, golden sprinkles, and a cozy bakery-style treat.
The Dough Secret That Keeps These Cookies Soft Instead of Puffy
A lot of frosted cookies go wrong before they ever hit the oven. Too much flour makes them dry, too much baking time makes them cakey, and overmixing once the flour goes in turns them tough. Here, the dough is built to stay tender: brown sugar for moisture, softened butter for structure, and just enough leavening to lift the cookies without making them domed and bread-like.
The melted butterscotch chips are the part people skip, but they matter. They spread the butterbeer flavor through the dough instead of leaving it all in the frosting, and that gives you a cookie that tastes finished even before the topping goes on. Pull them from the oven when the centers still look a little soft; they set as they cool, and that’s what keeps the middle plush.
What Each Butterbeer Ingredient Is Doing Here

- Brown sugar — This is what gives the cookies their chewy, caramel-like base. White sugar would make them sweeter and crisper, but it wouldn’t give the same softness or depth.
- Melted butterscotch chips — These carry the butterbeer flavor through the dough. If you only use chips as a mix-in, the taste stays muted; melting them first lets that butterscotch flavor coat the batter.
- Cream soda — A little goes a long way. It adds the nostalgic butterbeer note without flooding the dough with liquid, which would throw off the texture.
- Butterscotch sauce in the frosting — This is what makes the topping taste like more than sweet buttercream. Use a thick sauce, not a thin syrup, or the frosting can get loose and greasy.
- Powdered sugar — It gives the frosting body and keeps it pipeable. If it looks too stiff, add cream soda a teaspoon at a time instead of pouring it all in at once.
Building the Cookies and Frosting So Neither One Fights the Other
Creaming the Butter and Sugar
Beat the softened butter and brown sugar until the mixture looks lighter and a little fluffy. That step traps air and gives the cookies a more even texture, but stop once it’s combined and airy; overbeating can make the dough spread unpredictably. The melted butterscotch chips go in next, and they should be warm, not hot, or they can melt the butter and make the dough greasy.
Mixing the Dough Without Toughening It
Add the egg, vanilla, and cream soda, then mix just until they disappear into the batter. When the flour mixture goes in, fold only until you stop seeing dry streaks. If you keep mixing after that, the cookies bake up dense instead of soft, and the cinnamon stops reading as warm background flavor and starts tasting muddy.
Baking for Soft Centers
Scoop the dough into 2-tablespoon rounds and space them well apart. Bake at 375°F for 10 to 12 minutes, watching for edges that look set and tops that still look slightly underdone in the middle. That’s the window you want. If you wait for the centers to look fully baked in the oven, they’ll end up dry after cooling.
Whipping the Frosting to Pipeable Texture
Beat the softened butter and butterscotch sauce first, then add the powdered sugar and cream soda little by little. The frosting should turn smooth and fluffy, not wet. If it starts looking loose, add a spoonful more powdered sugar; if it feels stiff, add cream soda by the teaspoon. Pipe or spread it only after the cookies are completely cool, or the heat will melt the frosting and flatten the shape.
Ways to Adjust These Butterbeer Cookies Without Losing the Point
Gluten-Free Butterbeer Cookies
Use a good 1:1 gluten-free flour blend that includes xanthan gum. The cookies will still be soft, but they may spread a little less and have a slightly more delicate crumb, so let them cool on the sheet for a few extra minutes before moving them.
Dairy-Free Version
Use a plant-based butter that bakes well and dairy-free butterscotch chips if you can find them. The texture stays close, though the frosting may need an extra teaspoon of powdered sugar because non-dairy butter can soften faster than regular butter.
Less-Sweet Topping
If you want the frosting to play a supporting role instead of taking over, cut the powdered sugar by about 1/2 cup and keep the cream soda minimal. You’ll get a softer, thinner layer that still tastes like butterbeer but doesn’t bury the cookie.
Make Them Ahead
Bake the cookies a day early and frost them once they’re completely cool. If you frost too soon, the topping can slide, and the centers will soften too much as they sit. These keep their best texture when the cookies and frosting are stored separately until assembly time.
Storage and Reheating
- Refrigerator: Store frosted cookies in an airtight container for 4 to 5 days. The frosting stays stable, but the cookies soften a little more each day.
- Freezer: Freeze the unfrosted cookies for up to 2 months. Thaw at room temperature, then frost after they’re fully defrosted so the topping keeps its texture.
- Reheating: These don’t need reheating once frosted. If you want the cookies slightly warm, heat the plain cookies for 5 to 8 seconds in the microwave before adding frosting; warming frosted cookies can make the topping slide.
Questions I Get Asked About This Recipe
Harry Potter Butterbeer Cookies
Ingredients
Equipment
Method
- Beat the softened butter and brown sugar until smooth. The mixture should look lighter and fully combined before the next step.
- Add the melted butterscotch chips, egg, vanilla, and cream soda, and beat until glossy. Stop and scrape the bowl so no streaks remain.
- Whisk flour, baking soda, baking powder, cinnamon, and salt in a separate bowl, then fold into the wet ingredients. Mix just until no dry flour shows.
- Scoop 2-tablespoon rounds of dough onto a sheet pan, spacing them apart. Lightly flatten if needed so they bake evenly.
- Bake at 375°F for 10-12 minutes, until the edges are set and the centers look slightly soft. Remove before they brown heavily for a tender cookie texture.
- Cool the cookies completely on the sheet pan or a rack. Wait until fully cool so the frosting won’t melt or slide.
- Beat the softened unsalted butter and butterscotch sauce until smooth. The frosting base should look uniform with no streaks.
- Beat in powdered sugar, then mix with 2-3 tablespoons cream soda and vanilla until fluffy. Add cream soda gradually to reach a pipeable or spreadable consistency.
- Pipe or spread the butterbeer frosting onto each cooled cookie. Use a small swirl so the topping stays domed and neat.
- Decorate with gold sugar sprinkles while the frosting is still set. Finish with a light shake so the sparkle shows on top.