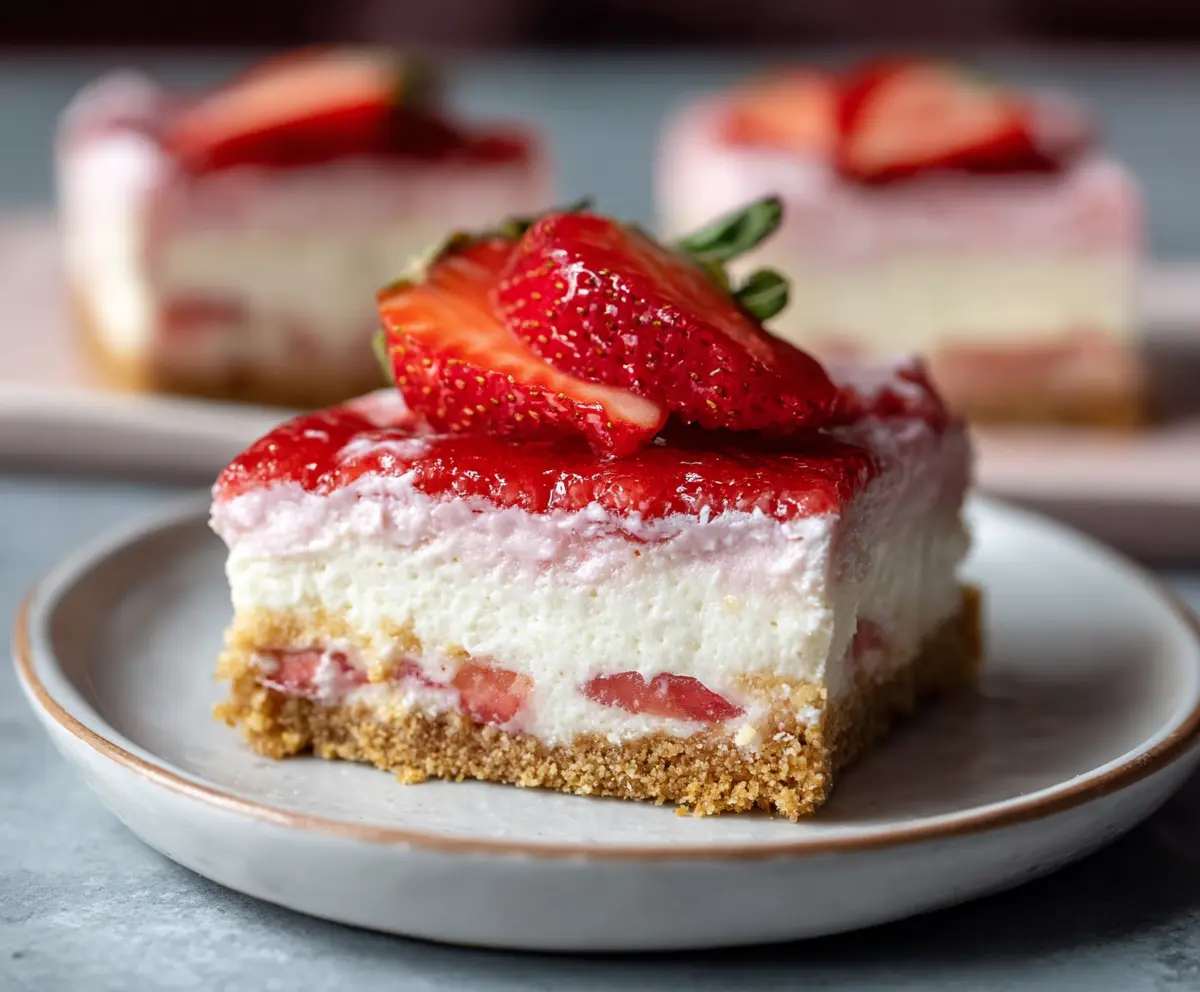
These Strawberry Cheesecake Bars are a treat that’s hard to resist! With a creamy cheesecake layer and fresh strawberries, they’re perfect for any sweet craving.
Making these bars is a breeze! Just layer the sweet base, spread the cheesecake mix, and top with juicy strawberries. Who can say no to that? 😋
I love serving these chilled for a refreshing snack on hot days. They’re easy to cut into squares, and everyone loves grabbing a slice. Enjoy every bite! 🍓
Ingredients & Substitutions
Graham cracker crumbs: These create the crisp crust. If you can’t find them, use crushed cookies like Oreos or digestive biscuits for a fun twist!
Unsalted butter: Essential for binding the crust. If you’re diary-free, coconut oil makes a great substitute, adding a subtle flavor.
Cream cheese: Go for full-fat for the best creamy texture. Neufchâtel cheese is a lower-fat alternative that works well too.
Heavy whipping cream: This gives the cheesecake its fluffy texture. If you’re looking for a lighter option, you can try using whipped coconut cream.
Fresh strawberries: They’re key for natural sweetness and flavor. If strawberries aren’t in season, frozen strawberries can be used—just thaw and drain excess moisture!
How Do I Get the Perfect Texture for the Cheesecake Layer?
Getting the cheesecake layer just right is crucial for these bars. Start by softening the cream cheese before mixing to ensure a smooth texture without lumps. Here’s a quick guide:
- In a mixing bowl, beat the softened cream cheese until creamy, about 2-3 minutes.
- Gradually add in powdered sugar and vanilla until smooth.
- Whip the cream separately until stiff peaks form, then gently fold it into the cream cheese mixture. This adds air and lightness—be gentle to keep that volume!
- Finally, add the chopped strawberries, folding them in just until combined. Avoid overmixing to keep that creaminess!

How to Make Strawberry Cheesecake Bars
Ingredients You’ll Need:
For the Crust:
- 2 cups graham cracker crumbs
- 1/2 cup unsalted butter, melted
- 1/4 cup granulated sugar
For the Cheesecake Layer:
- 16 oz (450g) cream cheese, softened
- 1 cup powdered sugar
- 1 tsp vanilla extract
- 1 cup heavy whipping cream
- 1 cup chopped fresh strawberries
For the Strawberry Topping:
- 1 cup fresh strawberries, sliced
- 1/4 cup strawberry jam or preserves
- 1 tbsp water (optional, to thin the jam)
How Much Time Will You Need?
This delicious dessert takes about 20 minutes of active preparation time, plus a couple of hours for chilling. You’ll spend around 10 minutes baking the crust and mixing up the cheesecake filling, and then let it chill in the refrigerator for 2 to 3 hours to set perfectly. Don’t forget to add an extra 30 minutes for the topping to chill!
Step-by-Step Instructions:
1. Preparing the Crust:
First, preheat your oven to 350°F (175°C). In a medium bowl, combine the graham cracker crumbs, melted butter, and granulated sugar. Use a fork to mix it well until it looks like wet sand.
Next, press this crumb mixture firmly and evenly into the bottom of a greased 9×9-inch square baking pan. Bake the crust for about 8-10 minutes until it’s a little golden, then remove it from the oven and let it cool completely.
2. Making the Cheesecake Layer:
In a large mixing bowl, beat the softened cream cheese on medium speed with a hand mixer until it’s smooth and creamy. Add in the powdered sugar and vanilla extract, and beat again until everything is well combined and fluffy.
In a separate bowl, whip the heavy cream until stiff peaks form. This means it should hold its shape when you lift the beaters out. Now, gently fold the whipped cream into the cream cheese mixture until they’re fully mixed and smooth.
Then, fold in the chopped strawberries gently so they don’t break apart too much. Take care not to overmix!
3. Assembling the Bars:
Pour the cheesecake mixture over your cooled crust and spread it out evenly. Cover and refrigerate it for at least 2-3 hours or until it’s nice and firm.
4. Preparing the Topping:
When the cheesecake bars are set, it’s time for the topping! In a small bowl, mix the strawberry jam with a tablespoon of water to thin it out slightly if necessary. This will make it easier to spread.
Spread the strawberry jam evenly over the top of the cheesecake layer. Then, carefully arrange the sliced fresh strawberries on top of the jam for that beautiful finishing touch.
5. Final Chill and Serving:
Refrigerate the bars again for another 30 minutes to let the topping set. Once you’re ready to serve, cut the cheesecake into squares and enjoy them chilled! For an extra special touch, you can garnish each square with fresh mint leaves.
Enjoy your scrumptious strawberry cheesecake bars with a lovely blend of creamy, crunchy, and fruity flavors!
Can I Use Gluten-Free Graham Crackers for the Crust?
Absolutely! Just substitute regular graham cracker crumbs with gluten-free graham cracker crumbs. They will work just as well and still give you that delicious crust you love.
How Long Can I Store Leftover Cheesecake Bars?
You can store leftover strawberry cheesecake bars in an airtight container in the refrigerator for up to 3 days. Just make sure they are well-covered to keep them fresh!
Can I Use Frozen Strawberries Instead of Fresh Ones?
Yes, you can use frozen strawberries! Just be sure to thaw them first and drain any excess liquid to avoid a watery filling. Fresh strawberries work best, but frozen can certainly be a convenient option.
What Should I Do If My Cheesecake Layer Doesn’t Set?
If your cheesecake layer doesn’t set as expected, it may need more time in the refrigerator. If you find that it’s still too soft after a few hours, you can try placing it in the freezer for about 20-30 minutes to help firm it up. Just be mindful not to leave it too long!